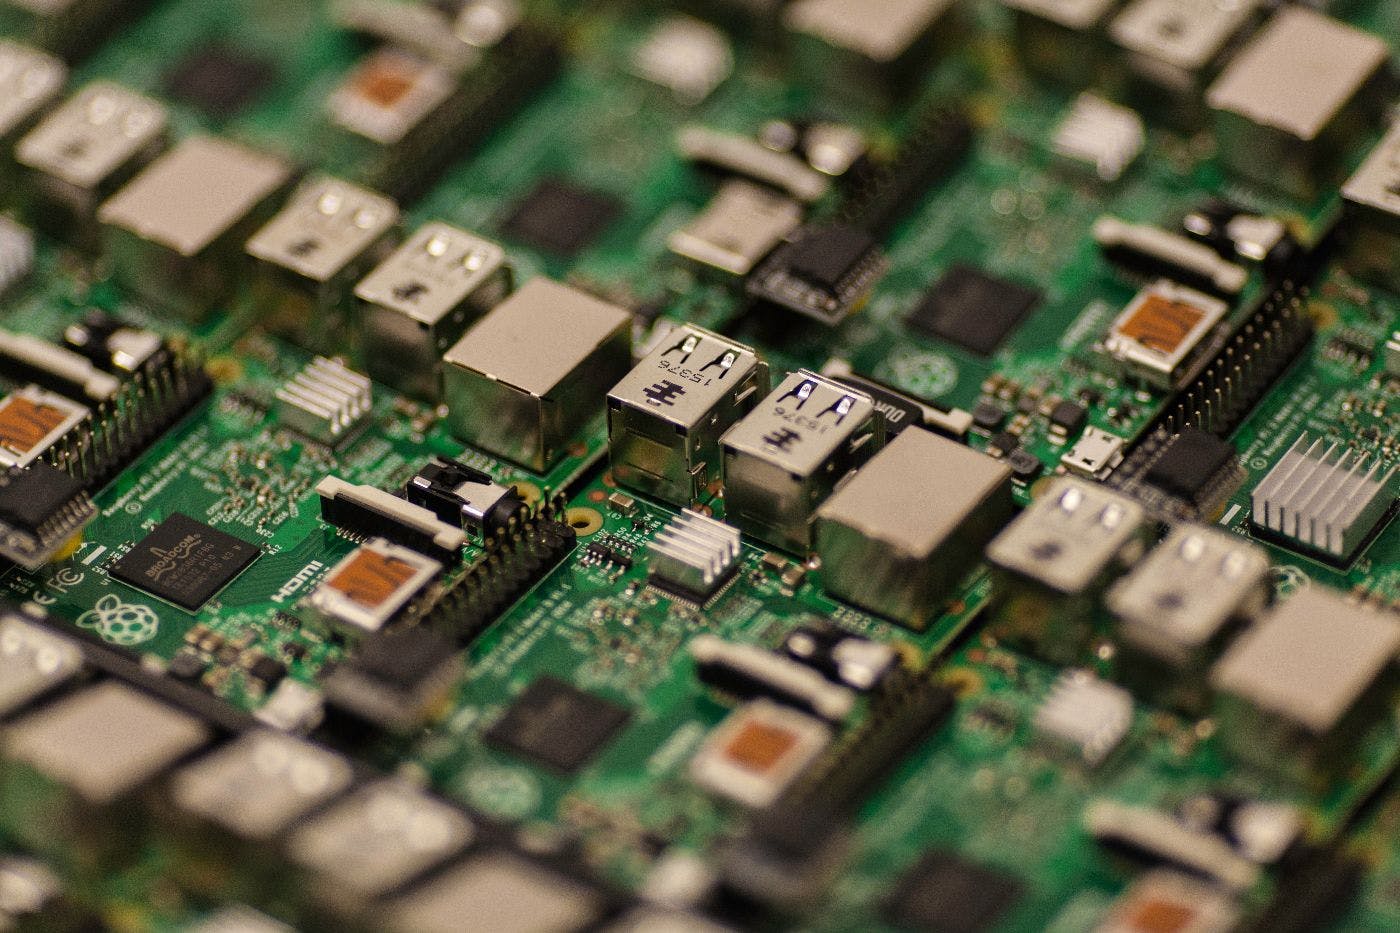
Worried about cloud privacy or unsure what to do with that Raspberry Pi you bought years ago? Here’s an idea you’ll love: turn it into a personal cloud server with Open Media Vault (OMV) for full control over storage, features, privacy, and customization. First of all, what is NAS? Network-attached storage (NAS) is a file storage system connected to a network, enabling multiple users and devices to access, store, and share data from one central location. It’s suitable for personal, corporate, or mixed-use. To Set Up NAS, You Need the Following: Raspberry Pi SD card PC / Mac Router A Storage device(SSD, SD, Hard Disk,or Flash Drive) Ethernet Cable I'm using Windows, so the setup for Open Media Vault, Raspberry Pi Imager installation, and NAS access in File Explorer may differ for macOS and Linux. How to Bake the Pi 1. Download the Raspberry Pi Imager Open your web browser and go to the official Raspberry Pi website https://www.raspberrypi.com/software/ Click on "Download for Windows” 2. Install the Raspberry Pi Imager Once the installer is downloaded, locate it in your Downloads folder (it will probably be named imager-setup.exe). Double-click the file icon to run the installer. Follow the on-screen instructions to complete the installation. Typically, this involves: a)Agreeing to the terms and conditions. b) Select the installation location (or use the default location).c)Click Install to start the process. Launch The Imager Search in the search menu for the imager by typing its name and launching it. Burn the Image Insert a microSD card or USB drive into your computer. Select the correct version of your Raspberry Pi. Select the Raspberry Pi Lite OS Select the storage media (e.g., an SD card or Flash Drive) where you want to create the image. ⚠️ Important: Double-check to ensure you don't accidentally select an SSD or hard drive from your computer. If the storage device contains important data, back it up first, as this process will erase all data on the device. Once confirmed, click Write and configure the settings: Set the local username and password. Connect to your wireless network. Enable SSH (necessary for headless operation, i.e., without a monitor or keyboard). Wait patiently until it is done. Setting up NAS(Raspberry Pi) Take your Raspberry Pi and insert the storage media (with the OS installed) into the appropriate slot. Next, connect the Ethernet cable to the Raspberry Pi. Finally, power it on. Note the IP address of your Raspberry Pi and ensure that both your computer and the Raspberry Pi are connected to the same network. Now, power on your computer, search for PowerShell, and open it. Type the following code in the PowerShell ssh <username>@<ip> Change the username to the username you set on the settings menu while writing the image and write the IP address which you noted earlier If you get something like this:- @@@@@@@@@@@@@@@@@@@@@@@@@@@@@@@@@@@@@@@@@@@@@@@@@@@@@@@@@@@ @ WARNING: REMOTE HOST IDENTIFICATION HAS CHANGED! @ @@@@@@@@@@@@@@@@@@@@@@@@@@@@@@@@@@@@@@@@@@@@@@@@@@@@@@@@@@@ IT IS POSSIBLE THAT SOMEONE IS DOING SOMETHING NASTY! Someone could be eavesdropping on you right now (man-in-the-middle attack)! It is also possible that a host key has just been changed. The fingerprint for the ED25519 key sent by the remote host is SHA256:yC9xSHKdd8qc98ekXQge/LTY4giXVQDui2RnytkpqBQ. Please contact your system administrator. Add correct host key in `C:\Users\user/.ssh/known_hosts` to get rid of this message. Offending ED25519 key in `C:\Users\user/.ssh/known_hosts:4` Host key for `192.168.xx.xx` has changed and you have requested strict checking. Host key verification failed. Open Notepadand navigate to:C:\Users\user\.ssh\known_hosts Delete the first line in the file. Save the changes and try the command again. You should see this on your screen right after: Next, type yes and hit continue. Then, enter the password Now you can controll your pi without even touching it. Once this is set up, enter sudo apt update && sudo aptto update and upgrade the system to the latest version. upgrade. This process will take time… so please be patient. Finally, we will use the wget command to pull the GitHub repositories of Open Media Vault and run the repos using Bash. sudo wget -O - https://raw.githubusercontent.com/OpenMediaVault-Plugin-Developers/installScript/master/install | sudo bash This might take up 30 minutes to complete. You’re done with the installation! Setting up Open Media Vault(OMV) The Raspberry Pi's IP address might change after a reboot. Follow these steps to proceed: Reboot the Raspberry Pi. Take note of the updated IP address. Open a web browser on your computer and enter the Raspberry Pi's new IP address into the search bar. Type “admin” in the username box and ”openmediavault” in the password box. Now go to the user settings button and select Change password Here’s a simplified version: Set your desired password and click Save. Open Command Prompt, SSH into the Raspberry Pi as before, and enter the command: bashCopyEditip route show You’ll see an output like this: scssCopyEditdefault via 192.168.xx.xxx dev end0 proto dhcp src 192.168.xx.xx metric 100 192.168.xx.xx/24 dev end0 proto kernel scope link src 192.168.xx.xx metric 100 192.168.xx.x dev end0 proto dhcp scope link src 192.168.xx.xx metric 100 Note the IP address after default via, e.g., 192.168.xx.xxx. This is your Network’s IP /Gateway. Next, we need to set static IP because it’s an important component of the headless operation. To set a static IP, we can use the GUI web interface… but it bricked my Raspberry Pi, so I took the reliable option of setting it using the terminal. Go to the Command Prompt again, ssh the pi, and type the following command:- sudo omv-firstaid Next, configure network interface: Next, choose the method by which you want your Raspberry Pi to communicate with the router. (I recommend using Ethernet, as it offers fast and reliable connectivity.) Once selected, press Enter. Navigate using the arrow keys and press enter to agree press yes or no as per this table:- Prompt Value Do you want to configure IPv4 for this interface? Yes Do you want to use DHCPv4 for this interface? No You’ll be prompted to enter the Pi's IP address. This time, we’ll set a static IP to prevent it from changing. Set the IP to the one you're currently using to connect to the Pi to avoid disconnection. You will be prompted to set the gateway. To do so, enter 255.255.255.0 Next, navigate using the arrow keys and press enter to agree Use the following guide: Do you want to configure IPv6 for this interface? No Please enter the DNS name server. If you don’t want to use any name server, just leave this field blank.Okay Do you want to enable WOL for this interface?No Next, you’ll see the prompt: Configuring the network interface. Note, the IP address may change and you may lose connection. Please wait. If you see this message, it means you've done a good job! This may take a little time, so please be patient. Afterward, insert the disk (where all the files will be saved) into your computer. Be careful to not select one of your SSDs or hard drives in your computer by mistake. Additionally, if the storage device you plan to use for the project contains important data, make sure to back it up beforehand, as all data on the device will be erased. Right-click on the drive and select the Format option. Enter the name you want for the drive and set the file system to NTFS. Next, select NTFS as the file system and click Start. Once the process is complete, you will receive a notification confirming that the format is finished Now, go back to the OMV interface (the page you opened in Chrome) and insert the formatted drive into the Raspberry Pi. Navigate to the Storage → File System. Click on the mount button, select the Drive, and hit save In the ‘pending configuration changes’ hit the check mark to save changes. Now go on Shared Folders→ Create Enter the desired name, select the drive from the drop-down menu in the File System section, and click Save. Make sure to note the name you’ve chosen for the drive. Go to services → SMB/CISF → Settings Click on Enable → Save Go to Shares and click on create. Click on enable→Select the drive → and click on save In the Pending Configuration Changes box, click the checkmark button to save the changes For Linux and Mac users, enable NFS, and the setup process for NFS will be similar to that of SMB. This is the basic setup. If you’d like, feel free to experiment and explore the wide range of plugins available for customization. Well Done! 😀 You’re done with the difficult part! Setting up the Drive in Windows Open File Explorer, go to "This PC," right-click, and select "Add a network location." A dialog box will appear. Click "Next" to proceed. Click on Choose a custom network location → Next. Enter \<ip addr><shared_Folder_name>into the field that pops up. Click "Next." You will be prompted to enter your credentials. Enter the password you set for the OS during the Raspberry Pi Imager setup. You’re all set! Well done! You’ve completed the project. Thanks, for reading!Shivank Dan. Worried about cloud privacy or unsure what to do with that Raspberry Pi you bought years ago? Here’s an idea you’ll love: turn it into a personal cloud server with Open Media Vault (OMV) for full control over storage, features, privacy, and customization. personal cloud server First of all, what is NAS? Network-attached storage (NAS) is a file storage system connected to a network, enabling multiple users and devices to access, store, and share data from one central location. It’s suitable for personal, corporate, or mixed-use. To Set Up NAS, You Need the Following: Raspberry Pi SD card PC / Mac Router A Storage device(SSD, SD, Hard Disk,or Flash Drive) Ethernet Cable Raspberry Pi SD card PC / Mac Router A Storage device(SSD, SD, Hard Disk,or Flash Drive) Ethernet Cable I'm using Windows , so the setup for Open Media Vault, Raspberry Pi Imager installation, and NAS access in File Explorer may differ for macOS and Linux. Windows How to Bake the Pi 1. Download the Raspberry Pi Imager 1. Download the Raspberry Pi Imager Open your web browser and go to the official Raspberry Pi website https://www.raspberrypi.com/software/ Click on "Download for Windows” Open your web browser and go to the official Raspberry Pi website https://www.raspberrypi.com/software/ https://www.raspberrypi.com/software/ Click on "Download for Windows” 2. Install the Raspberry Pi Imager 2. Install the Raspberry Pi Imager Once the installer is downloaded, locate it in your Downloads folder (it will probably be named imager-setup.exe). Double-click the file icon to run the installer. Once the installer is downloaded, locate it in your Downloads folder (it will probably be named imager-setup.exe ). Downloads imager-setup.exe Double-click the file icon to run the installer. Follow the on-screen instructions to complete the installation. Typically, this involves: a)Agreeing to the terms and conditions. b) Select the installation location (or use the default location).c)Click Install to start the process. Follow the on-screen instructions to complete the installation. Typically, this involves: a)Agreeing to the terms and conditions. b) Select the installation location (or use the default location).c)Click Install to start the process. Install Launch The Imager Search in the search menu for the imager by typing its name and launching it. Burn the Image Insert a microSD card or USB drive into your computer. Select the correct version of your Raspberry Pi. Select the Raspberry Pi Lite OS Select the Raspberry Pi Lite OS Select the storage media (e.g., an SD card or Flash Drive) where you want to create the image. ⚠️ Important: Double-check to ensure you don't accidentally select an SSD or hard drive from your computer. If the storage device contains important data, back it up first, as this process will erase all data on the device. Once confirmed, click Write and configure the settings: Set the local username and password. Connect to your wireless network. Enable SSH (necessary for headless operation, i.e., without a monitor or keyboard). Wait patiently until it is done. Select the storage media (e.g., an SD card or Flash Drive) where you want to create the image. ⚠️ Important: Double-check to ensure you don't accidentally select an SSD or hard drive from your computer. If the storage device contains important data, back it up first, as this process will erase all data on the device. Once confirmed, click Write and configure the settings: Set the local username and password. Connect to your wireless network. Enable SSH (necessary for headless operation, i.e., without a monitor or keyboard). Select the storage media (e.g., an SD card or Flash Drive) where you want to create the image. ⚠️ Important: Important: Double-check to ensure you don't accidentally select an SSD or hard drive from your computer. If the storage device contains important data, back it up first, as this process will erase all data on the device. Double-check to ensure you don't accidentally select an SSD or hard drive from your computer. If the storage device contains important data, back it up first, as this process will erase all data on the device. Once confirmed, click Write and configure the settings: Write Set the local username and password. Connect to your wireless network. Enable SSH (necessary for headless operation, i.e., without a monitor or keyboard). Set the local username and password . local username and password Connect to your wireless network . wireless network Enable SSH (necessary for headless operation, i.e., without a monitor or keyboard). SSH Wait patiently until it is done. Wait patiently until it is done. Setting up NAS(Raspberry Pi) Take your Raspberry Pi and insert the storage media (with the OS installed) into the appropriate slot. Next, connect the Ethernet cable to the Raspberry Pi. Finally, power it on. Take your Raspberry Pi and insert the storage media (with the OS installed) into the appropriate slot. Next, connect the Ethernet cable to the Raspberry Pi. Finally, power it on. Note the IP address of your Raspberry Pi and ensure that both your computer and the Raspberry Pi are connected to the same network. Now, power on your computer, search for PowerShell, and open it. Type the following code in the PowerShell Now, power on your computer, search for PowerShell, and open it. Now, power on your computer, search for PowerShell , and open it. PowerShell Type the following code in the PowerShell Type the following code in the PowerShell ssh <username>@<ip> ssh <username>@<ip> Change the username to the username you set on the settings menu while writing the image and write the IP address which you noted earlier Change the username to the username you set on the settings menu while writing the image and write the IP address which you noted earlier If you get something like this:- @@@@@@@@@@@@@@@@@@@@@@@@@@@@@@@@@@@@@@@@@@@@@@@@@@@@@@@@@@@ @ WARNING: REMOTE HOST IDENTIFICATION HAS CHANGED! @ @@@@@@@@@@@@@@@@@@@@@@@@@@@@@@@@@@@@@@@@@@@@@@@@@@@@@@@@@@@ IT IS POSSIBLE THAT SOMEONE IS DOING SOMETHING NASTY! Someone could be eavesdropping on you right now (man-in-the-middle attack)! It is also possible that a host key has just been changed. The fingerprint for the ED25519 key sent by the remote host is SHA256:yC9xSHKdd8qc98ekXQge/LTY4giXVQDui2RnytkpqBQ. Please contact your system administrator. Add correct host key in `C:\Users\user/.ssh/known_hosts` to get rid of this message. Offending ED25519 key in `C:\Users\user/.ssh/known_hosts:4` Host key for `192.168.xx.xx` has changed and you have requested strict checking. Host key verification failed. @@@@@@@@@@@@@@@@@@@@@@@@@@@@@@@@@@@@@@@@@@@@@@@@@@@@@@@@@@@ @ WARNING: REMOTE HOST IDENTIFICATION HAS CHANGED! @ @@@@@@@@@@@@@@@@@@@@@@@@@@@@@@@@@@@@@@@@@@@@@@@@@@@@@@@@@@@ IT IS POSSIBLE THAT SOMEONE IS DOING SOMETHING NASTY! Someone could be eavesdropping on you right now (man-in-the-middle attack)! It is also possible that a host key has just been changed. The fingerprint for the ED25519 key sent by the remote host is SHA256:yC9xSHKdd8qc98ekXQge/LTY4giXVQDui2RnytkpqBQ. Please contact your system administrator. Add correct host key in `C:\Users\user/.ssh/known_hosts` to get rid of this message. Offending ED25519 key in `C:\Users\user/.ssh/known_hosts:4` Host key for `192.168.xx.xx` has changed and you have requested strict checking. Host key verification failed. Open Notepadand navigate to:C:\Users\user\.ssh\known_hosts Delete the first line in the file. Save the changes and try the command again. Open Notepad and navigate to: C:\Users\user\.ssh\known_hosts Notepad C:\Users\user\.ssh\known_hosts Delete the first line in the file. Save the changes and try the command again. You should see this on your screen right after: Next, type yes and hit continue. Then, enter the password Next, type yes and hit continue. Then, enter the password Now you can controll your pi without even touching it. Now you can controll your pi without even touching it. Once this is set up, enter sudo apt update && sudo aptto update and upgrade the system to the latest version. upgrade. Once this is set up, enter sudo apt update && sudo apt to update and upgrade the system to the latest version. upgrade. sudo apt update && sudo apt upgrade. This process will take time… so please be patient. Finally, we will use the wget command to pull the GitHub repositories of Open Media Vault and run the repos using Bash. Finally, we will use the wget command to pull the GitHub repositories of Open Media Vault and run the repos using Bash. sudo wget -O - https://raw.githubusercontent.com/OpenMediaVault-Plugin-Developers/installScript/master/install | sudo bash sudo wget -O - https://raw.githubusercontent.com/OpenMediaVault-Plugin-Developers/installScript/master/install | sudo bash This might take up 30 minutes to complete. You’re done with the installation! You’re done with the installation! You’re done with the installation! Setting up Open Media Vault(OMV) The Raspberry Pi's IP address might change after a reboot. Follow these steps to proceed: Reboot the Raspberry Pi. Take note of the updated IP address. Open a web browser on your computer and enter the Raspberry Pi's new IP address into the search bar. Reboot the Raspberry Pi. Reboot the Raspberry Pi. Take note of the updated IP address. Take note of the updated IP address. Open a web browser on your computer and enter the Raspberry Pi's new IP address into the search bar. Type “admin” in the username box and ”openmediavault” in the password box. Type “admin” in the username box and ”openmediavault” in the password box. Now go to the user settings button and select Change password Now go to the user settings button and select Change password Here’s a simplified version: Set your desired password and click Save. Open Command Prompt, SSH into the Raspberry Pi as before, and enter the command: Set your desired password and click Save . Save Open Command Prompt, SSH into the Raspberry Pi as before, and enter the command: bashCopyEditip route show bashCopyEditip route show You’ll see an output like this: You’ll see an output like this: scssCopyEditdefault via 192.168.xx.xxx dev end0 proto dhcp src 192.168.xx.xx metric 100 192.168.xx.xx/24 dev end0 proto kernel scope link src 192.168.xx.xx metric 100 192.168.xx.x dev end0 proto dhcp scope link src 192.168.xx.xx metric 100 scssCopyEditdefault via 192.168.xx.xxx dev end0 proto dhcp src 192.168.xx.xx metric 100 192.168.xx.xx/24 dev end0 proto kernel scope link src 192.168.xx.xx metric 100 192.168.xx.x dev end0 proto dhcp scope link src 192.168.xx.xx metric 100 Note the IP address after default via, e.g., 192.168.xx.xxx. Note the IP address after default via , e.g., 192.168.xx.xxx . default via 192.168.xx.xxx This is your Network’s IP /Gateway. This is your Network’s IP /Gateway. Next, we need to set static IP because it’s an important component of the headless operation. Next, we need to set static IP because it’s an important component of the headless operation. To set a static IP, we can use the GUI web interface… but it bricked my Raspberry Pi, so I took the reliable option of setting it using the terminal. To set a static IP, we can use the GUI web interface… but it bricked my Raspberry Pi, so I took the reliable option of setting it using the terminal. Go to the Command Prompt again, ssh the pi, and type the following command:- Go to the Command Prompt again, ssh the pi, and type the following command:- sudo omv-firstaid sudo omv-firstaid Next, configure network interface: Next, configure network interface: Next, choose the method by which you want your Raspberry Pi to communicate with the router. (I recommend using Ethernet, as it offers fast and reliable connectivity.) Next, choose the method by which you want your Raspberry Pi to communicate with the router. (I recommend using Ethernet , as it offers fast and reliable connectivity.) Ethernet Once selected, press Enter. Once selected, press Enter . Enter Navigate using the arrow keys and press enter to agree Navigate using the arrow keys and press enter to agree press yes or no as per this table:- press yes or no as per this table:- Prompt Prompt Value Value Do you want to configure IPv4 for this interface? Do you want to configure IPv4 for this interface? Yes Yes Do you want to use DHCPv4 for this interface? Do you want to use DHCPv4 for this interface? No No You’ll be prompted to enter the Pi's IP address. This time, we’ll set a static IP to prevent it from changing. You’ll be prompted to enter the Pi's IP address. This time, we’ll set a static IP to prevent it from changing. Set the IP to the one you're currently using to connect to the Pi to avoid disconnection. You will be prompted to set the gateway. To do so, enter 255.255.255.0 You will be prompted to set the gateway. To do so, enter 255.255.255.0 255.255.255.0 Next, navigate using the arrow keys and press enter to agree Use the following guide: Use the following guide: Do you want to configure IPv6 for this interface? No Please enter the DNS name server. If you don’t want to use any name server, just leave this field blank. Okay Do you want to enable WOL for this interface? No Do you want to configure IPv6 for this interface? Do you want to configure IPv6 for this interface? No No No Please enter the DNS name server. If you don’t want to use any name server, just leave this field blank. Please enter the DNS name server. If you don’t want to use any name server, just leave this field blank. Okay Okay Okay Do you want to enable WOL for this interface? Do you want to enable WOL for this interface? No No No Next, you’ll see the prompt: Configuring the network interface. Note, the IP address may change and you may lose connection. Please wait. Configuring the network interface. Note, the IP address may change and you may lose connection. Please wait. If you see this message, it means you've done a good job! This may take a little time, so please be patient. Afterward, insert the disk (where all the files will be saved) into your computer. Be careful to not select one of your SSDs or hard drives in your computer by mistake. Additionally, if the storage device you plan to use for the project contains important data, make sure to back it up beforehand, as all data on the device will be erased. Be careful to not select one of your SSDs or hard drives in your computer by mistake. Additionally, if the storage device you plan to use for the project contains important data, make sure to back it up beforehand, as all data on the device will be erased. Right-click on the drive and select the Format option. Enter the name you want for the drive and set the file system to NTFS. Right-click on the drive and select the Format option. Format Enter the name you want for the drive and set the file system to NTFS . NTFS Next, select NTFS as the file system and click Start. Once the process is complete, you will receive a notification confirming that the format is finished Next, select NTFS as the file system and click Start . NTFS Start Once the process is complete, you will receive a notification confirming that the format is finished Now, go back to the OMV interface (the page you opened in Chrome) and insert the formatted drive into the Raspberry Pi. Now, go back to the OMV interface (the page you opened in Chrome) and insert the formatted drive into the Raspberry Pi. OMV Navigate to the Storage → File System. Navigate to the Storage → File System. Click on the mount button, select the Drive, and hit save In the ‘pending configuration changes’ hit the check mark to save changes. Now go on Shared Folders→ Create Click on the mount button, select the Drive, and hit save In the ‘pending configuration changes’ hit the check mark to save changes. Now go on Shared Folders→ Create Enter the desired name, select the drive from the drop-down menu in the File System section, and click Save. Enter the desired name, select the drive from the drop-down menu in the File System section, and click Save . File System Save Make sure to note the name you’ve chosen for the drive. Make sure to note the name you’ve chosen for the drive. Go to services → SMB/CISF → Settings Go to services → SMB/CISF → Settings Click on Enable → Save Click on Enable → Save Go to Shares and click on create. Go to Shares and click on create. Click on enable→Select the drive → and click on save In the Pending Configuration Changes box, click the checkmark button to save the changes Click on enable→Select the drive → and click on save In the Pending Configuration Changes box, click the checkmark button to save the changes Pending Configuration Changes For Linux and Mac users, enable NFS, and the setup process for NFS will be similar to that of SMB. This is the basic setup. If you’d like, feel free to experiment and explore the wide range of plugins available for customization. For Linux and Mac users, enable NFS, and the setup process for NFS will be similar to that of SMB. This is the basic setup. If you’d like, feel free to experiment and explore the wide range of plugins available for customization. Well Done! 😀 You’re done with the difficult part! Well Done! 😀 You’re done with the difficult part! Setting up the Drive in Windows Open File Explorer, go to "This PC," right-click, and select "Add a network location." A dialog box will appear. Click "Next" to proceed. Open File Explorer, go to "This PC," right-click, and select "Add a network location." A dialog box will appear. Click "Next" to proceed. Click on Choose a custom network location → Next. Click on Choose a custom network location → Next. Choose a custom network location Enter \<ip addr><shared_Folder_name>into the field that pops up. Enter \<ip addr><shared_Folder_name> into the field that pops up. \<ip addr><shared_Folder_name> Click "Next." Click "Next." You will be prompted to enter your credentials. Enter the password you set for the OS during the Raspberry Pi Imager setup. You’re all set! Enter the password you set for the OS during the Raspberry Pi Imager setup. You’re all set! Well done! You’ve completed the project. Well done! You’ve completed the project. Thanks, for reading! Shivank Dan.