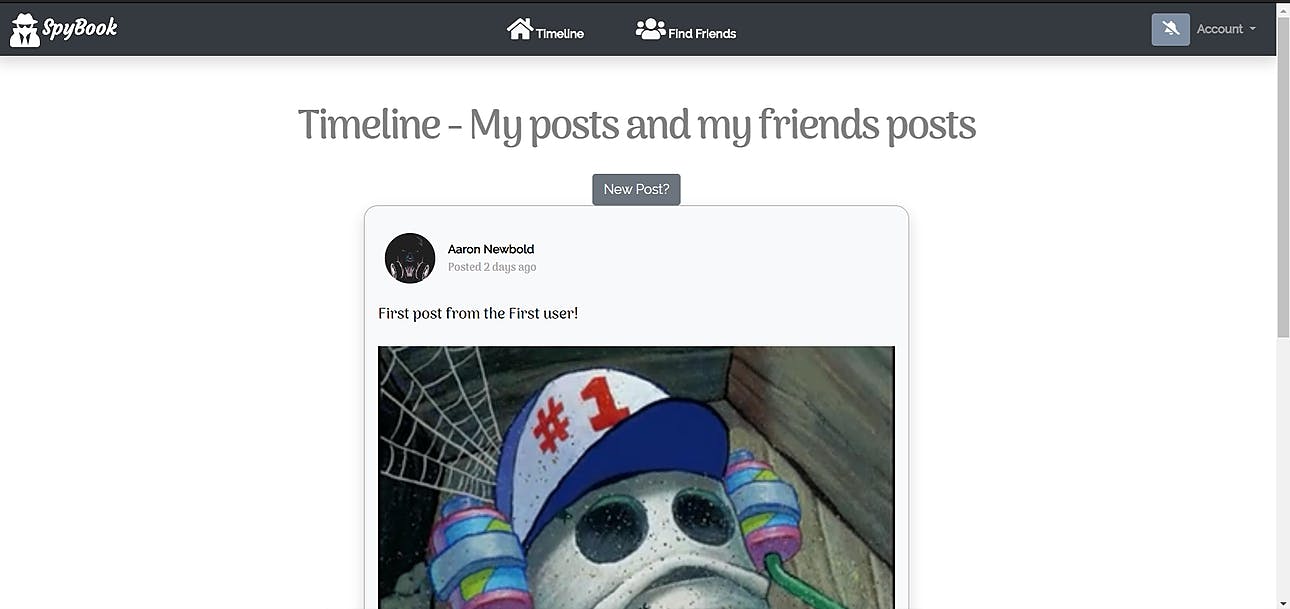
: Social Media Website Live Demo SpyBook : Github SpyBook According to the : the goal of this exercise is to build some of the baseline features found in one of the more popular social media website applications, . Odin Project Facebook While following this article we will be putting together some of the core features of the platform — users, profiles, “friending”, posts, comments, news feed, and “liking”. We will also implement a sign-in feature by using the real Facebook through the use of gems such as ‘ and ‘ . OmniAuth ’ Devise ’ Entity Relationship Diagram (ERD) And Association Planning In our Facebook replica Ruby on Rails Project we will need specific tables within our database to hold certain table relative information. So, with this in mind we must plan ahead and think about all the information we will need to store and access. Well, for just about every piece of software out there that has been created with the goal of interaction between multiple users in mind. There must be some type of database table containing information regarding these users . I.e. their names, emails, passwords, ids and just about any other information needed from the user to accomplish the software’s goals. Since we are attempting to build an application containing the core features of Facebook, we will need a , , and a . Users Table Friendship Requests Table, Posts Table, Comments Table Likes Table Notifications Table Users Table Information we will want stored within this table will be (integer type) (perhaps to hold the name of a profile picture). column id , email, first name, last name, password digest and an image All the columns for the user table will be strings except for the primary key which is the column’s id. Friendship Requests Table Information we will want stored in this table will be column (primary key, integer type), (foreign key, integer), (foreign key, integer) and (Boolean). id sent_to_id sent_by_id status The two foreign keys are pretty much self-explanatory, the contains the ID of the sending the friend request and the contains the ID of the the friend request was sent to. Status determines whether or not the friend request was accepted. sent_by_id User sent_to_id User Posts Table Information we will want stored in this table will be column (primary key, integer), (text) and (foreign key, integer). id content user_id The will be the column that holds the information of the post and the will hold the ID of the that created the post. content user_id User Comments Table Information we will want stored in this table will be the column (primary key, integer), content (text), (foreign key, integer) and (foreign key, integer). id post_id user_id The table is similar to the table with the addition of a foreign key which points to the ID of the this comment is associated with. Comments Posts post_id Post Likes Table Information we will want stored in this table will be the column (primary key, integer), (foreign key, integer) and (foreign id, integer). id post_id comment_id Similar to both the and table the table will hold references to either the ID of the that was liked or the that was liked. Posts Comments Likes Post Comment Notifications Table Information we will want stored in this table will be the column (primary key, integer), (integer) and (string). id notice_id type The will hold the ID of either a , a or a . The type will be a string which holds the string representation of which Table the belongs to. For example, a ID can be stored in and the string “comment” will be stored in the column. notice_id Post Comment Friend Request notice_id Comment’s notice_id type This notifications model will also have a reference to the user who is going to be notified when someone likes one of their posts, comments on one of their posts or sends them a friend request. This will be a rather basic notification model which will not give reference to the user who caused the notification to be sent. After planning out the tables and their associations we came to conclude that: Chart built using website: LucidChart.com Project Setup Creating a new Rails app using PostgreSQL : Source Getting Started with Rails: Heroku To automatically have rails set up the postgresql (pg) gem for us we will use the following line in the terminal to build our new app: $ rails fakebook new --database=postgresql Gems to Install All the below gems should be added or already included in your Gemfile gem , , gem gem gem , gem gem # Use postgresql as the database for Active Record 'pg' '>= 0.18' '< 2.0' # Rubocop gem to correct linter related issues keeping your code close to standard coding practices 'rubocop' # Devise security gem 'devise' # To handle images 'carrierwave' '~> 2.0' 'mini_magick' # Use omniauth-facebook gem allows Facebook login integration 'omniauth-facebook' Optional Gems gem gem group , gem gem gem group gem gem # Allows access to twitter's Bootstrap framework 'bootstrap' # Hirb gem organizes the display for active record information into tables when using the rails console… eg. After opening rails console type Hirb.enable to activate it 'hirb' # All gems below are related to the RSpec Gem except the dotenv-rails gem :development :test do # RSpec Testing 'database_cleaner' 'rspec-rails' # A Ruby gem to load environment variables from `.env` files. 'dotenv-rails' end :test do 'capybara' 'selenium-webdriver' end After adding all the necessary gems into the (Generally found at the root directory). Run the command into the terminal: Gemfile bundle install $ bundle install or the shorthand ‘ ’: bundle $ bundle Setting up PostgreSQL Database Source: Ruby on Rails with PostgresSQL First ensure that PostgreSQL is installed by running this apt command within the terminal: $ apt-get -y install postgresql postgresql-contrib libpq-dev In some cases, you may need to run this command with administrative authority using sudo: $ sudo apt-get -y install postgresql postgresql-contrib libpq-dev When the installation is done, login to the postgres user and access the postgresql shell. $ su — postgres $ psql In some cases, you may need to run this command with administrative authority using sudo: $ sudo su — postgres Next, give the postgres user a new password with command below: $ \password postgres Enter new password: Next, create a new role named ‘ ’ with the password ‘ ’ using the command below: rails-dev aqwe123 $ create role rails_dev with createdb login password ‘aqwe123’; You don’t have to create this role using ‘rails-dev’ or password ‘aqwe123’ but just remember what you used. Now check to see if the new role was successfully created: $ /du List of all roles and their permissions in Postgres. Getting Rails App to connect to PostgreSQL Database Now you will need to edit your ( ) file to include the role’s and you just created. database.yml /config /database.yml/ username password In the development section, and type the name of the role we’ve created in earlier ‘ ’. uncomment line 32 rails_dev username: rails_dev Set the password field on to the password you used for the ‘ ’ role. line 35 rails_dev password: aqwe123 and for the database host configuration. Uncomment line 40 44 host: localhost port: 5432 Now go to the test section and add the new configuration below. The database will be the name of your rails app followed by an ‘ ’: _test database: fakebook_test host: localhost port: 5432 username: rails_dev password: aqwe123 After editing your file it should look similar to this, but the database may be different depending on what you named your rails app. database.yml <%= %> <%= %> # PostgreSQL. Versions 9.3 and up are supported. # # Install the pg driver: # gem install pg # On macOS with Homebrew: # gem install pg - - with-pg-config=/usr/local/bin/pg_config # On macOS with MacPorts: # gem install pg - - with-pg-config=/opt/local/lib/postgresql84/bin/pg_config # On Windows: # gem install pg # Choose the win32 build. # Install PostgreSQL and put its /bin directory on your path. # # Configure Using Gemfile # gem 'pg' # default: &default adapter: postgresql encoding: unicode # For details on connection pooling, see Rails configuration guide # https://guides.rubyonrails.org/configuring.html#database-pooling pool: ENV.fetch( ) { } "RAILS_MAX_THREADS" 5 development: <<: *default database: fakebook_development # The specified database role being used to connect to postgres. # To create additional roles in postgres see `$ createuser - help`. # When left blank, postgres will use the default role. # This is # the same name as the operating system user that initialized the database. username: rails_dev # The password associated with the postgres role (username). password: aqwe123 # Connect on a TCP socket. Omitted by default since the client uses # a domain socket that doesn't need configuration. Windows does not # have domain sockets, so uncomment these lines. host: localhost # The TCP port the server listens on. Defaults to 5432. # If your server runs on a different port number, change # accordingly. port: 5432 # Schema search path. The server defaults to $user,public #schema_search_path: myapp,sharedapp,public # Minimum log levels, in increasing order: # debug5, debug4, debug3, debug2, debug1, # log, notice, warning, error, fatal, and panic # Defaults to warning. # min_messages: notice # Warning: The database defined as "test" will be erased and # re-generated from your development database when you run "rake". # Do not set this db to the same as development or production. test: <<: *default database: fakebook_test host: localhost port: 5432 username: rails_dev password: aqwe123 # As with config/credentials.yml, you never want to store sensitive # information,like your database password, in your source code. # If your source code is # ever seen by anyone, they now have access to your database. # # Instead, provide the password as a unix environment variable when # you boot the app. # Read https://guides.rubyonrails.org/configuring.html#configuring-a-database # for a full rundown on how to provide these environment variables # in a production deployment. # # On Heroku and other platform providers, you may have a full # connection URL available as an environment variable. For example: # # DATABASE_URL="postgres://myuser:mypass@localhost/somedatabase" # # You can use this database configuration with: # # production: # url: <%= ENV['DATABASE_URL'] %> # production: <<: *default database: fakebook_production username: rails_dev password: ENV[ ] 'FAKEBOOK_DATABASE_PASSWORD' Next, generate the database with the rails command: $ rails db:setup If you added the optional gem ‘ ( ) you can use a ‘ ’ file which you would create at the root directory to store a ‘ ’ and ‘ ’ value. Within the file named ‘ ’ you would put: gem ‘dotenv-rails’’ Documentation .env USERNAME PASSWORD .env USERNAME = 'rails_dev' PASSWORD = 'aqwe123' Then in the ( ) file you would swap all instances of the value of username and password: database.yml /config /database.yml/ username: rails_dev password: aqwe123 would be changed to: <%= %> <%= %> username: ENV[ ] 'USERNAME' password: ENV[ ] 'PASSWORD' Bootstrap (Optional) Ensure that you have included the gem ‘bootstrap’ in your Gemfile. Application.css to Application.scss Look for the file ‘ ’ (app/assets/stylesheets/application.css) and change the name of the file from ‘ to ‘ switching it to a Sass file. application.css application. css ’ application .scss’ Open the file and Erase lines 13 and 14 *= . *= require_tree require_self and add in this new line to import Bootstrap CSS // Custom bootstrap variables must be imported * * bootstrap. @ "bootstrap"; @ "custom"; set or before import import Import Bootstrap module and dependencies Now you will need to add a few files to your yarn file. Within the terminal run this command: $ yarn popper. add bootstrap jquery js Next, make your way into the ‘ file found in the directory ( ) and add these lines in application.js’ app/javascript/packs/application.js ; ; ; import 'bootstrap' import 'jquery' import 'popper.js' This should allow you to use all of the latest bootstrap classes within your rails views. Using Devise Gem Source: Devise After adding all necessary gems and running bundle install, you will need to install devise. In the terminal use the command: $ rails devise:install generate At this point, a number of instructions will appear in the console. Among these instructions, you’ll need to set up the default URL options for the Devise mailer in each environment. Within the ‘ ’ file ( ) add the following line: development.rb config/environments/development.rb config.action_mailer.default_url_options = { , } host: 'localhost' port: 3000 Users Model After Devise has been properly installed you will now use it to generate the User model. Using the provided parameter on the rails generate command. $ rails devise User generate , since we wish to also add a , and column to our according to the provided up above. We will add a few more parameters onto the terminal command. However First name Last name Image User model ERD $ rails generate devise fname:string lname:string image:string User We won’t need to add email as a parameter or password digest because Devise handles this for us. Afterwards we will the database to Add the newly created to the Database: migrate Users Table $ rails db:migrate – Don’t forget to run $ rails db:migrate after you create each model. Especially those that will be referenced Permitting additional parameters with Devise Since we are using Devise to handle the sign up and sign in processes, we will have to add a few lines within the application controller to allow the retrieval of the , and columns parameters from our future forms for User creation. The change we will make will be similar to this: fname lname image app/controllers/application.rb before_action before_action , devise_controller? protected devise_parameter_sanitizer.permit( , %i[fname lname image]) devise_parameter_sanitizer.permit( , %i[fname lname image]) 1 < ActionController::Base class ApplicationController 2 :authenticate_user! 3 :configure_permitted_parameters if: 4 5 6 7 def configure_permitted_parameters 8 :sign_up keys: 9 :account_update keys: 10 end 11 end Notice that on lines and , , and , are added to the list of symbols within the parameter. Also take note that on line we added the method and ordered it to run the method. Since this is placed within the application controller, this method is ran before every controller action, forcing users to sign in before they attempt to do anything. 8 9 fname lname image keys: 2 before_action :authenticate_user! Users Controller Following the general Rails Model View Controller (MVC) model we will also generate a controller for our User model. $ rails generate controller index show Users The added parameters and causes Rails to create two empty methods within the generated Users controller(app/controllers/users_controller) as well as two related views ( ) and routes ( ) to these methods. index show app/views/users config/routes.rb Devise Views Now, since we added additional columns onto the base Devise User model ( , and ), we will need to add those fields to the sign-up form. Since Devise handles log ins and sign-ups we will need access to the views that Devise creates. To gain access to these views we will need to run the following command in the terminal: fname lname image $ rails devise:views generate This command creates and adds all of the views that Devise uses to the project folder. There is a way to add parameters to the function above to limit the amount of views created to avoid clutter, see devise documentation for that ( . Documentation ) Add first name and last name fields to registration page <%= %> <%= %> <%= %> <%= %> <%= %> <%= %> <%= %> <%= %> <%= %> <% %> <%= %> <% %> <%= %> <%= %> <%= %> <%= %> <%= %> <% %> Sign up < = > div class "col-md-6 mx-auto mb-5" < = > h1 class "center bold" </ > h1 form_for(resource, resource_name, registration_path(resource_name)) as: url: do |f| render , resource "devise/shared/error_messages" resource: < = > div class "form-group row" < = > div class "col" f.label :first_name f.text_field , :fname :" - ", : , : " " class form control col autofocus true autocomplete fname </ > div < = > div class "col" f.label :last_name < /> br f.text_field , :lname :" - ", : , : " " class form control col autofocus true autocomplete lname </ > div </ > div < = > div class "form-group" f.label :email < /> br f.email_field , :email :" - ", : , : " " class form control autofocus true autocomplete email </ > div < = > div class "form-group" f.label :password @minimum_password_length if ( < > em @minimum_password_length characters minimum) </ > em end < /> br f.password_field , :password :" - ", : " - " class form control autocomplete new password </ > div < = > div class "form-group" f.label :password_confirmation < /> br f.password_field , :password_confirmation :" - ", : " - " class form control autocomplete new password </ > div < = > div class "row" < = > div class "actions col-md-3" f.submit , "Sign up" :" - " class btn btn secondary </ > div < = > div class "col" render "devise/shared/links" </ > div </ > div end </ > div classes are used in the code above but you can use your own CSS classes or the defaults found in the file. Now with this code we should have the addition of two new form fields, and . Bootstrap first_name last_name Adding Image Uploads Source: Carrier Wave Uploader Ensure that the ‘carrierwave’ and the ‘mini_magick’ gems are included in your Gemfile and are ‘bundle installed’. Afterwards, run the command: $ rails uploader Image generate This should create a file ‘ ’ in the directory image_uploader.rb app/uploaders/image_uploader.rb Next, you are going to open this file and uncomment lines and 4 38–40 Then you will add this code on line 5: process resize_to_limit: [400, 400] This line of code simply resizes any image uploaded which has a greater or than back to and . You may change this value as you see fit. width height 400 pixels 400 pixels width 400 pixels height Add mount_uploader to User mount_uploader , ImageUploader devise , , , , , , %i[facebook] validate private errors.add( , ) image.size > .megabytes 1 < ApplicationRecord class User 2 :image 3 # Include default devise modules. Others available are: 4 # :confirmable, :lockable, :timeoutable, :trackable and 5 # :omniauthable 6 :database_authenticatable :registerable :recoverable :rememberable :validatable 7 :omniauthable omniauth_providers: 8 :picture_size 9 10 11 # Validates the size of an uploaded picture. 12 def picture_size 13 :image 'should be less than 1MB' if 1 14 end 15 end On line , the method is added from the carrierwave gem and the ‘ImageUploader’ parameter supplied references the name of the uploader you generated. We use ‘ImageUploader’ since we generated an uploader called image (app/uploaders/image_uploader.rb). 2 mount_uploader On lines we create a new private method called ‘ ’ which returns an error if the image uploaded is greater than 1 megabyte. 12–14 picture_size And on line we add the ‘ ’ method into the validation requirements for the model. 8 picture_size User Add image field to registration page app/views/devise/registrations/new.html.erb <%= %> <%= %> <%= %> <%= %> <% %> <!-- ...Doesn't show other code up above --> < = > div class "picture form-group" f.label :upload_your_profile_picture < /> br f.file_field , :image :" - ", : ' / , / , / ' class form control accept image jpeg image gif image png </ > div < = > div class "row" < = > div class "actions col-md-3" f.submit , "Sign up" :" - " class btn btn secondary </ > div < = > div class "col" render "devise/shared/links" </ > div </ > div end </ > div Following the same format we used earlier we add another field to the registration page form allowing the uploading of images. <script = > document.getElementById( ).addEventListener( , var size_in_megabytes = this.files[ ]. / / ; (size_in_megabytes > ) { alert( ); } }); </script> type "text/javascript" 'user_image' 'change' { function () 0 size 1024 1024 if 1 'Maximum file size is 1 MB. Please choose a smaller file.' Using the script tag we add some JavaScript to the end of the page which displays an alert error when the file uploaded is greater than 1 MB in size. Posts Model Using: $ rails model Post content:text user:references generate We will generate a Post model with two columns and . The parameter will automatically add the line ‘ ’ in: content user_id user:references belongs_to :user app/models/post.rb belongs_to < ApplicationRecord class Post :user end This line creates an association between and . Which basically says a can belong to a leading to the inverse link of the association where a is allowed to have many posts. To finish creating this link we will now need to go into the model and add this line in: Posts Users Post User User User app/models/user.rb has_many < ApplicationRecord class User :posts end Posts Controller Using: $ rails controller Posts index show create generate new Just as before when we generated the controller with additional parameters empty methods will be added into the controller file, views will be created and routes to these methods will be added into Users config/routes.rb Comments Model Using: $ rails generate model : post: : Comment content text references user references This generates a model with three columns , and . The parameter will automatically add the lines ‘ ’ and ‘ ’ in: Comment content post_id user_id user:references belongs_to :user belongs_to :post app/models/comment.rb belongs_to belongs_to < ApplicationRecord class Comment :user :post end This line creates an association between and as well as and . Which basically says a can belong to one and one leading to the inverse link of the association where a is allowed to and a is allowed to . To finish creating this link we will now need to go into the model and add this line in: Comments Users Comments Posts Comment User Post User have many posts Post have many comments User app/models/user.rb has_many < ApplicationRecord class User :comments end as well as this line in the model: Post app/models/post.rb belongs_to has_many < ApplicationRecord class Post :user :comments end We will generate a using: Comments Controller $ rails controller Comments create generate new Since we only need to be able to create comments and all comments will only be view-able on the same page as the post it was commented under. Likes Model Using: $ rails generate model Likes : post: : user references references comment references This generates a model with three columns , and . The parameters given will automatically add the lines ‘ ’ and ‘ ’ and ‘ ’ in: Like user_id post_id comment_id belongs_to :user belongs_to :post belongs_to :comment app/models/like.rb belongs_to belongs_to belongs_to < ApplicationRecord class Like :user :post :comment end We will also want to add some additional values to the method on post and comment to allow null values for the two foreign keys. belongs_to To do this we will add the ‘optional: true’ parameter. app/models/like.rb belongs_to belongs_to , belongs_to , < ApplicationRecord class Like :user :post optional: true :comment optional: true end This line creates an association between and and as well as and . Which basically says a can belong to one and one or one Likes Users , Likes Posts Likes Comments Like User Post Comment. Now, as we did previously we need to add the inverse of this association to the appropriate models: User model app/models/user.rb has_many , < ApplicationRecord class User :likes dependent: :destroy end The added parameter ‘ ‘ allows us to delete records from the table without SQL association errors. dependent :destroy Likes If we intend on allowing comments or posts to be deleted, we can also add those parameters onto the has_many methods regarding posts and comments. as well as in the model: Post app/models/post.rb belongs_to has_many has_many , < ApplicationRecord class Post :user :comments :likes dependent: :destroy end lastly, the model: Comment app/models/comment.rb belongs_to belongs_to has_many , < ApplicationRecord class Comment :user :post :likes dependent: :destroy end Now, we want to allow the post and comment foreign key columns to be allowed to be null. To do this we edit the generated migration found in: db/migrate/***_create_likes.rb create_table t.references , , t.references , , t.references , , t.timestamps 1 < ActiveRecord::Migration[6.0] class CreateLikes 2 def change 3 :likes do |t| 4 :user null: false foreign_key: true 5 :post null: true foreign_key: true 6 :comment null: true foreign_key: true 7 8 9 end 10 end 11 end On and we set the parameter null where ‘ ‘ to ‘ e‘. Lines 5 6 null: false null: tru We will generate a using: Likes Controller $ rails controller Likes create generate Friendship Request Model Using: $ rails generate model Friendship sent_to:references sent_by:references Now before we start editing the Friendship model that was created, we will need to add some code to the newly generated Migration: db/migrate/***_create_friendships.rb create_table t.references , , { } t.references , , { } t.boolean , t.timestamps < ActiveRecord::Migration[6.0] class CreateFriendships def change :friendships do |t| :sent_by null: false foreign_key: to_table: :users :sent_to null: false foreign_key: to_table: :users :status default: false end end end Originally ‘ :’ would have been set to ‘ ’ but instead we set it to ‘ linking it to the users table. foreign_key true foreign_key: { to_table: :users }’ Afterwards, we can run rails db:migrate , then we are going to add some extra parameters into the Friendship.rb model created as well as two scopes: $ app/models/Friendship.rb belongs_to , ‘User’, ‘sent_to_id’ belongs_to , ‘User’, ‘sent_by_id’ scope , -> { where(‘status =?’, ) } scope , -> { where(‘status =?’, ) } < ApplicationRecord class Friendship :sent_to class_name: foreign_key: :sent_by class_name: foreign_key: :friends true :not_friends false end The scopes created simply provide all records in the Friendship Table where the status column is equal to true (for the friends scope) or false (not_friends scope). The ‘belongs_to’ associative links create two associations between and . Sent_to and sent_by linking it to the columns ‘sent_to_id’ and ‘sent_by_id’ as foreign keys. To finish creating this link we will now need to go into the model and add these lines in: Friendships Users User has_many , , , , has_many , , , , has_many , -> { merge(Friendship.friends) }, , has_many , -> { merge(Friendship.not_friends) }, , has_many , -> { merge(Friendship.not_friends) }, , 1 < ApplicationRecord class User 2 :friend_sent class_name: 'Friendship' 3 foreign_key: 'sent_by_id' 4 inverse_of: 'sent_by' 5 dependent: :destroy 6 :friend_request class_name: 'Friendship' 7 foreign_key: 'sent_to_id' 8 inverse_of: 'sent_to' 9 dependent: :destroy 10 :friends 11 through: :friend_sent source: :sent_to 12 :pending_requests 13 through: :friend_sent source: :sent_to 14 :received_requests 15 through: :friend_request source: :sent_by 16 end Lines and are the inverse associations created to link to the and associations made in the Friendship model ( ). 2–5 6–9 sent_to sent_by app/models/friendship.rb On lines an association named is created, the ( ) assigned is the Table and the that this association is linked to within the Table is ‘ ’. 2–5 friend_sent class_name The name of the table or model this association is linked to Friendship foreign_key Friendship sent_by_id It is also set as the ‘ ’, sent_by being the name of the association we created in the model on Line , inverse_of: sent_by Friendship 3 app/models/Friendship.rb belongs_to , , 3 :sent_by class_name: 'User' foreign_key: 'sent_by_id' which explicitly declares bi-directional associations. The association also has the parameter to allow records relating to the association to be destroyed independent of the associative link. friend_sent dependent: :destroy On lines an association named is created, the assigned is the Table and the that this association is linked to within the Table is ‘ ’. 6–9 friend_request class_name Friendship foreign_key Friendship sent_to_id It is also set as the ‘ ’, sent_to being the name of the association we created in the model on Line : inverse_of: sent_to Friendship 2 app/models/Friendship.rb belongs_to , ‘User’, ‘sent_to_id’ 2 :sent_to class_name: foreign_key: On line an association named is made, the previously made association . 10–11 friends through friend_sent has_many , -> { merge(Friendship.friends) }, , 10 :friends 11 through: :friend_sent source: :sent_to The following is the SQL generated from the code: .* . = . . = $ ( = ) $ SELECT "users" FROM "users" INNER JOIN "friendships" ON "users" "id" "friendships" "sent_to_id" WHERE "friendships" "sent_by_id" 1 AND status TRUE LIMIT 2 This SQL statement columns from the Table the is equivalent to the “ found in the Table the column on that record has to be (Meaning that the two users are in a mutual friendship). SELECTS ALL Users WHERE User.id sent_to_id” Friendships AND status TRUE The “ on that record will be equivalent to the of the user of whom we wish to find out who all his friends are. sent_by_id” User.id So, essentially this statement returns to all the records from the where the supplied requirements are met. Records of . Rails Users Table all users considered to be the current user’s friends On line an association named “ is made, the previously made association “ . 12–13 pending_requests” through friend_sent” has_many , -> { merge(Friendship.not_friends) }, , 12 :pending_requests 13 through: :friend_sent source: :sent_to The following is the SQL generated from the code: .* . = . . = $ ( = ) $ SELECT "users" FROM "users" INNER JOIN "friendships" ON "users" "id" "friendships" "sent_to_id" WHERE "friendships" "sent_by_id" 1 AND status FALSE LIMIT 2 This SQL statement columns from the Table the is equivalent to the “ found in the Table the column on that record has to be ( ). SELECTS ALL Users WHERE User.id sent_to_id” Friendships AND status FALSE Meaning that the two users are not in a mutual friendship The “ on that record will be equivalent to the of the user of whom we wish to know who all he sent friend requests to. sent_by_id” User.id Therefore, this association returns the users that have received friend requests from the chosen user. On line an association named “ is made, the previously made association “ . 14–15 received_requests” through friend_request” has_many , -> { merge(Friendship.not_friends) }, , 14 :received_requests 15 through: :friend_request source: :sent_by The following is the SQL generated from the code: .* . = . . = $ ( = ) $ SELECT "users" FROM "users" INNER JOIN "friendships" ON "users" "id" "friendships" "sent_by_id" WHERE "friendships" "sent_to_id" 1 AND status FALSE LIMIT 2 This SQL statement columns from the Table the is equivalent to the “ found in the Table the column on that record has to be (Meaning that the two users are not in a mutual friendship). SELECTS ALL Users WHERE User.id sent_by_id” Friendships AND status FALSE The “ on that record will be equivalent to the of the user of whom we wish to see who all sent him friend requests. sent_to_id” User.id So, this association returns the users that has sent friend requests to a chosen user. We will generate a using: Friendship Request Controller Using: $ rails controller Friendships create generate Notifications Model Using: $ rails generate model Notification notice_id:integer notice_type:string user:references This generates a model with 3 columns , and . Friendship notice_id notice_type user_id The will be the id of either the that was written, that was added to one of the user’s posts or a request that was sent to the user. notice_id post comment friendship The keeps a string value record of whether the notice made is a reference to either the or . notice_type Posts Table, Comments Table Friendship Table The parameter will automatically add the line ‘ ’ into ( ). user:references belongs_to :user app/models/notification.rb Within the newly generated model we are going to add three scopes: Notification app/models/notification.rb belongs_to scope , -> { where( ) } scope , -> { where( ) } scope , -> { where( ) } < ApplicationRecord class Notification :user :friend_requests 'notice_type = friendRquest' :likes 'notice_type = like' :comments 'notice_type = comment' end The scopes created will allow us to single out notifications by type, e.g. Likes, comments or friend requests. This line creates two associations between and . To finish creating this link we will now need to go into the model and add: Notification Users User app/models/user.rb has_many , < ApplicationRecord class User :notifications dependent: :destroy end There is no need for a , however, the main methods we will use to create notifications we will create in the application helper: Notifications controller notice = user.notifications.build( notice_id, notice_type) user.notice_seen = user.save notice User.find(notice.notice_id) type == Post.find(notice.notice_id) type == Post.find(notice.notice_id) type == type == comment = Comment.find(notice.notice_id) Post.find(comment.post_id) module ApplicationHelper # Returns the new record created in notifications table def new_notification (user, notice_id, notice_type) notice_id: notice_type: false end # Receives the notification object as parameter along with a type # and returns a User record, Post record or a Comment record # depending on the type supplied def notification_find (notice, type) return if 'friendRequest' return if 'comment' return if 'like-post' return unless 'like-comment' end end The method will simply be used to create a new notification record and save it into the . new_notification(user, notice_id, notice_type) Notifications Table Since a notification will only be created as the result of another method function being called and it has no real view. Instead of creating a controller we will simply create it as a helper method. The method will be used to find a particular post, comment of friend request based on the and of the saved. notification_find(notice, type) notice_id notice_type notification record The will determine which to look into and search for the within that . notice_type Table notice_id Table Setting up Routes config /routes.rb Rails.application.routes.draw root devise_for resources , %i[index show] resources , %i[create] resources , %i[index new create show destroy] resources , %i[create] resources , %i[new create destroy] resources , %i[create] do 'users#index' :users :users only: do :friendships only: end :posts only: do :likes only: end :comments only: do :likes only: end end The order in which you define your routes is crucial for the and routes since they can in some instances end up overlapping. devise users User’s and Posts Adding methods into User model app/models/user.rb devise , , , , has_many has_many , has_many , has_many , , , , has_many , , , , has_many , -> { merge(Friendship.friends) }, , has_many , -> { merge(Friendship.not_friends) }, , has_many , -> { merge(Friendship.not_friends) }, , has_many , mount_uploader , PictureUploader validate myfriends = friends our_posts = [] myfriends.each f.posts.each our_posts << p posts.each our_posts << p our_posts private errors.add( , ) image.size > .megabytes < ApplicationRecord class User # Include default devise modules. Others available are: # :confirmable, :lockable, :timeoutable, :trackable and # :omniauthable :database_authenticatable :registerable :recoverable :rememberable :validatable :posts :comments dependent: :destroy :likes dependent: :destroy :friend_sent class_name: 'Friendship' foreign_key: 'sent_by_id' inverse_of: 'sent_by' dependent: :destroy :friend_request class_name: 'Friendship' foreign_key: 'sent_to_id' inverse_of: 'sent_to' dependent: :destroy :friends through: :friend_sent source: :sent_to :pending_requests through: :friend_sent source: :sent_to :received_requests through: :friend_request source: :sent_by :notifications dependent: :destroy :image :picture_size # Returns a string containing this user's first name and last name def full_name " " #{fname} #{lname} end # Returns all posts from this user's friends and self def friends_and_own_posts do |f| do |p| end end do |p| end end # Validates the size of an uploaded picture. def picture_size :image 'should be less than 1MB' if 1 end end We add two new methods into the model called and . User full_name friends_and_own_posts Method simply returns a string that concatenates both the user’s and . full_name fname lname def full_name " " #{fname} #{lname} end method returns all posts of all the user’s friends along with the user’s post. friends_and_own_posts myfriends = friends our_posts = [] myfriends.each f.posts.each our_posts << p posts.each our_posts << p our_posts def friends_and_own_posts do |f| do |p| end end do |p| end end The variable ‘ is an array that is populated using the ‘ ’ association which returns all records of the user’s friends. myfriends’ has_many :friends Afterwards, the posts of each of the friends along with the user’s own posts are pushed into ‘ ’. our_posts Creating Posts app/controllers/posts_controller.rb @our_posts = current_user.friends_and_own_posts @post = Post.find(params[ ]) @post = Post.new @post = current_user.posts.build(posts_params) @post.save redirect_to @post render private params. ( ).permit( , ) < ApplicationController class PostsController def index end def show :id end def new end def create if else 'new' end end ; def destroy end def posts_params require :post :content :imageURL end end @our_posts = current_user.friends_and_own_posts def index end The method creates an variable which stores the result of the previously created method in the model, ‘ to gather all the posts of this user and his friends. index instance User friends_and_own_posts’ @post = Post.find(params[ ]) def show :id end The method grabs a particular post depending on the id supplied by the route and stores it into an variable called . show instance @post @post = Post.new def new end The method creates a new record and assigns it to the @post variable but doesn’t save it. new Post @post = current_user.posts.build(posts_params) @post.save redirect_to @post render def create if else 'new' end end The method creates a new record, assigning the of that post to that of the that is signed in. ( create Post user_id current_user current_user is a devise included helper method) It also creates the using the parameters permitted by the method. If the post was created and successfully saved the browser will the of the post created. Post posts_params redirect_to show page view However, if the post was not able to be saved, the of a post ( ) will be shown. new page view which will be the form used to create a post private params. ( ).permit( , ) def posts_params require :post :content :imageURL end method is declared as a method ( ) which permits the parameters : and : provided by the create post route returning them in a Hash format. posts_params private method is only accessible within current file content imageURL # => <ActionController::Parameters {"content"=>"Example post", "imageURL"=>"http://example.com"} permitted: true> Users Controller app/controllers/users_controller.rb @users = User.all @friends = current_user.friends @pending_requests = current_user.pending_requests @friend_requests = current_user.received_requests @user = User.find(params[ ]) @user = User.find(params[ ]) current_user.id == @user.id redirect_back( users_path(current_user)) image = params[ ][ ] params[ ]. ? image @user.image = image @user.save flash[ ] = flash[ ] = redirect_back( root_path) < ApplicationController class UsersController def index end def show :id end def update_img :id unless fallback_location: return end :user :image unless :user nil if if :success 'Image uploaded' else :danger 'Image uploaded failed' end end fallback_location: end end Within the method: index @users = User.all @friends = current_user.friends @pending_requests = current_user.pending_requests @friend_requests = current_user.recieved_requests def index end We setup four(4) instance variables, 3 of which uses the associations we created within the model. User ‘ ’ gathers all the records of all this user’s friends. @friends = current_user.friends ‘ ’ gathers all the records of the users this user has sent friend requests to. @pending_requests = current_user.pending_requests ‘ ’ gathers all records of the users that has sent this user a friend request. @friend_requests = current_user.recieved_requests @user = User.find(params[ ]) current_user.id == @user.id redirect_back( users_path(current_user)) image = params[ ][ ] params[ ]. ? image @user.image = image @user.save flash[ ] = flash[ ] = redirect_back( root_path) def update_img :id unless fallback_location: return end :user :image unless :user nil if if :success 'Image uploaded' else :danger 'Image uploaded failed' end end fallback_location: end The method is used to switch the image file associated with the record. update_img User A simple and straight forward method which retrieves a U record based on the supplied parameter. ser :id Then sets the column of the record to the image provided by the route parameter and saves the record’s new value. image User :image image Comments & Likes Filling out the new, create and destroy methods in the Comments controller app/controllers/comments_controller.rb ApplicationHelper @comment = Comment.new @comment = current_user.comments.build(comment_params) @post = Post.find(params[ ][ ]) @comment.save @notification = new_notification(@post.user, @post.id, ) @notification.save redirect_to @post @comment = Comment.find(params[ ]) current_user.id == @comment.user_id @comment.destroy flash[ ] = redirect_back( root_path) private params. ( ).permit( , ) < ApplicationController class CommentsController include def new end def create :comment :post_id if 'comment' end end def destroy :id return unless :success 'Comment deleted' fallback_location: end def comment_params require :comment :content :post_id end end Starting off with the method: create @post = Post.find(params[ ][ ]) @comment = current_user.comments.build(comment_params) @comment.save @notification = new_notification(@post.user, @post.id, ) @notification.save redirect_to @post def create :comment :post_id if 'comment' end end The variable is supplied the value of the record in which this comment is written in reference to. instance @post Post stores the value of a new comment record referencing the as the owner and the return value of . A method which permits the retrieval of two fields from the form used to create a comment, : and : . @comment current_user comment_params content post_id Once the comment record is successfully saved and committed to the database, a new notification record is created using the previously created helper ( ). notification app/helpers/application_helper.rb @comment.save @notification = new_notification(@post.user, @post.id, ) @notification.save if 'comment' end The comment method: destroy @comment = Comment.find(params[ ]) current_user.id == @comment.user_id @comment.destroy flash[ ] = redirect_back( root_path) def destroy :id return unless :success 'Comment deleted' fallback_location: end The statement prevents users from deleting commenting that aren’t their own. return unless The method simply refreshes the current page. redirect_back() Allowing Likes app/controllers/likes_controller.rb ApplicationHelper type = type_subject?(params)[ ] @subject = type_subject?(params)[ ] notice_type = @subject already_liked?(type) dislike(type) @like = @subject.likes.build( current_user.id) @like.save flash[ ] = @notification = new_notification(@subject.user, @subject.id, notice_type) @notification.save flash[ ] = redirect_back( root_path) private type = params.key?( ) type = params.key?( ) subject = Post.find(params[ ]) type == subject = Comment.find(params[ ]) type == [type, subject] result = type == result = Like.where( current_user.id, params[ ]).exists? type == result = Like.where( current_user.id, params[ ]).exists? result @like = Like.find_by( params[ ]) type == @like = Like.find_by( params[ ]) type == @like @like.destroy redirect_back( root_path) < ApplicationController class LikesController include def create 0 1 "like- " #{type} return unless if else user_id: if :success " liked!" #{type} else :danger " like failed!" #{type} end fallback_location: end end def type_subject? (params) 'post' if 'post_id' 'comment' if 'comment_id' :post_id if 'post' :comment_id if 'comment' end def already_liked? (type) false if 'post' user_id: post_id: :post_id end if 'comment' user_id: comment_id: :comment_id end end def dislike (type) post_id: :post_id if 'post' comment_id: :comment_id if 'comment' return unless fallback_location: end end Since the method depends on a few helper provide methods I will explain those first. create type = params.key?( ) type = params.key?( ) subject = Post.find(params[ ]) type == subject = Comment.find(params[ ]) type == [type, subject] def type_subject? (params) 'post' if 'post_id' 'comment' if 'comment_id' :post_id if 'post' :comment_id if 'comment' end The method receives the parameters from the route and determines if the obtained is that of a comment or a post. type_subject?() id Since the like method is accessible by two nested routes. One within a and another within a depending on the route used to call the method a different parameter is given. create post route comment route, resources , %i[index new create show destroy] resources , %i[create] resources , %i[new create destroy] resources , %i[create] :posts only: do :likes only: end :comments only: do :likes only: end After is it decided which route was used, the method returns an array containing the , a string value of either ‘comment’ or ‘post’ and , the record of either the comment or post. type subject result = type == result = Like.where( current_user.id, params[ ]).exists? type == result = Like.where( current_user.id, params[ ]).exists? result def already_liked? (type) false if 'post' user_id: post_id: :post_id end if 'comment' user_id: comment_id: :comment_id end end Next up, the method returns either a true or false value determining whether a record exits for the or in question. already_liked? Like post comment @like = Like.find_by( params[ ]) type == @like = Like.find_by( params[ ]) type == @like @like.destroy redirect_back( root_path) def dislike (type) post_id: :post_id if 'post' comment_id: :comment_id if 'comment' return unless fallback_location: end Then we have the method which is essentially the method for the controller. It find the like record for the given post or comment based on the route used and destroys it. dislike destroy Likes Application helper Likes methods app/helpers/application_helper.rb result = result = Like.where( current_user.id, subject.id).exists? type == result = Like.where( current_user.id, subject.id).exists? type == result module ApplicationHelper # Checks whether a post or comment has already been liked by the # current user returning either true or false def liked? (subject, type) false user_id: post_id: if 'post' user_id: comment_id: if 'comment' end end Similar to the method in the controller, the method takes two arguments. A record object, and the string literal of its . already_liked Likes liked?(subject, type) subject type Friendship Helpers Since the Friendship controller depends on some helper methods we will create them in the application helper. app/helpers/application_helper.rb current_user.friend_sent.exists?( user.id, ) current_user.friend_request.exists?( user.id, ) request_sent = current_user.friend_sent.exists?( user.id) request_received = current_user.friend_request.exists?( user.id) request_sent != request_recieved request_sent == request_recieved && request_sent == request_sent == request_recieved && request_sent == module ApplicationHelper def friend_request_sent? (user) sent_to_id: status: false end def friend_request_received? (user) sent_by_id: status: false end # Checks whether a user has had a friend request sent to them by the current user or # if the current user has been sent a friend request by the user returning either true or false def possible_friend? (user) sent_to_id: sent_by_id: return true if return true if true return false if false end end Lets look a bit closer at this newly added methods. current_user.friend_sent.exists?( user.id, ) def friend_request_sent? (user) sent_to_id: status: false end The method checks whether a user has had a friend request sent to them by the current user returning either true or false. friend_request_sent? current_user.friend_request.exists?( user.id, ) def friend_request_received? (user) sent_by_id: status: false end This method checks whether a user has sent a friend request to the current user returning either true or false. request_sent = current_user.friend_sent.exists?( user.id) request_received = current_user.friend_request.exists? ( user.id) request_sent != request_recieved request_sent == request_recieved && request_sent == request_sent == request_recieved && request_sent == def possible_friend? (user) sent_to_id: sent_by_id: return true if return true if true return false if false end This method checks whether a user has had a friend request sent to them by the current user or if the current user has been sent a friend request by the user. This method returns either true or false. Friendship Controller app/controllers/friendships_controller.rb ApplicationHelper current_user.id == params[ ] friend_request_sent?(User.find(params[ ])) friend_request_recieved?(User.find(params[ ])) @user = User.find(params[ ]) @friendship = current_user.friend_sent.build( params[ ]) @friendship.save flash[ ] = @notification = new_notification(@user, @current_user.id, ) @notification.save flash[ ] = redirect_back( root_path) @friendship = Friendship.find_by( params[ ], current_user.id, ) @friendship @friendship.status = @friendship.save flash[ ] = @friendship2 = current_user.friend_sent.build( params[ ], ) @friendship2.save flash[ ] = redirect_back( root_path) @friendship = Friendship.find_by( params[ ], current_user.id, ) @friendship @friendship.destroy flash[ ] = redirect_back( root_path) < ApplicationController class FriendshipsController include def create return if :user_id # Disallow the ability to send yourself a friend request # Disallow the ability to send friend request more than once to same person return if :user_id # Disallow the ability to send friend request to someone who already sent you one return if :user_id :user_id sent_to_id: :user_id if :success 'Friend Request Sent!' 'friendRequest' else :danger 'Friend Request Failed!' end fallback_location: end def accept_friend sent_by_id: :user_id sent_to_id: status: false return unless # return if no record is found true if :success 'Friend Request Accepted!' sent_to_id: :user_id status: true else :danger 'Friend Request could not be accepted!' end fallback_location: end def decline_friend sent_by_id: :user_id sent_to_id: status: false return unless # return if no record is found :success 'Friend Request Declined!' fallback_location: end end The method: create current_user.id == params[ ] friend_request_sent?(User.find(params[ ])) friend_request_received?(User.find(params[ ])) @user = User.find(params[ ]) @friendship = current_user.friend_sent.build( params[ ]) @friendship.save flash[ ] = @notification = new_notification(@user, @current_user.id, ) @notification.save flash[ ] = redirect_back( root_path) def create return if :user_id return if :user_id return if :user_id :user_id sent_to_id: :user_id if :success 'Friend Request Sent!' 'friendRequest' else :danger 'Friend Request Failed!' end fallback_location: end The statement prevents the ability of sending yourself a friend request. first return The statement uses the method to prevent the sending of friend requests more than once to same person. second return friend_request_sent? The statement prevents the sending of friend requests to someone who has already sent you one, using method . third return friend_request_received? Since this friendships controller method is a nested route under the users resource the route created provides the parameter for use within this function. create user_id @friendship = current_user.friend_sent.build( params[ ]) sent_to_id: :user_id creates a new record in the table supplying the value of as that of the current user using the association between the model and model. current_user.friend_sent.build() Friendship sent_by_id friend_sent User Friendship Once the record is successfully saved a is created and linked. Friendship new_notification() @friendship = Friendship.find_by( params[ ], current_user.id, ) @friendship @friendship.status = @friendship.save flash[ ] = @friendship2 = current_user.friend_sent.build( params[ ], ) @friendship2.save flash[ ] = redirect_back( root_path) def accept_friend sent_by_id: :user_id sent_to_id: status: false return unless # return if no record is found true if :success 'Friend Request Accepted!' sent_to_id: :user_id status: true else :danger 'Friend Request could not be accepted!' end fallback_location: end The method updates the friendship record in the table setting the of the record to which we used to signify that the users are friends. accept_friend Friendship status true Once the original record is updated and saved a duplicate record is created. This duplicate record will have the inverse value for and . This makes it easier to perform friending tasks and database checks to determine friends lists. sent_by_id sent_to_id For example, John sends Samantha a friend request. Samantha accepts the friend request. Upon accepting the friend request another friend request is made automatically. But instead this time it will be as if Samantha had sent John a friend request and John had accepted it. @friendship = Friendship.find_by( params[ ], current_user.id, ) @friendship @friendship.destroy flash[ ] = redirect_back( root_path) def decline_friend sent_by_id: :user_id sent_to_id: status: false return unless # return if no record is found :success 'Friend Request Declined!' fallback_location: end end If a user declines a friend request the record is deleted out of the table. Friendship Editing Routes config/routes.rb Rails.application.routes.draw root devise_for resources , %i[index show] resources , %i[create] collection get get put , resources , %i[index new create show destroy] resources , %i[create] resources , %i[new create destroy] resources , %i[create] do 'users#index' :users :users only: do :friendships only: do do 'accept_friend' 'decline_friend' end end end '/users/:id' to: 'users#update_img' :posts only: do :likes only: end :comments only: do :likes only: end # For details on the DSL available within this file, see https://guides.rubyonrails.org/routing.html end We added two nested route methods under the already nested route, and ). collection friendships accept_friend decline_friend (more information on collection routes Also added a route link to the method in the controller. We used because and requests are used to update existing data. PUT update_img Users PUT PUT PATCH Views : Github SpyBook Views Custom CSS Classes Used Here For the views we will be using , and . Bootstrap GoogleFonts FontAwesome However, these are all , you may use your own custom classes. optional The main point of this section is to show you how to use the helper functions and controller methods to achieve our goal. Layout Views app/views/layouts We will only go over the routes, methods and helper methods used within the views. For the HTML format of the full view you can look at . Spybook’s Github views Essentially these views are view-able on every page, so, this is where we will create our Flash notifications and Navigation Bar. Flash Notifications We create a new file titled ‘ , the _ (underscore) preceding the name of the file dictates that this file will be a render. _flash.html.erb ’ app/views/layouts/_flash.html.erb <% %> <%= %> <% %> flash.each do |message_type, message| content_tag( , message, :div : " - class alert alert #{message_type}") end Since flash is a Hash, scans through each of the key, value pairs. The keys are between , , and . The values are the flash message supplied. flash.each do :notice :success :error :alert So , , : “alert alert-#{ }” , creates a new div element with it’s TextContent equal to the ‘ ’ supplied with a class equal to ‘alert alert-‘ ’’ supplied. ‘ ’ can be either , , or . content_tag(:div message class message_type ) message message_type message_type notice success error alert Navigation Bar Create a new file titled ‘ ’. _header.html.erb app/views/layouts/_header.html.erb We will be referencing the ‘ ’ file found in . _header.html.erb Spybook’s Layouts view <%= %> <% %> < = > div class "container mx-auto" < = > div class "row mx-auto" < = > div class "col-auto" link_to posts_path, raleway : " - - - class text light nav link font " do Timeline < = > i class "fas fa-home fa-2x" </ > i end </ > div <!-- ...Code below not shown --> The ‘ ’ route simply links to the link_to posts_path Posts index view app/views/posts/index.html.erb <%= %> <% %> < = > div class "col-auto" link_to users_path, : " - - - " class text light nav link font raleway do Find Friends < = > i class "fas fa-users fa-2x" </ > i end </ > div The ‘ ’ route simply links to the link_to users_path Users index view app/views/users/index.html.erb <% %> <%= %> < = > ul class "navbar-nav ml-auto" user_signed_in? if < = > li class "nav-item" < = , = = > button class "text-white btn btn-secondary" data- toggle "modal" data-target "#noticeModal" < = > i class "fas fa-bell" </ > i current_user.notifications.count </ > button </ > li <!-- ... --> The notification’s button will display an icon provided by and the number of notifications the current user has. FontAwesome The notifications system explained here in this tutorial is slightly different from the system used on the Github project. <%= %> <%= %> < = = > div class "dropdown-menu" aria-labelledby "navbarDropdown" link_to , user_path(current_user), "My Profile" : " - - " class dropdown item font raleway link_to , destroy_user_session_path, "Log out" : " - - ", : : class dropdown item font raleway method delete </ > div The ‘ ’ route links to the using the id of current user to display information relative to that user. link_to user_path(current_user) Users show view app/views/users/show.html.erb The ‘ ’ route links to a devise sessions controller method link_to destroy_user_session_path destroy <% %> <%= %> <% %> user_signed_in? if render , current_user.notifications 'shared/notifications' object: end This render at the bottom of the page is necessary for the notifications button to work. As it allows a pop up to appear once clicked which shows all notifications the user has. Application view app/views/layouts/application.html.erb We will be referencing the ‘ ’ file found in . application.html.erb Spybook’s Layouts view Here we will render our Flash notifications(render ‘layouts/flash’) and our Navigation bar(render ‘layouts/header’) as well as add links to and . GoogleFonts FontAwesome <%= %> <%= %> <%= %> < > body render 'layouts/header' < = > div class 'container' < > br render 'layouts/flash' yield </ > div </ > body is placeholder code where each of the other views will be displayed. <%= yield %> Next, we will create all of our shared views. Shared Rendered Modal Views app/views/shared Image Upload Modal Create a new file titled ‘ ’. _imageUploadModal.html.erb app/views/shared/_imageUploadModal.html.erb We will be referencing the ‘ ’ file found in . _imageUploadModal.html.erb Spybook’s Shared view <%= %> <%= %> <%= %> <%= %> <%= %> <% %> Change Profile Picture < = > div class "modal-body" < = = > h5 class "modal-title" id "imageUploadModalLabel" </ > h5 form_for(object, { }) html: method: :put do |f| render , object "devise/shared/error_messages" resource: < = > div class "field" f.label :Profile_image < /> br f.file_field , :image accept: 'image/jpeg,image/gif,image/png' </ > div < = > div class "actions" f.submit "Update" </ > div end </ > div Within the modal we will create a form which allows the user to upload any image of type jpeg, gif or png. <%= %> <%= %> form_for(object, { }) html: method: :put do |f| render , object "devise/shared/error_messages" resource: The object variable you see being used is going to be the user object once passed as reference by the method as we will see in the render User show view . app/views/users/show.html.erb <%= %> render , @user 'shared/imageUploadModal' object: At the bottom of the ‘ ’ file we will create a JavaScript function. _imageUploadModal.html.erb app/views/shared/_imageUploadModal.html.erb <script = > document.getElementById( ).addEventListener( , var size_in_megabytes = this.files[ ]. / / ; (size_in_megabytes > ) { alert( ); } }); </script> type "text/javascript" 'user_image' 'change' { function () 0 size 1024 1024 if 1 'Maximum file size is 1 MB. Please choose a smaller file.' This function returns an alert when the image file uploaded is greater than 1 Mb in size. Notifications Modal Create a new file titled ‘ ’. _notifications.html.erb app/views/shared/_notifications.html.erb We will be referencing the ‘ ’ file found in . _notifications.html.erb Spybook’s Shared view <% %> <% %> <% %> <%= %> <% %> < = > div class "modal-body" object.each do |n| <!--If Notification type is a Friend Request --> n.notice_type == if "friendRequest" user = notification_find(n, ) 'friendRequest' "Friend Request sent from " #{user.full_name} end Just like the modal render the modal render is passed an Image Notifications object variable: app/views/layouts/_header.html.erb <% %> <%= %> <% %> user_signed_in? if render , current_user.notifications 'shared/notifications' object: end This object variable passed is the associative link between the model and the model. has many User Notifications Since this is a link and it can return multiple records within the modal we run an loop to handle each notification separately. This allows us to categorize our notifications and the ability to show context correct text about each notification. has many Notifications each do app/views/shared/_notifications.html.erb <% %> <% %> <% %> <%= %> <% %> <% %> <%= %> <% %> <% %> <% %> <%= %> <% %> <% %> <% %> <%= %> <% %> <% %> <% %> <!-- ...Code above not shown --> < = > div class "modal-body" object.each do |n| <!-- If Notification type is a Friend Request --> n.notice_type == if "friendRequest" user = notification_find(n, ) 'friendRequest' "Friend Request sent from " #{user.full_name} end <!-- If Notification type is a comment --> n.notice_type == if "comment" link_to post_path(notification_find(n, )) 'comment' do Someone commented on your post end end <!-- If Notification type is a liked post --> n.notice_type == if "like-post" link_to post_path(notification_find(n, )) 'like-post' do Someone liked your post end end <!-- If Notification type is a liked comment --> n.notice_type == if "like-comment" link_to post_path(notification_find(n, )) 'like-comment' do Someone liked your comment under this post end end < > br end </ > div Aside from the friendship request notification all other notifications provide a link to the liked content using the helper we created in the file. notification_find application_helper Comments Views Comment Form View Create a new file titled ‘ ’. _form.html.erb app/views/comments/_form.html.erb We will be referencing the ‘ ’ file found in . _form.html.erb Spybook’s Comments view <%= %> form_for @comment = Comment.new do |f| The comments form view is a straight forward view which is going to be rendered in multiple places. It uses the Rails method to create a new record and attempts to submit this record using the controller method. form_for Comment Comments Create Comment Layout View Create a new file titled ‘ ’. _comment.html.erb app/views/comments/_comment.html.erb We will be referencing the ‘ ’ file found in . _comment.html.erb Spybook’s Comments view The comments layout is pretty straight forward it is a rendered view which is passed an object parameter which is generally going to be the comments associated with a particular post. <%= %> distance_of_time_in_words(c.created_at, Time.now) It uses a Rails method to display the amount of time that has passed from when the post was created to the current time. distance_of_time_in_words <%= %> render , c 'likes/like_comments' object: It also renders a view supplying the comment itself as an object variable. Likes Likes View app/views/likes/_like_comments.html.erb We will be referencing the ‘ ’ file and ‘ ’ found in . _like_comments.html.erb _like_posts.html.erb Spybook’s Likes view <%= %> <%= %> <% %> <% %> <% %> <% %> < > span object.likes.count link_to comment_likes_path(object), : " - ", : : class text light method post do liked?(subject = object, type = ) if 'comment' < = > button class "btn btn-liked size-12" < = > i class "fas fa-thumbs-up" </ > i </ > button else < = > button class "btn btn-neutral size-12" < = > i class "fas fa-thumbs-up" </ > i </ > button end end Likes </ > span View uses variable supplied to this rendered view to display the amount of the particular object has. object likes A link is created using the route which is passed the object as a parameter. This nested route links to the create method in the controller. comment_likes_path Likes The helper method which is created in the application_helper file is used to determine the color of the thumbs up icon. liked? app/views/likes/_like_posts.html.erb <%= %> <%= %> <% %> <% %> <% %> <% %> < > span object.likes.count link_to post_likes_path(object), : " - ", : : class text light method post do liked?(object, ) if 'post' < = > button class "btn btn-liked" < = > i class "fas fa-thumbs-up" </ > i </ > button else < = > button class "btn btn-neutral" < = > i class "fas fa-thumbs-up" </ > i </ > button end end Likes </ > span The only difference between the two like views is the route used. <%= %> link_to post_likes_path(object), : " - ", : : class text light method post do Its also worth mentioning the ‘ parameter on the method. This is necessary to create a new object. Generally is used to GET information. method: :post’ link_to Like link_to Posts Views New Post View Create a new file titled ‘ ’. new.html.erb app/views/posts/new.html.erb We will be referencing the ‘ ’ file found in , to fill in the data. new.html.erb Spybook’s Posts view Post Layout View Create a new file titled ‘ ’. _post_layout.html.erb app/views/posts/_post_layout.html.erb We will be referencing the ‘ ’ file found in , to fill in the data. _post_layout.html.erb Spybook’s Posts view This view is similar to the comments layout view as it renders comments, a comment form and a likes view within it. Post Show View Create a new file titled ‘ ’. show.html.erb app/views/posts/show.html.erb <%= %> Post < > h1 </ > h1 render , @post 'posts/post_layout' object: Timeline — Post Index View Create a new file titled ‘ ’. index.html.erb app/views/posts/index.html.erb <%= %> <% %> <% %> <%= %> <% %> Timeline - My posts and my friends posts < > h1 </ > h1 < = > div class "center font-raleway " link_to new_post_path, : " - " class btn btn secondary do New Post? end </ > div @our_posts.each do |p| render , p 'posts/post_layout' object: end Simple view which has a link to the . new post view It also renders the posts of the current user and the user’s friends using the instance variable created in the controller, . Posts @our_posts Users Views Find Friends — User Index View Create a new file titled ‘ ’. index.html.erb app/views/users/new.html.erb We will be referencing the ‘ ’ file found in , to fill in the data. index.html.erb Spybook’s Users view The index view uses the variables created in the controller to categorize all the users. instance Users <% %> <% %> <% %> @friends.empty? unless ... @pending_requests.empty? unless ... @friend_requests.empty? unless ... <% %> <% %> <%= %> <%= %> <% %> <%= %> <% %> <% %> <!-- ...Doesn't show all code up above --> @friend_requests.empty? unless Pending Friend Requests < = > div class "card my-5 py-3 bg-light shadow" < = > h2 class "center pb-3 text-dark border-bottom" </ > h2 @friend_requests.each do |user| <!-- Shows all users friend requests has been sent to --> < = > div class "d-flex align-items-center mb-2 border-bottom py-2" < = > div class "col-auto p-0 pl-5 text-capitalize" link_to user_path(user) do user.full_name end | Pending Friend Request... </ > div < = > div class "col-auto p-0 px-1" </ > div < = > div class "col-auto p-0" < = = = > button class "btn btn-pending shadow" data-toggle "modal" data-target "#decisionModal" < = > i class "fas fa-envelope" </ > i </ > button </ > div </ > div render , user 'friendships/decisionModal' object: < > br < > br end </ > div end <!-- ...Doesn't show all code down below --> All Pending Friend requests are created as buttons which once clicked opens a rendered modal view. Friendship Decision Modal View app/views/friendships/_decisionModal.html.erb The full code referenced can be found here . Spybook Friendship View Modal <%= %> <%= %> <% %> <%= %> <% %> Friend Request from <!-- Modal --> < = = = = = = > div class "modal fade" id "decisionModal" tabindex "-1" role "dialog" aria-labelledby "decisionModal" aria-hidden "true" < = = > div class "modal-dialog" role "document" < = > div class "modal-content" < = > div class "modal-body" < = = > h5 class "modal-title" id "decisionModalLabel" " " #{object.full_name} </ > h5 </ > div < = > div class "modal-footer" link_to accept_friend_user_friendships_path(object) do Accept < = = > button type "button" class "btn btn-accept text-white font-weight-bold" < = > i class "fas fa-user-check" </ > i </ > button end link_to decline_friend_user_friendships_path(object) do Decline < = = > button type "button" class "btn btn-decline text-white font-weight-bold" < = > i class "fas fa-user-times" </ > i </ > button end </ > div </ > div </ > div </ > div Friend request decision modal contains links to the and methods from the Controller. accept_friend decline_friend Friendship User Show View Create a new file titled ‘ ’. show.html.erb app/views/users/show.html.erb We will be referencing the ‘ ’ file found in , to fill in the data. show.html.erb Spybook’s Users view Omniauth Facebook Integration Go to website Facebook developer’s Create an account and then create a new app. Take note of the and the . You will need these values later on. App ID App Secret Fill out the Contact Email information Set the Category for the App and Set a Privacy Policy URL Privacy Policy Generator Then afterwards you will save the changes and now you should be able to switch the app development status to ‘Live’ instead of ‘In Development’. Configuring Project for Facebook Use Devise OmniAuth Documentation You should already have the ‘ ’ installed at this point. gem omniauth-facebook If you added the optional ‘ ’ you can use a file which you would create at the root directory to store a ‘ ’ and ‘ ’ value. gem dotenv-rails .env FACEBOOK_APP_ID FACEBOOK_APP_SECRET Within the ‘ ’ file you would put: .env ./.env FACEBOOK_APP_ID = 'FILL IN WITH YOUR APP ID' FACEBOOK_APP_SECRET = 'FILL IN WITH YOUR APP SECRET' Update User model Next up, you should add the columns “ ” (string) and “ ” (string) to your User model. provider uid Using the below command: $ rails g migration AddOmniauthToUsers provider:string uid:string Then migrate the database: $ rails db:migrate Next, you will add two(2) OmniAuth methods to model and And also add extra parameters onto the devise method. User self.from_omniauth() self.new_with_session(). app/models/user.rb has_many has_many , has_many , has_many , , , , has_many , , , , has_many , -> { merge(Friendship.friends) }, , has_many , -> { merge(Friendship.not_friends) }, , has_many , -> { merge(Friendship.not_friends) }, , has_many , mount_uploader , PictureUploader devise , , , , , , %i[facebook] validates , { .. }, validates , { .. }, validate myfriends = friends our_posts = [] myfriends.each f.posts.each our_posts << p posts.each our_posts << p our_posts where( auth.provider, auth.uid).first_or_create user.email = auth.info.email user.password = Devise.friendly_token[ , ] user.fname = auth.info.first_name user.lname = auth.info.last_name user.image = auth.info.image .tap (data = session[ ] && session[ ][ ][ ]) user.email = data[ ] user.email.blank? private errors.add( , ) image.size > .megabytes < ApplicationRecord class User :posts :comments dependent: :destroy :likes dependent: :destroy :friend_sent class_name: 'Friendship' foreign_key: 'sent_by_id' inverse_of: 'sent_by' dependent: :destroy :friend_request class_name: 'Friendship' foreign_key: 'sent_to_id' inverse_of: 'sent_to' dependent: :destroy :friends through: :friend_sent source: :sent_to :pending_requests through: :friend_sent source: :sent_to :recieved_requests through: :friend_request source: :sent_by :notifications dependent: :destroy :image # Include default devise modules. Others available are: # :confirmable, :lockable, :timeoutable, :trackable and :omniauthable :database_authenticatable :registerable :recoverable :rememberable :validatable :omniauthable omniauth_providers: :fname length: in: 3 15 presence: true :lname length: in: 3 15 presence: true :picture_size def full_name " " #{fname} #{lname} end # Returns all posts from this user's friends and self def friends_and_own_posts do |f| do |p| end end do |p| end end . def self from_omniauth (auth) provider: uid: do |user| 0 20 # assuming the user model has a first name # assuming the user model has a last name # assuming the user model has an image # If you are using confirmable and the provider(s) you use validate emails, # uncomment the line below to skip the confirmation emails. # user.skip_confirmation! end end . def self new_with_session (params, session) super do |user| if 'devise.facebook_data' 'devise.facebook_data' 'extra' 'raw_info' 'email' if end end end # Validates the size of an uploaded picture. def picture_size :image 'should be less than 1MB' if 1 end end We modify one of the newly added OmniAuth functions to work with our User model database columns. where( auth.provider, auth.uid).first_or_create user.email = auth.info.email user.password = Devise.friendly_token[ , ] user.fname = auth.info.first_name user.lname = auth.info.last_name user.image = auth.info.image . def self from_omniauth (auth) provider: uid: do |user| 0 20 end end We edit the method to use our model’s columns , and . self.from_omniauth() User fname lname image Edit Devise Initializer Next, you need to declare the provider in your by adding the code below devise.rb config/initializers/devise.rb Devise.setup config.action_mailer.default_url_options = { , } config.omniauth , ENV[ ], ENV[ ], { }, , do |config| # ...Doesn't show other code up above host: 'localhost' port: 3000 :facebook 'FACEBOOK_APP_ID' 'FACEBOOK_APP_SECRET' token_params: parse: :json scope: 'public_profile,email' info_fields: 'email,first_name,last_name,gender,birthday,location,picture' end Update Routes config /routes.rb Rails.application.routes.draw root devise_for , { } resources , %i[index show] resources , %i[index show] resources , %i[create] collection get get put , resources , %i[index new create show destroy] resources , %i[create] resources , %i[new create destroy] resources , %i[create] do 'users#index' :users controllers: omniauth_callbacks: 'users/omniauth_callbacks' :users only: do :users only: do :friendships only: do do 'accept_friend' 'decline_friend' end end end '/users/:id' to: 'users#update_img' :posts only: do :likes only: end :comments only: do :likes only: end # For details on the DSL available within this file, see https://guides.rubyonrails.org/routing.html end devise_for , { } :users controllers: omniauth_callbacks: 'users/omniauth_callbacks' Added the additional parameter for onto the route. controllers devise_for Test Omniauth Facebook Login Run the test server and use the devise generated ‘Register with Facebook’ link provided to create an account. After using the link to create an account it will add a new product to your Facebook app called ‘Facebook Login’. You will then click onto the newly added Facebook Login product and go into its settings. After entering the settings page for the app, you will need to add the two routes created by the . You will add these routes into the field and hit save changes. devise omniauth facebook gem Valid OAuth Redirect URIs The routes added will generally be the URL of the website, which in our case the name of the Heroku app live link, plus ‘ and ‘ /users/auth/facebook’ /users/auth/facebook/callback’ In my case it was and https://spybook-v2.herokuapp.com/users/auth/facebook https://spybook-v2.herokuapp.com/users/auth/facebook/callback Now you can set the Facebook app from mode to mode. Development Live Deployment to Heroku Merge recent changes to the git hub master branch. Create new Heroku application: $ heroku create Then push changes to Heroku master using: $ git push heroku master Then generate database on Heroku application: $ heroku run rails db:migrate Set Heroku config variables Documentation Using terminal Set Facebook App ID $ heroku config: =YOURFACEBOOKAPPID set FACEBOOK_APP_ID Set Facebook App Secret $ heroku config: =YOURFACEBOOKAPPSECRET set FACEBOOK_APP_SECRET Then open Heroku application $ heroku open Stay Tuned!