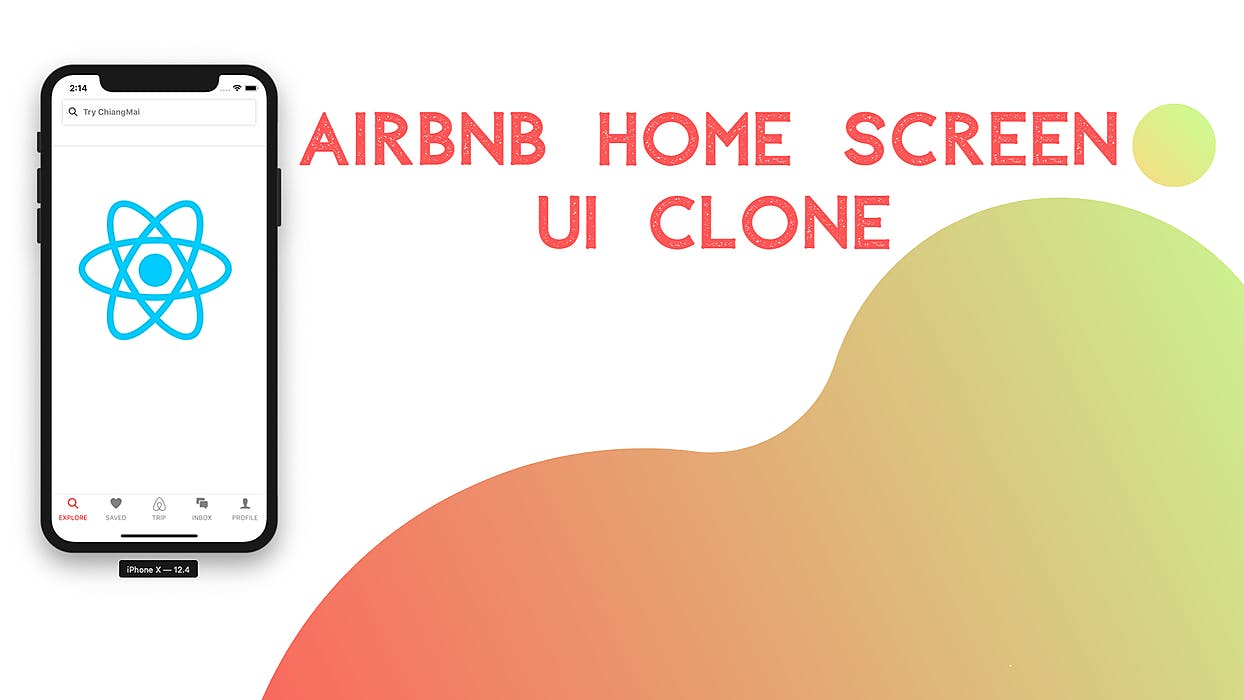
This tutorial series was inspired by React native template which helps us build some amazing ready to deploy applications that anyone can use to build startups or sell the application templates. This tutorial replicates the coding implementations and designs from the Youtube video tutorial by for the Airbnb clone. The video tutorial is very easy to follow and intuitive. Here, we are going to follow the video tutorial but implement it by using a different version of React Native packages and plugins. Unsure programmer In this first part of this tutorial series, we are going to implement the bottom menu tabs as well as the search bar at the top to set up a beautiful UI. The tutorial is very simple and interesting which will provide step by step guide to implement the required features. So, let’s get started! Implementing Bottom Menu Tabs Here, we are going to implement the bottom menu tab buttons for our Airbnb clone app. But first, we need to configure the react-native navigations and screens so that we can implement the tab buttons properly. Here, we are going to use react-navigation v4.0 which provides many changes for Bottom tab navigator configuration by separating the packages to react-navigation-tabs and react-native-reanimated. So, to handle the overall react-native navigations we need to install the following packages first: : , : , : , : "react-native-gesture-handler" "^1.4.1" "react-native-reanimated" "^1.3.0" "react-navigation" "^4.0.10" "react-navigation-tabs" "^2.5.5" We can install the packages given above either by using NPM or yarn or expo. After the successful installation of all the package, we need to change directory to the ios folder in our project command prompt and run the command given in the code snippet below: pod install Now, we need to run the project in our iOS emulator by using the following code snippet: react-native run-ios Note that: The emulator may need to run prior to running the app in the emulator. Adding Blank screens for Menu Here, we are going to create 5 blank screens for the tab menu buttons. The screens project directory with the required screens are provided below in the screenshot of app’s project directory: The code for the Profile screen in provided in the code snippet below. We need to copy the code given below and paste it to file. Profile.js React, {Component} ; {View, Text, StyleSheet} ; { render() { ( <Text>Profile</Text> ); } } Profile; styles = StyleSheet.create({ : { : , : , : , }, }); import from 'react' import from 'react-native' class Profile extends Component return < = > View style {styles.container} </ > View export default const container flex 1 alignItems 'center' justifyContent 'center' Now, we need to do the same for all the other screens. That is, copy the code from above code snippet of the Profile screen and then paste it to other remaining for screen files. . We need to remember to change the class name for each screen matching their respective file names For example: In , we need to edit the class name to . Explore.js Explore For , we need to edit the class name to . Saved.js Saved For , we need to edit the class name to . Trip.js Edit And For , we need to edit the class name to . Inbox.js Inbox Creating Bottom Menu tabs This step is very important because we are going to configure the navigations for our app. Here, we are going to use method provided by . Hence, this method enables us to set up a bottom tab menu with all the screens that we created earlier. createBottomTabNavigator react-navigation-tabs Thus, we need to open the App.js file and then import all the packages and screens that are required to configure our bottom as shown in the code snippet below: TabNavigator {createAppContainer} ; {createBottomTabNavigator} ; Explore ; Saved ; Inbox ; Trip ; TabNavigator = createBottomTabNavigator({ : { : Explore, }, : { : Saved, }, : { : Trip, }, : { : Inbox, }, : { : Inbox, }, }); createAppContainer(TabNavigator); import from 'react-navigation' import from 'react-navigation-tabs' import from './screens/Explore' import from './screens/Saved' import from './screens/Inbox' import from './screens/Trip' const Explore screen Saved screen Trip screen Inbox screen Profile screen export default Here, we use Buttom Tab navigator from and map screens to the menu. Then, we use the App container imported from package to wrap our with all the screens. react-navigation-tabs react-navigation TabNavigator Hence, we get the following result in our emulator screen: As we can see in the emulator simulation above, all the tabs are perfectly set up at the bottom and we can click on them to navigate to different screens. But all the tab menu buttons only contain the text of the respective screens. Therefore, we need to add icons to the tabs to make them look more appealing and cool. Adding Icon with style In this step, we are going to add the Icons to our bottom tab menu buttons. For that, we need to install a package that provides us with beautiful icons. So, the package we use here is which provides us with icons from different icon providers like , , , etc. react-native-vector-icons Ionicons FontAwesome Material Design To add the package to our project, we need to run the following command in our project command prompt: yarn add react-native-vector-icons And one more important thing is that we need to add Font from to the XCode project manually. For the iOS platform, we need to follow this instruction from and . node_modules Apple official readme from Github The addition of Font to Xcode is shown in the screenshot below: Then, we need to import the package into our App.js file with as the required icon package as shown in the code snippet below: react-native-vector-icons Ionicons import Icon from 'react-native-vector-icons/Ionicons' Then, we need to add the icons to our botton menu tab buttons by using object which will help us configure the navigator options. In the object, we can set the and as shown in the code snippet below: navigationOptions navigationOptions tabBarLabel tabBarIcon TabNavigator = createBottomTabNavigator( { : { : Explore, : { : , : ( <Icon name="ios-heart" color={tintColor} size={24} /> ) } }, Trip: { screen: Trip, navigationOptions: { tabBarLabel: "TRIP", tabBarIcon: ({ tintColor }) => ( <Image source={require("./images/airbnb.png")} style={{ height: 24, width: 24, tintColor: tintColor }} /> ) } }, Inbox: { screen: Inbox, navigationOptions: { tabBarLabel: "INBOX", tabBarIcon: ({ tintColor }) => ( <Icon name="ios-chatboxes" color={tintColor} size={24} /> ) } }, Profile: { screen: Inbox, navigationOptions: { tabBarLabel: "PROFILE", tabBarIcon: ({ tintColor }) => ( <Icon name="ios-person" color={tintColor} size={24} /> ) } } }, const Explore screen navigationOptions tabBarLabel "EXPLORE" tabBarIcon ( ) => { tintColor } ) } }, Saved: { screen: Saved, navigationOptions: { tabBarLabel: "SAVED", tabBarIcon: ({ tintColor }) => ( < = = = /> Icon name "ios-search" color {tintColor} size {24} is color that we use to define the color for the menu. Here, we are going to set the and . tintColor activeTintColor inactiveTintColor Finally, we need to add some extra styles to the menu and configure it as a second parameter to as shown in the code snippet below: createBottomTabNavigator , { : { : , : , : { : , : , : { : , : }, : , : , : } } } tabBarOptions activeTintColor "red" inactiveTintColor "grey" style backgroundColor "white" borderTopWidth 0 shadowOffset width 5 height 3 shadowColor "black" shadowOpacity 0.5 elevation 5 Hence, we get the following result in our emulator screen: As we can see, the bottom menu tab buttons are perfectly configured with the tab icons and tab labels along with active and inactive tint colors. This completes our implementation of bottom menu tab buttons for our Airbnb clone app in React Native. Now, we move on to our next task which is to create a search bar at the top of the Explore screen. Adding Search Bar at the top In this section, we are going to add a search bar to the top of the Explore screen. So, we need to open the Explore.js file and import all the necessary packages in order to create the search bar. The required packages to import are provided in the code snippet below. Then, we are going to use component and Icon component to create the search bar with a search icon on the left side. Then, we need to wrap the Icon and components with a View component containing required styles. TextInput TextInput Moreover, This View component must be wrapped with another View component and then again wrapped with component in order to make the Search bar visible and well below the device status bar. SafeAreaView The required code and the styles in order to implement the search bar are provided in the code snippet below: React, { Component } ; { View, TextInput, SafeAreaView } ; Icon ; { render() { ( <View style={{ flex: 1 }}> <View style={{ backgroundColor: "white", height: 80, borderBottomWidth: 1, borderBottomColor: "#dddddd" }} > <Icon name="ios-search" size={20} style={{ marginRight: 10 }} /> <TextInput /> </View> </View> </SafeAreaView> import from "react" import from "react-native" import from "react-native-vector-icons/Ionicons" class Explore extends Component return < = }}> SafeAreaView style {{ flex: 1 ); } } export default Explore; Hence, we get the following result in the emulator screen with the search bar at the top: As we can see, the search bar the top looks out of its place and doesn’t look appealing at all. So, we need to add some styles to the search component and to the View component wrapping the icon and search input in order to make it look more appealing. TextInput The code to do this provided in the code snippet below: <View style={{ : , : , : , : }} > <Icon name="ios-search" size={20} style={{ marginRight: 10 }} /> <TextInput underlineColorAndroid="transparent" placeholder="Try ChiangMai" placeholderTextColor="grey" style={{ flex: 1, fontWeight: "700", backgroundColor: "white" }} /> </View> </View> backgroundColor "white" height 80 borderBottomWidth 1 borderBottomColor "#dddddd" < = " ", , " ", , { , }, " ", }} > View style {{ flexDirection: row padding: 10 backgroundColor: white marginHorizontal: 20 shadowOffset: width: 0 height: 0 shadowColor: black shadowOpacity: 0.2 Hence, the final result is shown in the emulator screenshot below: As we can see, the search bar appears perfectly at the top with a tab menu at the bottom. This completes our implementation of the Bottom tab menu and Search bar in our Airbnb clone project using React Native. Conclusion This is the first part of our Airbnb clone tutorial series. In this post, we learned how to use provided by and set up the bottom tab menu. We also got step by step guide on how to set up a search bar at the top. We also learned how to set up different packages that help us create an app that mimics the Airbnb app. In the next part of this tutorial series, we will work on Horizontal ScrollView. So, Stay Tuned!! BottomTabNavigator react-navigation