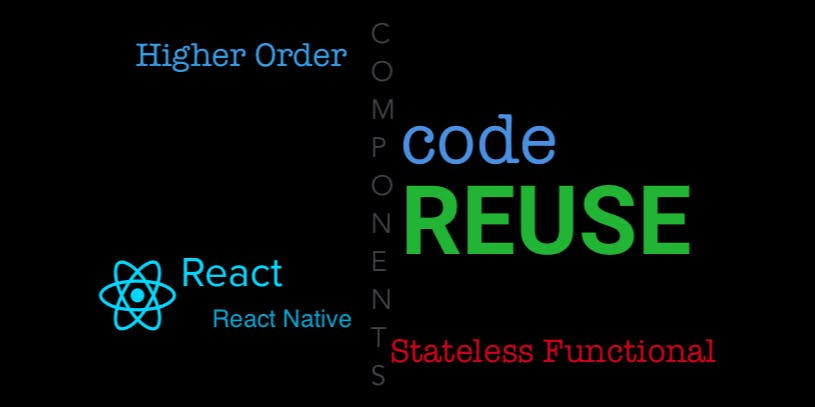
is a JavaScript library for building UIs. Although it’s nowhere strictly defined, the idea with React is to follow the component-based ideology. Its declarative views make and . ReactJS the code more predictable easier to debug Kolosek team, which I am a part of, uses ReactJS combined with as a bundle manager, combined with for app state management, and some other libraries that make the developers life easier, like for handling build and deployment (and some other) tasks. Webpack Redux Immutable JS Gulp It can be used both as a simple static webpage, or it can be rendered on the server, for example, . React applications rendered on servers are commonly called but are also sometimes referred as isomorphic. Node JS universal apps In this article, the focus is on React solely, as Redux and Immutable JS will be documented separately. React and JSX In React you’ll widely see parts of code like these: const element = <h1>Hello, world!</h1>; This is neither a JavaScript string nor a HTML, but it’s called , a syntax extension for JavaScript. It’s widely used inside render methods for React, to render dynamic parts of web pages. JSX produces React “elements” and is, for example, widely used when . JSX rendering something based on the condition To use JSX inside render method, it needs to be wrapped inside : {} <img src={user.avatarUrl}></img> It’s safe to use JSX, as it prevents injection attacks, so there’s no worry there’ll be some code injection. You’ll also definitely want to render a list of items or loop through some object at a certain point when developing. This is also done using JSX, and like for conditions, I have . ALWAYS REMEMBER TO USE THE KEYS FOR LISTS! a separate article that focuses on rendering lists solely help React identify which items have changed, are added, or are removed. The keys must be unique and shouldn’t be changeable for proper rendering of React elements in the list. The keys Component-based Organization and Props React recommends . All logically separable parts of the code, like input field, a button, a form, a list etc. should be written in separate components. component-based organization of the code All the simple parts of the code should be written as components (often also called ), meaning that they will only render based on parameters passed to them, and won’t have an idea on any app logic. dummy pure Here are two examples of a dummy component: function Button({ onClick, text }) { return ( <button onClick={onClick} > {text} </button> ); } You can pass the whole object as using {…objectName} syntax; this will pass every key-value from objectName as separate prop. props function InputField(props) { // props is an object containing keys like onChange, placeholder, etc... // return ( <input {...props} /> ); } If you want to extract only some of the props, you can do it like this: function InputField(props) { const { onChange, placeholder, value, } = props; return ( <input onChange={onChange} placeholder={placeholder} value={value} /> ); } Basically, you can use them by importing them into the file (using a relative path to the file) and then calling them in the render method. Here’s an example: Now, how can these dummy components be used? import React, { Component } from 'react'; import InputField from '../components/InputField.js'; import Button from '../components/Button.js'; class Login extends Component { ... render() { return ( <InputField onChange={this.handleChange('email')} placeholder={"Email"} type="text" value={this.state.email} /> <InputField onChange={this.handleChange('password')} placeholder={"Password"} type="password" value={this.state.password} /> <Button onClick={this.login} > {'Login'} </Button> ); } ... } Did you notice that I wrote this component the other way than earlier ones? That’s because it’s not a one but will contain some more logic in it. Components written this way are called smart components or and can have other methods bound to it besides render method. You can find out more about dummy and smart components . dummy classes here Now, what exactly are ? props You can think of a component as a function (remember the dummy examples? They even use the standard function definition!). Basically, props are the . Anything can be a prop: a string, boolean, number, some other React element, undefined… parameters passed to that function when it’s called The most important thing to keep in mind about the props is that they are , meaning that they can’t be changed in the component receiving them and shouldn’t be mutated. You can read more on how to pass props in . read-only our series on how to properly use props in React React State In the previous chapter you’ve learned that props are parameters passed to the component. , on the other hand, is private and its main purpose is to manipulate it within the component. The state is available to classes, and is used to handle some internal changes (like updating some text stored based on onChange event): State only import React, { Component } from 'react'; import InputField from '../components/InputField.js'; ... class Login extends Component { // We define initial component state in constructor function constructor() { super(); this.state = { email: '', } } // Handling state change is done by using this.setState function handleChange = (event) => { this.setState(() => { return { email: event.target.value, }; }); } ... render() { return ( <InputField onChange={this.handleChange} placeholder={"Email"} type="text" value={this.state.email} /> { ... } ); } ... } The state is initialized in the , a special method called before initial component render. All the custom methods (like handleChange in the previous example) should be written using arrow function, so they’re automatically bound to a component. constructor You might notice that some other people use this.setState like this: this.setState({ email: event.target.value, }); This is a bad way to update the state! The state is updated asynchronously, and if there’s need to update the state multiple times in a row, it’ll just batch all the setStates done this way. Use instead, as described in other examples. functional way to update the state Now, let’s look at another example: import React, { Component } from 'react'; import InputField from '../components/InputField.js'; ... class Login extends Component { constructor() { super(); this.state = { email: '', password: '', } } handleChange = (type) => (event) => { this.setState(() => { const stateUpdates = {}; stateUpdates[type] = event.target.value; return stateUpdates; }); } ... render() { return ( <InputField onChange={this.handleChange("email")} placeholder={"Email"} type="text" value={this.state.email} /> <InputField onChange={this.handleChange("password")} placeholder={"Password"} type="password" value={this.state.password} /> { ... } ); } ... } There’s one rule when defining custom methods: . The example above shows a way how to do it correctly. If the method is bound in the render method, the new function will be created each time the component is rerendered. I have actually covered this in . never bind it in a render method a post on props function Component Lifecycle Methods handling the component lifecycle are inherited from Component (yes, that Component you’re importing at the top of the file). The most detailed description of lifecycle methods can be found . here An important thing to remember is that in the case of universal apps (apps rendered on the server) browser related global variables like a window, localStorage, etc. can only be used after the component was mounted (i.e. they’ll only be available in ). componentDidMount Styling React Components Although React itself doesn’t support directly using CSS for styling but is more oriented to inline JSXstyles (passing style object prop to an HTML tag), this approach is not used that often. Many, if not all, of the real-life projects you’ll ever see, some is set up, so you can use styling like with ease. This is configured via Webpack. CSS/SCSS loader CSS columns Routing in React For routing, use . Its documentation is pretty straightforward and is pretty short, so it’s a must-read. Basically, we use Router and Routes to define routes, Link component for linking pages and Redirect component to redirect to some other page on a certain action. React Router v4 Practice Ideas Initiate a new React app using . Create React App Try creating few very simple components: wrapper around input tag with a label, a button that’ll be gray and have its text changed once disabled, an avatar. Try creating a bit more complex component: a form that will have email, password, first and last name fields and a button (reuse dummy components you wrote in the previous step!). Validate the form: email, password, first and last name fields should be filled in before button becomes enabled. Email should also be of a valid format. Once the form is valid and login button is pressed, pop up an alert with values user filled in. Congratulations! You’ve written your first ever React component! Originally published at kolosek.com on April 2, 2018.