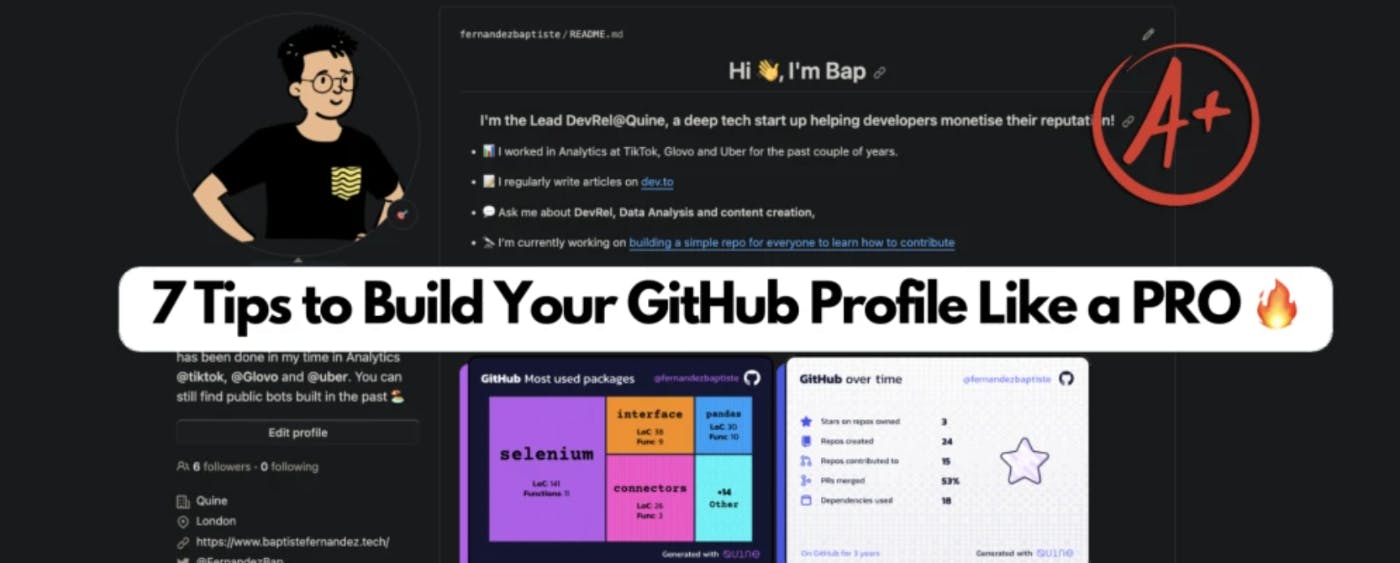
Hey friends 👋 Ever gone to someone's Github's profile and thought: In this article, I will attempt to show you that building a professional GitHub profile is much easier than you think. That's right, even if you are not a seasoned expert, you can make your profile look solid. Here's an example of my GitHub Profile. Let's dive into how you can get your profile looking just as good in the next 10 minutes. 😉 Ready, set, let's gooo ⏰ 1. Create your GitHub Profile: Add a README If you haven't already done it, you must create your own GitHub to build your profile page. README For this, head to your profile and click on . Your repositories After that, create a repository: New The repo's name needs to be the same as your username. Make sure to make the repo Public Click on Add a README file 2. An Open Source Repo for your Repo 🤫 I discovered this not so long ago, and I fell in love with it.❤️ repo This cool project helps you build your own GitHub profile in no time! Go to and fill in your information. GitHub Profile README Generator You don't need to complete every section; only the relevant ones. Note: Once completed: Click on Generate README Then click on copy-markdown Head over to your newly created GitHub profile and paste the code inside your 💪 README 3. Level up your Profile design with Widgets You should now have a profile that is starting to look pretty slick! To up your game, you can add some elegant widgets that provide valuable stats to showcase your skills and achievements. 🚀⭐️ In my case, I have added these to my : profile You can also add some Widgets to showcase your or experience: Web3 StackOverflow These Widgets are , and you can get them by signing up to . completely free of use quine.sh Simply head over to on your Quine profile and paste the copied Wiget code into your page. "Widgets" README 4. "Beautify" your Contact Information 💄 It is possible that you don't like some of the designs from the GitHub README generator. 🙃 Some people prefer a different style, especially pertaining to their social links/linkouts. Here's an alternative style you can use: If you like this style, you can create your own badge using this synthax:  For example, if you wanted to add your , it would be: GitHub badge ] Depending on the type of banner icons you want to show, you can find a lot of neat icons in this list . 🙌 here 5. Utilise the PIN repositories feature If you have already built up a couple of projects, this is the right opportunity to showcase the ones you are most proud of! On your profile, simply click on and select up to 6 projects that you want to pin. Customize your pins 6. Contribute and level up your game! After your pin repositories, your profile will show the below grid. This represents your contributions and level of activity on GitHub. It is important to emphasise that although you should try to showcase your consistency by contributing often, the % of "green-ness" on this bar is not the most important aspect. 👀 Many people focus on trying to build a perfect streak, but in reality, their work is not impactful, and their contributions are of little value. In my opinion (and I believe a lot of people share this sentiment), contributions should be focused on: ❤️ Quality > Quantity Having said that, it is in your interest to build a couple of projects or contribute to other people's projects regularly. Now, to try to contribute to projects, there are various tools you can use. 🔎 Here are 3 free sites which can help you find the next project to work on: GitHub Explore UpForGrabs Quine.sh Alternatively, if this is your first time contributing, I have created this step-by-step for first-timers. You will learn the mechanics of contributing on GitHub and be able to contribute in the next 10 min! article 7. Add a Bio We are ready to make the final touches... Your profile should look pretty fire by now. 🔥 The last thing I would advise you to do is to complete your . Bio When you are on your profile page, head over to the left side underneath your picture and click on . Edit Profile Add a brief description of yourself and you are good to go! That's it for now. 😄 I hope you are happy with ! 💅 your polished GitHub profile I must emphasize that my profile is still far from being the best in the world... However, with these free tools at your disposal, you will be able to customize a fantastic new profile! This is why I'd love to take a sneak peek and get inspired by the cool profiles you will build! 👀 Share your brand-new profiles in the comment section! 🙌 If you want to join the self-proclaimed "coolest" server in open source 😝, you should join our . We are here to help you on your journey in open source. 🫶 discord server Also published . here