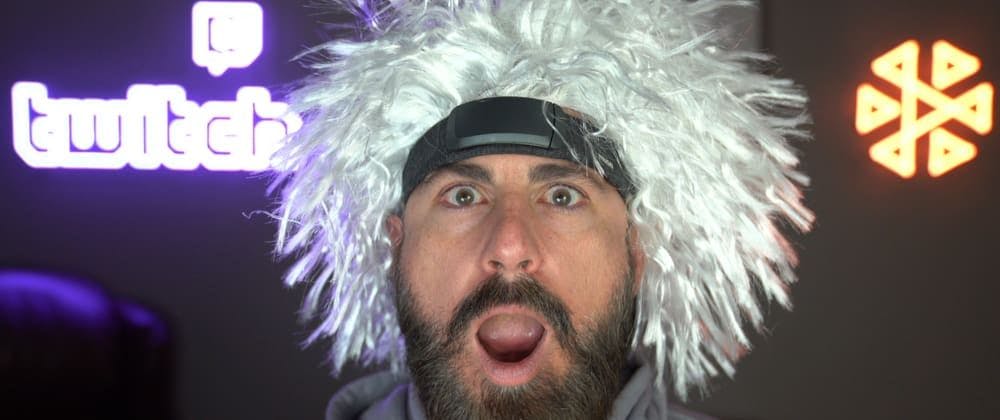
Earlier this year, I created a really fun project that I called "Brain to the Cloud" where I saved my brain data to the cloud while playing Call of Duty so that I could analyze the relationship between my cognitive function and video game performance. I wrote up a three-part blog post series and created some fun videos to summarize my findings on that project. If you'd like to check those out, you can refer to the links at the bottom of this post. A few months after I published that project, I started working at Twitch as the lead Developer Advocate for Amazon Interactive Video Service (Amazon IVS) - a fully managed solution for creating live, interactive video streaming solutions (check out to learn more). The next step of my "Brain to the Cloud" project was obvious - I needed to my brain. this series live stream Broadcasting My Brain Before we look at the code, let's see the final product. There are 2 views for the application: a broadcasting view, and a playback view. In the broadcasting view, we can preview the live video, start the broadcast, and connect the Muse headband to stream the brain data obtained from the headband. In the playback view, we display the live stream with a element, and chart the brain data in real-time <video> Project Overview There are 5 steps to this project: Broadcast live stream Capture brain data Publish brain data as timed metadata within the live stream Playback live stream Listen for timed metadata and render brain data in a chart in real-time If you prefer graphical depictions of such things, here's how this looks: Building the Project I used React for this project. Why? Well, I've got plenty of experience with Vue and Angular, but I'm probably one of the last developers on earth to try React. I figured it was about time to figure out what all the hype was about, and I knew that this would not be a difficult project to build with it. Due to my lack of prior experience, I'm not what you'd call an "advanced" user of the framework, but I have to say that I'm pretty happy with what I see so far. I found the process enjoyable and did not find myself "fighting" with the framework. But this blog post isn't about my opinion on JavaScript frameworks, so I'll save that for a future post. Instead, let's talk about how I broadcast my brain! The Hardware In my original "Brain to the Cloud" project, I used a "vintage" EEG headset called a MindFlex to capture my brain readings. It worked fairly well but required me to "hack" the device by adding an ESP-12 microcontroller in order to pull the readings off of the device and send them to the cloud. This time I reached for something slightly newer - and something that I could use with no modifications. After a bit of research, I settled on the . Thankfully, there is a really awesome open-source library called which lets me access the brain readings directly in a web browser with Web Bluetooth (in supported browsers, of course). Muse S Headband muse-js The Live Stream Broadcast Until recently, live streaming with IVS required us to use a third-party client to broadcast our streams as RTMPS. But we recently launched a game-changer: the . As the name implies, this SDK gives us the ability to broadcast our live stream via WebRTC directly from a web browser. Clearly, this was a perfect fit for live streaming my brain since it means that I can create an "all-in-one" solution for broadcasting my brain data along with my live stream without relying on third-party software or external scripts. Amazon Amazon IVS Web Broadcast SDK Adding Web Broadcast to the React App We're not going to look at every single step required to utilize the Web Broadcast SDK in this post. Instead, we'll look at the highlights to get a general idea of how it works. Don't worry - I've got another post coming soon where we'll dig into the "step-by-step" process for using the Web Broadcast SDK, so stay tuned for that. That said, let's take a quick journey to see how I used the SDK in this project. My first step was to use a web broadcast to install the module. Using your favorite package management tool, run: amazon-ivs-web-broadcast $ npm install amazon-ivs-web-broadcast Next, we need to import it into our component. In my Broadcast.jsx component, I added: import IVSBroadcastClient, { STANDARD_LANDSCAPE } from 'amazon-ivs-web-broadcast' ; We can create an instance of the IVSBroadcastClient with the desired stream configuration and ingest the endpoint from our Amazon IVS channel and set it into our component's state. }) }); this .setState({ broadcastClient : IVSBroadcastClient.create({ streamConfig : STANDARD_LANDSCAPE, ingestEndpoint : this .state.ingestEndpoint, Now that we've got an instance of the client, we can add our camera to the client. For this we use . navigator.mediaDevices.getUserMedia() }, }, }, }); const streamConfig = STANDARD_LANDSCAPE; const videoStream = await navigator.mediaDevices.getUserMedia({ video : { deviceId : { exact : this .state.selectedVideoDeviceId }, width : { ideal : streamConfig.maxResolution.width, max : streamConfig.maxResolution.width, height : { ideal : streamConfig.maxResolution.height, max : streamConfig.maxResolution.height, this .state.broadcastClient.addVideoInputDevice(videoStream, 'camera1' , { index : 0 }); Adding the user's microphone to the client follows a similar pattern. }, }); const audioStream = await navigator.mediaDevices.getUserMedia({ audio : { deviceId : this .state.selectedAudioDeviceId this .state.broadcastClient.addAudioInputDevice(audioStream, 'mic1' ); Because of the browser security model, we need to get permissions to access the user's camera and microphone. Refer to the for more information on this, and to see how I captured a list of devices and presented them in a dialog to allow the user to choose the broadcast device if multiple options are available. Note: project source on GitHub Now we can add a live preview to the page so that we can see what our viewers will ultimately see on the player side of things. <canvas ref={ this .previewRef} id= 'broadcast-preview' ></canvas> And attach the preview to the : broadcastClient this .state.broadcastClient.attachPreview( this .previewRef.current); To start the broadcast, add a button to the page, and in the handler for the button call on the (passing the necessary ). onClick startBroadcast() broadcastClient streamKey this .state.broadcastClient.startBroadcast( this .state.streamKey); Obtaining My Brain Data As I mentioned above, I used the library, which provides the ability to connect to the headband and pull the raw data. However, does not calculate the absolute band powers for the EEG data. For this, I needed to reach for : . muse-js muse-js another library eeg-pipes The first step is to add and import the libraries. $ npm install @neurosity/pipes $ npm install muse-js import { zipSamples, MuseClient } from 'muse-js' ; import { powerByBand, epoch, fft } from '@neurosity/pipes' ; Next, I added a button with a click handler. In the handler, I connect to the headset, start listening for data, and subscribe to the stream. zipSamples(client.eegReadings) .pipe( powerByBand(), ) .subscribe( } ); const client = new MuseClient(); await client.connect(); await client.start(); epoch({ duration : 1024 , interval : 250 , samplingRate : 256 }), fft({ bins : 256 }), ( data ) => { const ch0 = [data.delta[ 0 ], data.theta[ 0 ], data.alpha[ 0 ], data.beta[ 0 ], data.gamma[ 0 ]]; const ch1 = [data.delta[ 1 ], data.theta[ 1 ], data.alpha[ 1 ], data.beta[ 1 ], data.gamma[ 1 ]]; const ch2 = [data.delta[ 2 ], data.theta[ 2 ], data.alpha[ 2 ], data.beta[ 2 ], data.gamma[ 2 ]]; const ch3 = [data.delta[ 3 ], data.theta[ 3 ], data.alpha[ 3 ], data.beta[ 3 ], data.gamma[ 3 ]]; const meta = [ch0, ch1, ch2, ch3]; //publish metadata Publishing my Brain Data as Timed Metadata Now that I've got a handler that collects my brain data from the Muse headband, it's time to publish that data as timed metadata in the live stream. The awesome thing about is that it is directly embedded in the video stream, and remains a permanent part of that stream. That means that it exists even in recorded versions, meaning that even in on-demand playback we can listen for and respond to the events. timed metadata The Web Broadcast SDK does not support publishing timed metadata from the client side, so we'll have to use ( ) via the . For this, I created an AWS Lambda function. putMetadata docs AWS SDK for JavaScript }); }, }; } } } } }; } response.body = err.stack; } }; const AWS = require ( 'aws-sdk' ); const ivs = new AWS.IVS({ apiVersion : '2020-07-14' , region : 'us-east-1' exports .send = async (event, context, callback) => { // response object const response = { 'statusCode' : 200 , 'headers' : { 'Access-Control-Allow-Origin' : '*' , 'Access-Control-Allow-Methods' : 'OPTIONS,GET,PUT,POST,DELETE' , 'Content-Type' : 'application/json' 'body' : '' , 'isBase64Encoded' : false // parse payload let payload; try { payload = JSON .parse(event.body); catch (err) { response.statusCode = 500 ; response.body = JSON .stringify(err); callback( null , response); return ; // validate payload if (!payload || !payload.channelArn || !payload.metadata) { response.statusCode = 400 ; response.body = 'Must provide, channelArn and metadata' ; callback( null , response); return ; // check payload size let byteLength = Buffer.byteLength(payload.metadata, 'utf8' ); if (byteLength > 1024 ) { response.statusCode = 400 ; response.body = 'Too big. Must be less than or equal to 1K' ; callback( null , response); return ; // putmetadata input let params = { channelArn : payload.channelArn, metadata : payload.metadata try { await ivs.putMetadata(params).promise(); response.statusCode = 200 ; response.body = JSON .stringify({ 'published' : true }, '' , 2 ); callback( null , response); catch (err) { response.statusCode = 500 ; callback( null , response); return ; To publish my brain data as timed metadata, I created an Amazon API Gateway to invoke the function and modify the method above to call the AWS Lambda function. subscribe() .pipe( powerByBand(), ) .subscribe( fetch(LAMBDA_URL, { }, }) }); } } ); zipSamples(client.eegReadings) epoch({ duration : 1024 , interval : 250 , samplingRate : 256 }), fft({ bins : 256 }), ( data ) => { const ch0 = [data.delta[ 0 ], data.theta[ 0 ], data.alpha[ 0 ], data.beta[ 0 ], data.gamma[ 0 ]]; const ch1 = [data.delta[ 1 ], data.theta[ 1 ], data.alpha[ 1 ], data.beta[ 1 ], data.gamma[ 1 ]]; const ch2 = [data.delta[ 2 ], data.theta[ 2 ], data.alpha[ 2 ], data.beta[ 2 ], data.gamma[ 2 ]]; const ch3 = [data.delta[ 3 ], data.theta[ 3 ], data.alpha[ 3 ], data.beta[ 3 ], data.gamma[ 3 ]]; const meta = [ch0, ch1, ch2, ch3]; // put metadata if broadcasting if ( this .state.isBroadcasting) { 'method' : 'POST' , 'mode' : 'no-cors' , 'headers' : { 'Content-Type' : 'application/json' , 'body' : JSON .stringify({ channelArn : this .state.channelArn, metadata : JSON .stringify(meta) Building the Live Stream Playback and Charting My Brain Data Once the live stream with brain data broadcast view was complete, it was time to create a playback experience that would display the live stream and chart the brain data in real time as it came in via timed metadata. Creating The Live Stream Player We can use the IVS Web Player SDK via NPM, but since it uses WebAssembly . To avoid that trickiness, I find it easier to use the web player via a tag and I added that to my in my React app. things can get tricky <script> index.html <script src= "https://player.live-video.net/1.12.0/amazon-ivs-player.min.js" ></script> In my component, I grab a reference to the player and some necessary elements. Playback.jsx const { IVSPlayer } = window ; const { create : createMediaPlayer, isPlayerSupported, PlayerEventType, PlayerState } = IVSPlayer; const { ENDED, PLAYING, READY, BUFFERING } = PlayerState; const { TEXT_METADATA_CUE, ERROR } = PlayerEventType; For playback, we use the native tag. <video> <video ref={ this .videoRef} controls playsInline></video> And to initialize the player and start playback: this .playerRef.current = createMediaPlayer(); this .playerRef.current.attachHTMLVideoElement( this .videoRef.current); this .playerRef.current.load(STREAM_URL); this .playerRef.current.play(); Listening and Responding to Timed Metadata Now that we're playing the live stream, we can listen for and respond to the incoming brain data. this .playerRef.current.addEventListener(TEXT_METADATA_CUE, this .onPlayerMetadata); Set the brain data into our component state: }); }); }; onPlayerMetadata = ( e ) => { //console.log(e); const data = JSON .parse(e.text); this .setState( state => { state.ch0.datasets[ 0 ].data = data[ 0 ]; state.ch1.datasets[ 0 ].data = data[ 1 ]; state.ch2.datasets[ 0 ].data = data[ 2 ]; state.ch3.datasets[ 0 ].data = data[ 3 ]; this .chartReferenceCh0.current.data.datasets[ 0 ].data = state.ch0.datasets[ 0 ].data; this .chartReferenceCh1.current.data.datasets[ 0 ].data = state.ch1.datasets[ 0 ].data; this .chartReferenceCh2.current.data.datasets[ 0 ].data = state.ch2.datasets[ 0 ].data; this .chartReferenceCh3.current.data.datasets[ 0 ].data = state.ch3.datasets[ 0 ].data; return ({ ch0 : state.ch0, ch1 : state.ch1, ch2 : state.ch2, ch3 : state.ch3 And render it with a bar chart (with Chart.js): options={ { }, } } } /> <Bar data={ this .state.ch0} ref={ this .chartReferenceCh0} aspectRatio : 1 , title : { display : true , text : 'Channel: ' + channelNames[ 0 ] }, responsive : true , tooltips : { enabled : false legend : { display : false The visualization is cool, and certainly provides a fun way to see my brain data while I'm live streaming a game, but doesn't provide a ton of context. So I figured it would make sense to include some calculations to give insight into what the data actually means. For that, I found some calculations in the which included some formulas that can be used to calculate factors like relaxation (alpha divided by delta), and concentration (beta divided by theta). Another a way to derive fatigue ((theta + alpha) / beta). I wrapped these calculations up in a handy, reusable component. muse-lsl project on GitHub great blog post I found highlighted </Col> </Row> <Row className= 'mb-2' > { /* Delta: 0 Theta: 1 Alpha: 2 Beta: 3 Gamma: 4 */ } <Col xs={ 12 } xxl={ 4 } className= 'align-items-center mb-2 mb-xxl-0' > < Badge className = 'fs-6 w-100' bg = 'info' > Relaxation: < span className = 'fw-bold' > < NumberFormat value = {this.props.dataset.data[0] ? ( this.props.dataset.data [ 2 ] / this.props.dataset.data [ 0 ]) : 0 } decimalScale = {2} displayType = { ' text '} /> </ span > </ Badge > < Col xs = {12} xxl = {4} className = 'align-items-center mb-2 mb-xxl-0' > < Badge className = 'fs-6 w-100' bg = 'info' > Fatigue: < span className = 'fw-bold' > < NumberFormat value = { this.props.dataset.data [ 3 ] ? ( ( this.props.dataset.data [ 1 ] + this.props.dataset.data [ 2 ]) / this.props.dataset.data [ 3 ] ) : 0 } decimalScale = {2} displayType = { ' text '} /> </ span > </ Badge > </ Col > < Col xs = {12} xxl = {4} className = 'align-items-center mb-2 mb-xxl-0' > < Badge className = 'fs-6 w-100' bg = 'info' > Focus: < span className = 'fw-bold' > < NumberFormat value = {this.props.dataset.data[1] ? ( this.props.dataset.data [ 3 ] / this.props.dataset.data [ 1 ]) : 0 } decimalScale = {2} displayType = { ' text '} /> </ span > </ Badge > </ Col > Summary In this post, we looked at how I created a React application to live stream my brain data with Amazon IVS. If you'd like to learn more about Amazon IVS, please check out the series here on dev.to. If you're interested in trying out the application or just checking out the full source for the application, check it out on . Your comments, questions and feedback is always welcome, so leave a comment here or connect with me on Getting Started with Amazon Interactive Video Service GitHub Twitter Links Brain to the Cloud - Part I - Project Intro and Architectural Overview Brain to the Cloud - Part II - How I Uploaded My Brain to the Cloud Brain to the Cloud - Part III - Examining the Relationship Between Brain Activity and Video Game Performance Project Source Code First Published . here