paint-brush
Display Hierarchical Data as List with Search Featureby@dzmitryantonenka
726 reads
726 reads

Display Hierarchical Data as List with Search Feature

by Dzmitry AntonenkaOctober 26th, 2021
Read on Terminal Reader
Read this story w/o Javascript
tldt arrow

Too Long; Didn't Read

SwiftListTreeDataSource is a package to visualize hierarchical data as a list with the search feature. It was decided to create a package that will allow addressing all the functional requirements for the iOS platform. We need to use a simple list from a hierarchical structure: add children after each parent element.

Companies Mentioned

Mention Thumbnail
Mention Thumbnail

Coins Mentioned

Mention Thumbnail
Mention Thumbnail
featured image - Display Hierarchical Data as List with Search Feature
Dzmitry Antonenka HackerNoon profile picture

Recently I faced an interesting task to display hierarchical data as a list for the iOS platform. For example, displaying folders and related files is convenient in this mode.

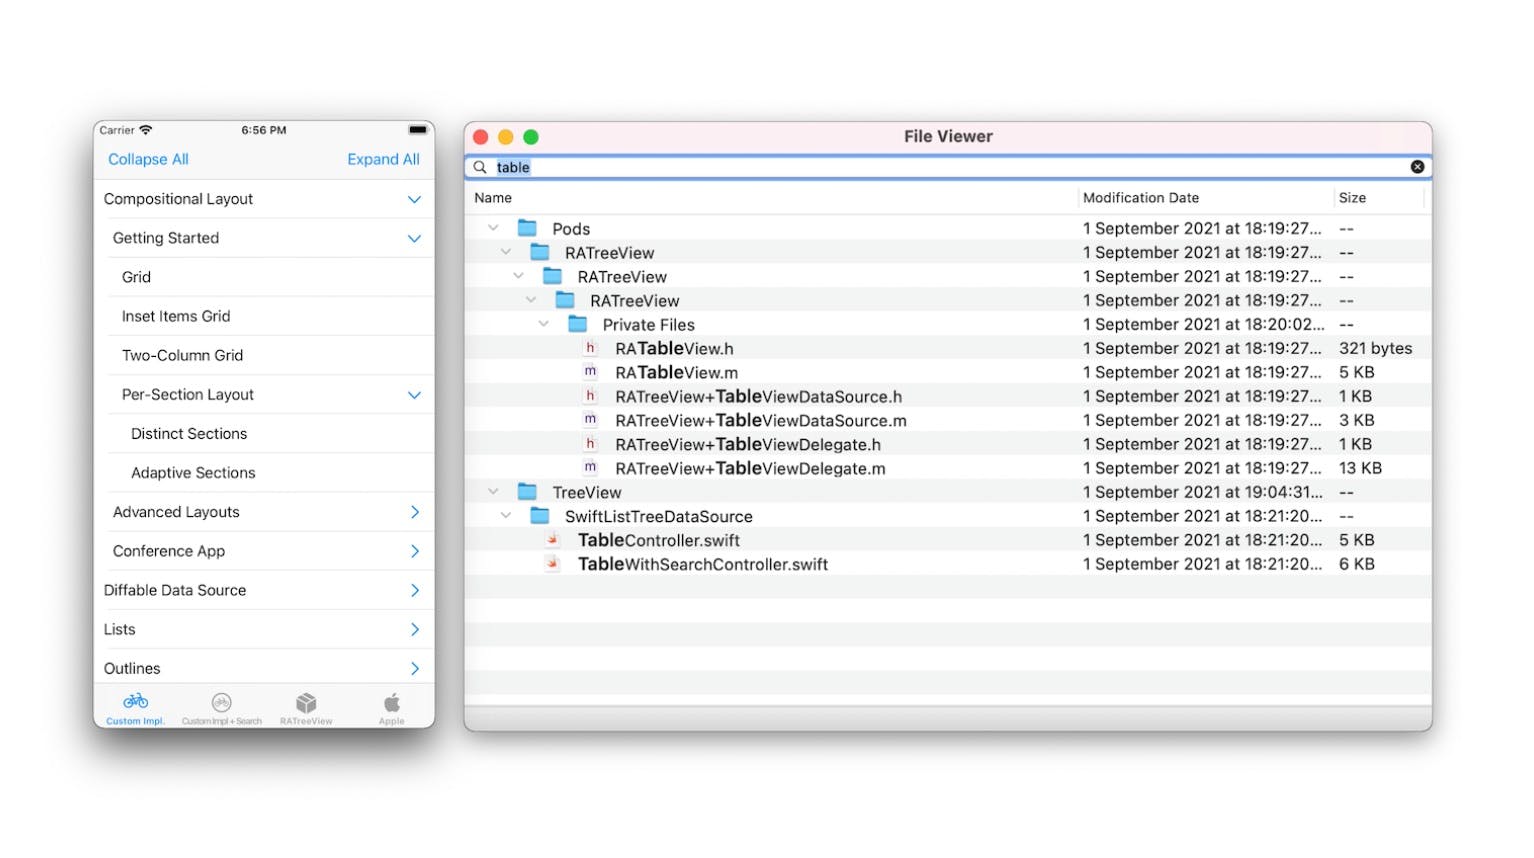
Here is the package to visualize hierarchical data as a list with the search feature: SwiftListTreeDataSource.

Popular solutions for Apple platforms:

  1. NSDiffableDataSourceSectionSnapshot. Apple adds this feature starting iOS 14. The downside: no support for old iOS versions, no search support.
  2. RATreeView. Looks really great, supports old OS versions, MIT license. The downside: created many issues and no support starting 2016. Implementation depends on UITableView a lot, adding search support will require quite some rework and most likely will create stability concerns for the component.

So it was decided to create a package that will allow addressing all the functional requirements.

  • Note: example source code includes only key points of the algorithm. For the final version, please check the link above.

Display hierarchy, simple case

Despite the hierarchical nature of data from the example, we can see that this is the same flat list to display. The indentation is the decoration of the list item, which can be calculated based on its nesting level.

To handle this scenario, we need to create a simple list from a hierarchical structure: add children after each parent element. Let’s create models and a method to build a data source for the list.

Now we can use a created data source, for example, in

UITableView
:

Handle unlimited nesting

Let’s consider a more complex example, in which nesting has no restrictions:

From the data structure, we can see its recursive nature: an element can contain several elements of the same type, which themselves can also contain elements, and so on.

For this task, we need to update the model: 

isChild
 makes sense for nesting 1, but here we need to know the depth level of the element. Let’s name the new model for displaying 
TreeItem
:

Let’s add two properties, parent and level:

  1. parent is needed to determine the relationship between elements and will also help to determine the depth of nesting.
  2. level is a property that stores nesting, calculated once through level (of:) to avoid wasting resources when constantly accessing it.

The implementation of level (of :)  loops through the chain of available parents each time incrementing the counter: finally, the number of available parents makes it possible to calculate the depth of the current element.

Data processing

First, we need to convert the original data model to a 

TreeItem
 so that it can be used for displaying items. Let’s put the logic in a separate class named 
ListTreeDataSource
.

The append (_: to :) method checks where items need to be added: to an existing parent or as root. If a parent is specified, then the lookup table is checked and added to parentBackingItem.subitems otherwise, to 

backingStore
. The target TreeItems are created, cached, and added to the target array.

The lookup table allows us to quickly find the target TreeItem for a given item. Otherwise, we have to traverse the entire tree every time, which is not really efficient.

To add the entire hierarchy of objects, we can write a small utility that recursively traverses and adds all the elements:

TreeDataSource.backingStore
 is a data store in a format convenient for us, but it is not enough to display the data. To do this, we need to build a flat list from this hierarchical store. Let’s write a generic version to create a list data source and name it 
depthFirstFlattened
:

The recursive implementation looks pretty straightforward: after each parent, add all of its nested elements before moving on to the next one.

In fact, this is a depth-first traversal of the graph with the accumulation of the traversed elements to the “flat” list. The output is a one-dimensional perspective on a tree (an array of nodes), which can be used as a data source for a UI framework.

Data for the list

Now we can fix the TODO for items needed by the UI component:

There’s an option to call reload method automatically when data changes (after calling append for example). The downside is that if we have thousands of nodes, it will create serious performance problems as it will be constantly called. Therefore, we’ll keep it up to the user of the component, providing more control.

Display only expanded nested elements

This requires a little tweak: create 

TreeItem.isExpanded
 property and filter which child items will be shown:

Example usage with UITableView:

The structure of the component also provides the ability to add new data to the existing state, e.g., in case of deferred loading/loading on demand. Methods for inserting/deleting elements are also available but not described to make the material more compact.

Decrease indentation for deep nesting

The formula for determining the indentation can be improved. For example, on the iPhone 5, it is difficult to fit even a small hierarchy. Below are attached screenshots of the current vs. desired visual state of deep nesting.

My good friend from the data analysis department helped with the exponential decay formula to try to fit the indentation into space available:

Optimizing performance

A recursive implementation looks elegant, but it can be problematic for a large dataset. To achieve optimal performance on older devices, let’s rewrite the breadth-first and depth-first traversal algorithms using an iterative style through the queue and stack:

Performance testing

  • Testing machine specification: MacBook Pro 2019, 2,6 GHz 6-Core Intel Core i7, 16 GB 2667 MHz DDR4

It was also interesting to compare the performance with the Apple component, but I guess this will not be very correct since it also combines the functionality of 

NSDiffableDataSourceSectionSnapshot
 and probably does more work providing less control. For the sake of interest, two performance tests:

Search feature

The task is also to provide the ability to search for all elements, with the following criteria:

    1. Capability to find target elements by search criteria, both parents and children.
    2. Show full path to target elements (keep the same visual structure).
    3. If a parent element is found with children that do not match the search criteria, do not apply the filter to them (search for a folder when we do not know the content).
    4. Keep the option to hide / open parent elements.

Let’s visually represent our task:

In this case, there’re couple of key points:

  1. The entire data set is used for search, including the children of the leaf levels.
  2. The parent elements may or may not match the search criteria, but we need them to display the entire path.
  3. If a parent is found with children that do not match the search criteria, do not apply the filter to them. But if there are children that meet the criterion, then the filter will be applied. Note: this is an arguable point and may depend on business requirements, I took inspiration based on how the filter works in Xcode by project files, although there are slight differences.

To do this, we will create a new class that extends the capabilities of the previous one. Here we can also apply the depth-first traversal method, with an additional filter:

Preparing state for filter:

  1. allFlattenedItemStore
     is a flat list of all “expanded” items for search, cached to optimize resource consumption. The data source for the filter.
  2. Reset the state of all elements by 
    isExpanded = false
    .
  3. Retrieving 
    filteredTargetItems
     — the search targets obtained by applying the filter to 
    allFlattenedItemStore
    .
  4. Get 
    targetItemsTraversedParentSet
     — the set of parents of the target items.
  5. Mark items in 
    targetItemsTraversedParentSet
     as 
    isExpanded=true
     to expose the path to target items.
  6. Preparation of the state is complete, invoke depth-first traversal with a filter that is determined by the current state in 
    isIncludedInExpand
    .

Filter logic:

  1. If the element is the root, then it needs to match the search criteria or be included in the set 
    targetItemsTraversedParentSet
    .
  2. If the element itself is included in the set of 
    targetItemsTraversedParentSet
    , then it fits criteria (such as RootChild_2).
  3. The filter is then applied to all items whose parents are in the 
    targetItemsTraversedParentSet
     set. Additionally, the user can expand the target element of the search, and therefore `else true` is needed to include the rest of the child elements.

Summary

The final component does not depend on the UI frameworks and can be used with UITableView, UICollectionView, NSTableView, SwiftUI, or in a console application. All source code and demo with examples can be checked on GitHub. The component includes unit tests and performance tests.

Thank you for the reading! I hope the material was useful. Any feedback is welcome.