11,784 reads
Live stream an ONVIF Camera on your iOS app! 📱
by Remy VirinJanuary 17th, 2018


Too Long; Didn't Read
Onvif (stands for:: Open Network Video Interface Forum) is a non-profit with the goal of facilitating the development and use of a global open standard for the interface of physical IP-based security products. The goal behind these specifications is to standardise how to connect to these products, for instance if you develop an app for streaming video from an ONVIF camera, it should work with every ONVif camera. The problem is, VLC (Real Time Streaming Protocol) is aiming to make streaming simpler.


Onvif (stands for: Open Network Video Interface Forum) is a non-profit with the goal of facilitating the development and use of a global open standard for the interface of physical IP-based security products — Wikipedia
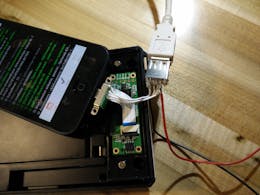
Being able to control your house, open doors, view in real time your living room, control the lights is a childhood dream! I was really delighted to develop an app and a pod to ease the development of ONVIF iOS apps.
ONVIF goal is to standardise how IP products (video surveillance cameras, alarms, doors, audio recorders…) communicate with each others. They created some specifications manufacturers have to conform to be compliant with ONVIF. The goal behind these specifications is to standardise how to connect to these products, for instance if you develop an app for streaming video from an ONVIF camera, it should work with every ONVIF camera.
Try it!
If you just want to try the demo project, open a terminal and run pod try ONVIFCameraYou will be able to login on every ONVIF camera and view its live stream:


How to connect to a camera and visualise its live stream on iOS? 👨🏽💻
- Create a new project on Xcode
- In your terminal type:
pod init - Add
pod `ONVIFCamera`to yourPodfileand runpod install
Once it’s done, you can add the following code to connect to the camera and retrieve its information:

Getting camera informations
Note: Calling getServices before getting the information is not mandatory but strongly recommended. It retrieves the different paths depending on the web service you’re calling, from one camera to another it can change. For instance getProfiles command will have this path on a Dahua camera /onvif/media2_service whereas it will be /onvif/media2 on a Uniview camera.
If you implement new web services call in your app, you need to parse their path in this call.
To be able to see the live stream of the camera we need to retrieve the different profiles (media profiles, with different configurations available) from the camera, select the one we want to play and retrieve the corresponding stream URI.
Here is how we retrieve the profiles and the stream URI:
Getting the stream URI
Depending on your camera, your URI will look like this one: rtsp://IP_ADDRESS:PORT/cam/realmonitor?channel=1 etc...
The URI does not follow the http protocol, but the rtsp protocol, which is normal because RTSP (Real Time Streaming Protocol) is aiming to make streaming simpler. The problem is, AVPlayer doesn’t handle RTSP. Fortunately, VLC comes to the rescue!
How to read a RTSP stream on iOS? 🎥
- Add the pod
MobileVLCKitto your Podfile and runpod install - After adding VLC as a pod, your project shouldn’t link anymore. On my side, I have 78 link errors. To fix it, simply add an Objective-C++ file (for instance
forVLCLink.mm) - Once your project is compiling you can import
MobileVLCKitin your bridging header. - Here is how you play the video with
MobileVLCKitonce you have the rtsp URI:
Playing RTSP stream with VLC
Tip: You can also insert the login and password in the rtsp uri like this: rtsp://login:password@IP_ADDRESS:PORT/cam/realmonitor?channel=1 etc.. . If you use the ONVIFCamera pod, the URI saved in ONVIFCamera.streamURI already contains the login and password.
If you want to learn how to create the same project on Android, you can read this article.
Creating an ONVIF library was a exciting opportunity, as you can see in my previous posts, I really enjoy having an interaction between my iOS apps and hardware devices, whether it’s a printer for iPhone, a camera, or even a door! I’m really looking forward to test new ONVIF devices and develop apps that can be useful for everyone that has ONVIF devices.
The code of this project is open source, you can download it on Github.
If you have any question, I’ll be happy to read them in the comments!

L O A D I N G
. . . comments & more!
. . . comments & more!