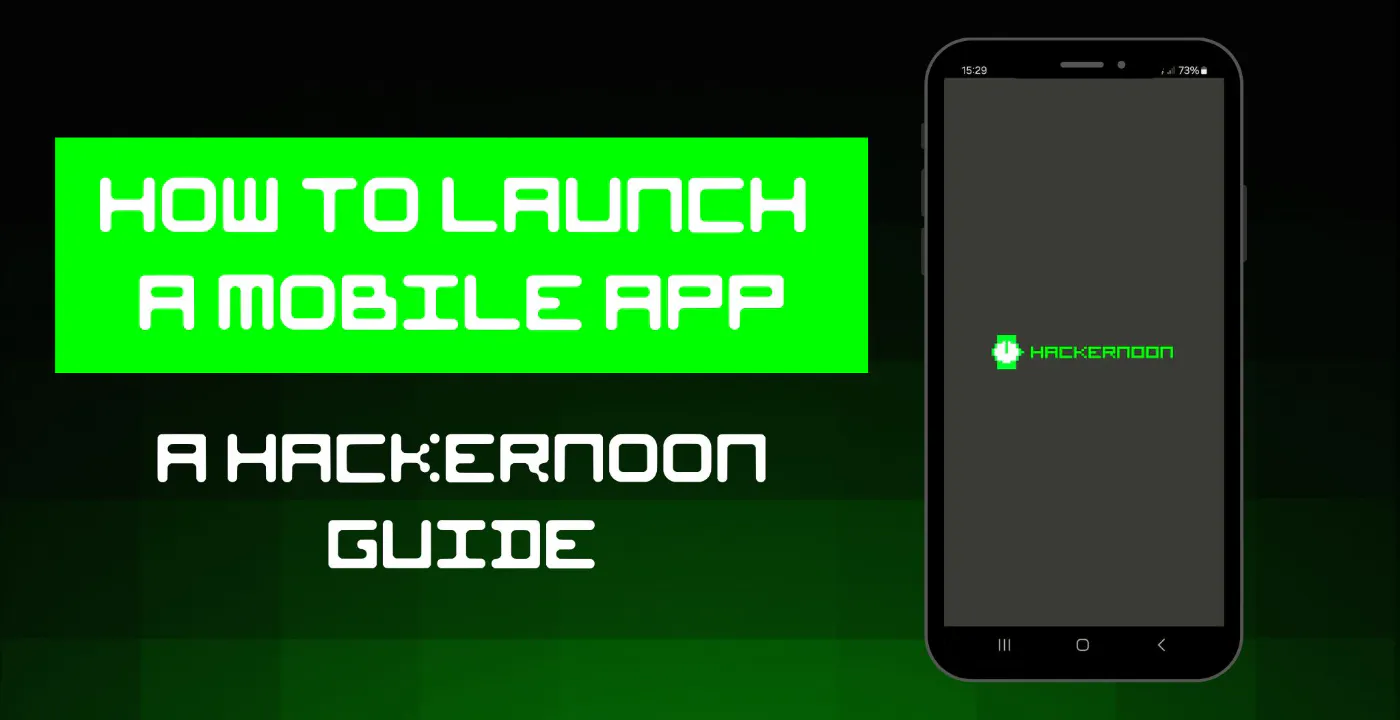
If you’re looking for a beginner-friendly guide on how to launch your first mobile app, you come to the right place. The HackerNoon Mobile App was also our first jump into the world of app development and we recognize that at first, we were just as lost as you probably are right now. Let us help you get your app off the ground by sharing our own hard-won lessons. Remember to refer to Apple's and Google's official documentation for detailed step-by-step instructions and guidelines to ensure a successful app submission process. Table of Links A Comprehensive Guide From HackerNoon Google Play Store Step-by-step Guide Apple App Store Step-by-step Guide Release Notes Apple App Store Step-by-step Guide Enroll in the Apple Developer Program: [ ] Register for an Apple Developer account at developer.apple.com. [ ] Choose the appropriate membership type (Individual or Organization) and pay the annual fee - 99 USD Here’s a demo: Prepare Your App for Submission: [ ] Ensure your app adheres to Apple's App Store Review Guidelines, including content, design, and functionality requirements. [ ] Test your app on various Apple devices to ensure compatibility and performance. Handle device-specific features like screen sizes, resolutions, and orientations. [ ] Incorporate support for Apple's latest iOS versions and technologies. If your app includes account-based features, provide either an active demo account or fully-featured demo mode, plus any other hardware or resources that might be needed to review your app (e.g. login credentials or a sample QR code) Create App Store Assets: [ ] Design an app icon following Apple's Human Interface Guidelines (PNG format, multiple sizes). [ ] Capture high-quality screenshots that showcase your app's features and UI. [ ] Prepare a visually appealing app preview video (optional but recommended). [ ] Write a compelling and concise app description with relevant keywords. [ ] Develop localized descriptions and keywords for different App Store regions. Code Signing: Create an iOS distribution provisioning profile and distribution certificate [ ] Add your Developer Program account to Xcode. From the top menu, select Xcode, then choose Preferences. [ ] Click on Accounts. In the bottom left corner of the window, press the + sign, then Add Apple ID... [ ] Enter your Apple ID and password for the Apple Developer Program, then click Sign In. [ ] Next, enable automatic signing. From the Project Editor, choose a target and select General. Scroll down to the "Signing" section and click the triangle icon to expand the settings. Click on the box to Automatically manage signing. Select your team. Archive and upload the app using Xcode [ ] Before we submit the app for review through App Store Connect, we need to upload the build through Xcode. In Xcode, select Generic iOS Device as the deployment target. [ ] Choose Product from the top menu and click on Archive. [ ] The Xcode Organizer will launch, displaying any archives you've created in the past. Make sure the current build is selected and click on Upload to App Store in the right-hand panel. [ ] Select your credentials and click Choose. [ ] In the next window, click on Upload in the bottom right-hand corner. A success message will appear when the upload has been completed. Click Done. Create an App Store Connect record for the app - configure the app's metadata and further details in its App Store Connect record [ ] In the App Store Connect dashboard, select My Apps. [ ] Click on the + sign in the upper left-hand corner, then New App. [ ] To create a new App Store Connect record, you'll need these details: platform, app name, default language, bundle ID, and SKU. You can't change these details later, so be sure of what you enter. ➡️ Use keywords in your app name to optimize for discovery. ➡️ The bundle ID must be an exact match of the bundle identifier in your Xcode project Info.plist file (in the target's General --> Identity section). ➡️ The SKU is not visible to users and is up to you to set. It can be an identifier you use in your company or something else that is meaningful for you. Acceptable characters include letters, numbers, hyphens, periods, and underscores, and they must begin with a letter or number. [ ] Under the "App Store" tab in App Store Connect, on the "App Information" page, add additional languages, categories, and app's Privacy Policy URL [ ] Set the app as free or select its price tier on the "Pricing and Availability" page [ ] Under the "Features" tab, we can add configurations to any App Store technologies in your app, like Game Center and in-app purchases [ ] At this stage, the app will be marked with a yellow dot and the status "Prepare for Submission" in the left-hand panel under "App Store". Select the build you want to configure. This is where we will add the information for the product page on the App Store. [ ] Upload the app's screenshots (in JPEG or PNG format and without status bars). We can upload a set of screenshots for one device and use them for all the other sizes. [ ] Click on Save in the upper right-hand corner of the window after the screenshots have finished uploading. [ ] Scroll down and enter the app's description, keywords, support URL, and marketing URL. ➡️ The app's description and keywords are critical. Make sure to optimize them for discovery. ➡️ The support URL can be as simple as a landing page with a contact form. ➡️ The marketing URL can be your app's website and is optional. [ ] In the "General App Information" section below, upload the app's icon, and enter its version number, copyright, and contact information. ➡️ The app's icon should be 1024px x 1024px. ➡️ The version number should exactly match the one in Xcode. ➡️ The copyright info typically looks like this: "Copyright (c) 2017, Instabug, Inc.". ➡️ The contact info here is what will be displayed to users. [ ] Click on Edit next to "Rating" and select the applicable options for our app - app can be rejected during the review if it doesn't match its rating. [ ] Under the "App Review Information" section, enter your contact info (Marcos?), any notes you have for the reviewer, and set the version release date. ➡️ The contact information here is for the reviewer in case they need to reach you directly. ➡️ Notes for the reviewer can include information about specific hardware they might need to use or user account information they might need for access. ➡️ For first releases, you should typically leave the version release date as automatic. [ ]In the top right-hand corner, click Save. App Store Connect [ ] Log in to App Store Connect (appstoreconnect.apple.com) using your developer account. [ ] Click on "Select a build before you submit your app." [ ] Choose the build that you uploaded through Xcode. Click Done in the bottom right-hand corner, then Save in the top-right-hand corner, then Submit for Review. [ ] Finally, answer the Export Compliance, Content Rights, and Advertising Identifier questions and click Submit. App Review and Release: [ ] Monitor the review progress and address any issues or requests from Apple's review team promptly - select Activity in the top horizontal menu, then App Store Versions in the left-hand panel. [ ] Once approved, set the release date for the app or release it immediately. Here’s a guide by @CodeWithChris that helped us better understand the whole process: https://www.youtube.com/watch?v=YPLs3xrDcm0&embedable=true App Store Review Guidelines - Key Points to Avoid Inappropriate Content: Avoid including explicit, offensive, or illegal content in your app. Misleading Information: Ensure your app's description, screenshots, and metadata accurately represent its functionality. User Privacy: Obtain user consent for data collection and handle user data securely and responsibly. Crashes and Bugs: Thoroughly test your app to identify and fix any crashes, bugs, or performance issues. User Interface: Follow Apple's Human Interface Guidelines, provide a visually appealing design, and maintain a consistent user experience. App Functionality: Ensure your app works as intended and doesn't include hidden or undocumented features. App Store Review Guidelines - Required Elements Ensure that all app information and metadata are complete and accurate Update your contact information in case App Review needs to reach you Provide App Review with full access to your app. Enable backend services so that they’re live and accessible during the review Include detailed explanations of non-obvious features and in-app purchases in the App Review notes, including supporting documentation where appropriate Functionality: Your app must function properly and provide a clear purpose and value to users. Legal Compliance: Comply with applicable laws, including intellectual property rights, privacy, and data protection regulations. Minimum User Experience: Your app should provide some level of functionality even without additional in-app purchases or subscriptions. In-App Purchases: Clearly communicate any in-app purchases or subscriptions to users and follow Apple's guidelines regarding their implementation. App Store Metadata: Provide accurate and relevant information in your app's metadata, including app name, description, screenshots, and keywords. Other Guidelines Development Guidelines: UIKit, AppKit, WatchKit, App Extensions, iOS Data Storage Guidelines, Apple File System, App Store Connect Help, Developer Account Help Design Guidelines: Human Interface Guidelines Brand and Marketing Guidelines: Marketing Resources and Identity Guidelines, Apple Pay Marketing Guidelines, Add to Apple Wallet Guidelines, Guidelines for Using Apple Trademarks and Copyrights Important Notes It takes about one to three days to receive approval, and it can take up to 24 hours for the app to appear in the App Store after approval. Please note, that starting April 2023, all iOS and iPadOS apps submitted to the App Store must be built with Xcode 14.1 and the iOS 16.1 SDK. iPhone apps will be published automatically on the Mac App Store on Apple silicon Macs, unless you update their availability in App Store Connect. Apple has big rejection rates for apps that show any type of bugs, slow apps, undetailed app descriptions, unfinished apps, etc. If you collect user’s information, you need to provide them with a clear privacy policy. You can’t use Apple images. Ensure the app works appropriately at each location and has a correct translation - though Apple loves global apps! Remember to refer to Apple's official documentation for detailed step-by-step instructions and guidelines to ensure a successful app submission process. If you’re looking for a beginner-friendly guide on how to launch your first mobile app, you come to the right place. The HackerNoon Mobile App was also our first jump into the world of app development and we recognize that at first, we were just as lost as you probably are right now. Let us help you get your app off the ground by sharing our own hard-won lessons. If you’re looking for a beginner-friendly guide on how to launch your first mobile app, you come to the right place. The HackerNoon Mobile App was also our first jump into the world of app development and we recognize that at first, we were just as lost as you probably are right now. Let us help you get your app off the ground by sharing our own hard-won lessons. HackerNoon Mobile App Remember to refer to Apple's and Google's official documentation for detailed step-by-step instructions and guidelines to ensure a successful app submission process. Remember to refer to Apple's and Google's official documentation for detailed step-by-step instructions and guidelines to ensure a successful app submission process. Remember to refer to Apple's and Google's official documentation for detailed step-by-step instructions and guidelines to ensure a successful app submission process. Table of Links A Comprehensive Guide From HackerNoon Google Play Store Step-by-step Guide Apple App Store Step-by-step Guide Release Notes A Comprehensive Guide From HackerNoon A Comprehensive Guide From HackerNoon Google Play Store Step-by-step Guide Google Play Store Step-by-step Guide Apple App Store Step-by-step Guide Apple App Store Step-by-step Guide Release Notes Release Notes Apple App Store Step-by-step Guide Step-by-step Guide Enroll in the Apple Developer Program: [ ] Register for an Apple Developer account at developer.apple.com. [ ] Choose the appropriate membership type (Individual or Organization) and pay the annual fee - 99 USD Here’s a demo: Enroll in the Apple Developer Program: [ ] Register for an Apple Developer account at developer.apple.com. [ ] Choose the appropriate membership type (Individual or Organization) and pay the annual fee - 99 USD Here’s a demo: Enroll in the Apple Developer Program: Enroll in the Apple Developer Program: [ ] Register for an Apple Developer account at developer.apple.com. [ ] Choose the appropriate membership type (Individual or Organization) and pay the annual fee - 99 USD [ ] Register for an Apple Developer account at developer.apple.com . [ ] developer.apple.com [ ] Choose the appropriate membership type (Individual or Organization) and pay the annual fee - 99 USD [ ] Here’s a demo: Here’s a demo: Prepare Your App for Submission: Prepare Your App for Submission: Prepare Your App for Submission: [ ] Ensure your app adheres to Apple's App Store Review Guidelines, including content, design, and functionality requirements. [ ] Test your app on various Apple devices to ensure compatibility and performance. Handle device-specific features like screen sizes, resolutions, and orientations. [ ] Incorporate support for Apple's latest iOS versions and technologies. [ ] Ensure your app adheres to Apple's App Store Review Guidelines, including content, design, and functionality requirements. [ ] Ensure your app adheres to Apple's App Store Review Guidelines , including content, design, and functionality requirements. Apple's App Store Review Guidelines [ ] Test your app on various Apple devices to ensure compatibility and performance. Handle device-specific features like screen sizes, resolutions, and orientations. [ ] Test your app on various Apple devices to ensure compatibility and performance. Handle device-specific features like screen sizes, resolutions, and orientations. [ ] Incorporate support for Apple's latest iOS versions and technologies. [ ] Incorporate support for Apple's latest iOS versions and technologies. If your app includes account-based features, provide either an active demo account or fully-featured demo mode, plus any other hardware or resources that might be needed to review your app (e.g. login credentials or a sample QR code) If your app includes account-based features, provide either an active demo account or fully-featured demo mode, plus any other hardware or resources that might be needed to review your app (e.g. login credentials or a sample QR code) Create App Store Assets: Create App Store Assets: Create App Store Assets: [ ] Design an app icon following Apple's Human Interface Guidelines (PNG format, multiple sizes). [ ] Capture high-quality screenshots that showcase your app's features and UI. [ ] Prepare a visually appealing app preview video (optional but recommended). [ ] Write a compelling and concise app description with relevant keywords. [ ] Develop localized descriptions and keywords for different App Store regions. [ ] Design an app icon following Apple's Human Interface Guidelines (PNG format, multiple sizes). [ ] Apple's Human Interface Guidelines [ ] Capture high-quality screenshots that showcase your app's features and UI. [ ] [ ] Prepare a visually appealing app preview video (optional but recommended). [ ] [ ] Write a compelling and concise app description with relevant keywords. [ ] [ ] Develop localized descriptions and keywords for different App Store regions. [ ] Code Signing: Create an iOS distribution provisioning profile and distribution certificate Code Signing: Create an iOS distribution provisioning profile and distribution certificate Code Signing: Create an iOS distribution provisioning profile and distribution certificate [ ] Add your Developer Program account to Xcode. From the top menu, select Xcode, then choose Preferences. [ ] Click on Accounts. In the bottom left corner of the window, press the + sign, then Add Apple ID... [ ] Enter your Apple ID and password for the Apple Developer Program, then click Sign In. [ ] Next, enable automatic signing. From the Project Editor, choose a target and select General. Scroll down to the "Signing" section and click the triangle icon to expand the settings. Click on the box to Automatically manage signing. Select your team. [ ] Add your Developer Program account to Xcode. From the top menu, select Xcode, then choose Preferences. [ ] [ ] Click on Accounts. In the bottom left corner of the window, press the + sign, then Add Apple ID... [ ] [ ] Enter your Apple ID and password for the Apple Developer Program, then click Sign In. [ ] [ ] Next, enable automatic signing. From the Project Editor, choose a target and select General. Scroll down to the "Signing" section and click the triangle icon to expand the settings. Click on the box to Automatically manage signing. Select your team. [ ] Archive and upload the app using Xcode Archive and upload the app using Xcode Archive and upload the app using Xcode [ ] Before we submit the app for review through App Store Connect, we need to upload the build through Xcode. In Xcode, select Generic iOS Device as the deployment target. [ ] Choose Product from the top menu and click on Archive. [ ] The Xcode Organizer will launch, displaying any archives you've created in the past. Make sure the current build is selected and click on Upload to App Store in the right-hand panel. [ ] Select your credentials and click Choose. [ ] In the next window, click on Upload in the bottom right-hand corner. A success message will appear when the upload has been completed. Click Done. [ ] Before we submit the app for review through App Store Connect, we need to upload the build through Xcode. In Xcode, select Generic iOS Device as the deployment target. [ ] Generic iOS Device [ ] Choose Product from the top menu and click on Archive. [ ] Product Archive. [ ] The Xcode Organizer will launch, displaying any archives you've created in the past. Make sure the current build is selected and click on Upload to App Store in the right-hand panel. [ ] Upload to App Store [ ] Select your credentials and click Choose . [ ] Choose [ ] In the next window, click on Upload in the bottom right-hand corner. A success message will appear when the upload has been completed. Click Done . [ ] Upload Done Create an App Store Connect record for the app - configure the app's metadata and further details in its App Store Connect record Create an App Store Connect record for the app - configure the app's metadata and further details in its App Store Connect record Create an App Store Connect record for the app - configure the app's metadata and further details in its App Store Connect record [ ] In the App Store Connect dashboard, select My Apps. [ ] Click on the + sign in the upper left-hand corner, then New App. [ ] To create a new App Store Connect record, you'll need these details: platform, app name, default language, bundle ID, and SKU. You can't change these details later, so be sure of what you enter. ➡️ Use keywords in your app name to optimize for discovery. ➡️ The bundle ID must be an exact match of the bundle identifier in your Xcode project Info.plist file (in the target's General --> Identity section). ➡️ The SKU is not visible to users and is up to you to set. It can be an identifier you use in your company or something else that is meaningful for you. Acceptable characters include letters, numbers, hyphens, periods, and underscores, and they must begin with a letter or number. [ ] Under the "App Store" tab in App Store Connect, on the "App Information" page, add additional languages, categories, and app's Privacy Policy URL [ ] Set the app as free or select its price tier on the "Pricing and Availability" page [ ] Under the "Features" tab, we can add configurations to any App Store technologies in your app, like Game Center and in-app purchases [ ] At this stage, the app will be marked with a yellow dot and the status "Prepare for Submission" in the left-hand panel under "App Store". Select the build you want to configure. This is where we will add the information for the product page on the App Store. [ ] Upload the app's screenshots (in JPEG or PNG format and without status bars). We can upload a set of screenshots for one device and use them for all the other sizes. [ ] Click on Save in the upper right-hand corner of the window after the screenshots have finished uploading. [ ] Scroll down and enter the app's description, keywords, support URL, and marketing URL. ➡️ The app's description and keywords are critical. Make sure to optimize them for discovery. ➡️ The support URL can be as simple as a landing page with a contact form. ➡️ The marketing URL can be your app's website and is optional. [ ] In the "General App Information" section below, upload the app's icon, and enter its version number, copyright, and contact information. ➡️ The app's icon should be 1024px x 1024px. ➡️ The version number should exactly match the one in Xcode. ➡️ The copyright info typically looks like this: "Copyright (c) 2017, Instabug, Inc.". ➡️ The contact info here is what will be displayed to users. [ ] Click on Edit next to "Rating" and select the applicable options for our app - app can be rejected during the review if it doesn't match its rating. [ ] Under the "App Review Information" section, enter your contact info (Marcos?), any notes you have for the reviewer, and set the version release date. ➡️ The contact information here is for the reviewer in case they need to reach you directly. ➡️ Notes for the reviewer can include information about specific hardware they might need to use or user account information they might need for access. ➡️ For first releases, you should typically leave the version release date as automatic. [ ]In the top right-hand corner, click Save. [ ] In the App Store Connect dashboard, select My Apps. [ ] [ ] Click on the + sign in the upper left-hand corner, then New App . [ ] + New App [ ] To create a new App Store Connect record, you'll need these details: platform, app name, default language, bundle ID, and SKU. You can't change these details later, so be sure of what you enter. ➡️ Use keywords in your app name to optimize for discovery. ➡️ The bundle ID must be an exact match of the bundle identifier in your Xcode project Info.plist file (in the target's General --> Identity section). ➡️ The SKU is not visible to users and is up to you to set. It can be an identifier you use in your company or something else that is meaningful for you. Acceptable characters include letters, numbers, hyphens, periods, and underscores, and they must begin with a letter or number. [ ] ➡️ Use keywords in your app name to optimize for discovery. ➡️ The bundle ID must be an exact match of the bundle identifier in your Xcode project Info.plist file (in the target's General --> Identity section). ➡️ The SKU is not visible to users and is up to you to set. It can be an identifier you use in your company or something else that is meaningful for you. Acceptable characters include letters, numbers, hyphens, periods, and underscores, and they must begin with a letter or number. ➡️ Use keywords in your app name to optimize for discovery. ➡️ Use keywords in your app name to optimize for discovery. ➡️ Use keywords in your app name to optimize for discovery. ➡️ Use keywords in your app name to optimize for discovery. ➡️ The bundle ID must be an exact match of the bundle identifier in your Xcode project Info.plist file (in the target's General --> Identity section). ➡️ The bundle ID must be an exact match of the bundle identifier in your Xcode project Info.plist file (in the target's General --> Identity section). ➡️ The bundle ID must be an exact match of the bundle identifier in your Xcode project Info.plist file (in the target's General --> Identity section). ➡️ The bundle ID must be an exact match of the bundle identifier in your Xcode project Info.plist file (in the target's General --> Identity section). ➡️ The SKU is not visible to users and is up to you to set. It can be an identifier you use in your company or something else that is meaningful for you. Acceptable characters include letters, numbers, hyphens, periods, and underscores, and they must begin with a letter or number. ➡️ The SKU is not visible to users and is up to you to set. It can be an identifier you use in your company or something else that is meaningful for you. Acceptable characters include letters, numbers, hyphens, periods, and underscores, and they must begin with a letter or number. ➡️ The SKU is not visible to users and is up to you to set. It can be an identifier you use in your company or something else that is meaningful for you. Acceptable characters include letters, numbers, hyphens, periods, and underscores, and they must begin with a letter or number. ➡️ The SKU is not visible to users and is up to you to set. It can be an identifier you use in your company or something else that is meaningful for you. Acceptable characters include letters, numbers, hyphens, periods, and underscores, and they must begin with a letter or number. [ ] Under the "App Store" tab in App Store Connect, on the "App Information" page, add additional languages, categories, and app's Privacy Policy URL [ ] [ ] Set the app as free or select its price tier on the " Pricing and Availability " page [ ] Pricing and Availability [ ] Under the "Features" tab, we can add configurations to any App Store technologies in your app, like Game Center and in-app purchases [ ] App Store technologies App Store technologies Game Center in-app purchases [ ] At this stage, the app will be marked with a yellow dot and the status "Prepare for Submission" in the left-hand panel under "App Store". Select the build you want to configure. This is where we will add the information for the product page on the App Store. [ ] [ ] Upload the app's screenshots (in JPEG or PNG format and without status bars). We can upload a set of screenshots for one device and use them for all the other sizes. [ ] [ ] Click on Save in the upper right-hand corner of the window after the screenshots have finished uploading. [ ] Save [ ] Scroll down and enter the app's description, keywords, support URL, and marketing URL. ➡️ The app's description and keywords are critical. Make sure to optimize them for discovery. ➡️ The support URL can be as simple as a landing page with a contact form. ➡️ The marketing URL can be your app's website and is optional. [ ] ➡️ The app's description and keywords are critical. Make sure to optimize them for discovery. ➡️ The support URL can be as simple as a landing page with a contact form. ➡️ The marketing URL can be your app's website and is optional. ➡️ The app's description and keywords are critical. Make sure to optimize them for discovery. ➡️ The app's description and keywords are critical. Make sure to optimize them for discovery. ➡️ The app's description and keywords are critical. Make sure to optimize them for discovery. ➡️ The app's description and keywords are critical. Make sure to optimize them for discovery. optimize ➡️ The support URL can be as simple as a landing page with a contact form. ➡️ The support URL can be as simple as a landing page with a contact form. ➡️ The support URL can be as simple as a landing page with a contact form. ➡️ The support URL can be as simple as a landing page with a contact form. ➡️ The marketing URL can be your app's website and is optional. ➡️ The marketing URL can be your app's website and is optional. ➡️ The marketing URL can be your app's website and is optional. ➡️ The marketing URL can be your app's website and is optional. [ ] In the "General App Information" section below, upload the app's icon, and enter its version number, copyright, and contact information. ➡️ The app's icon should be 1024px x 1024px. ➡️ The version number should exactly match the one in Xcode. ➡️ The copyright info typically looks like this: "Copyright (c) 2017, Instabug, Inc.". ➡️ The contact info here is what will be displayed to users. [ ] ➡️ The app's icon should be 1024px x 1024px. ➡️ The version number should exactly match the one in Xcode. ➡️ The copyright info typically looks like this: "Copyright (c) 2017, Instabug, Inc.". ➡️ The contact info here is what will be displayed to users. ➡️ The app's icon should be 1024px x 1024px. ➡️ The app's icon should be 1024px x 1024px. ➡️ The app's icon should be 1024px x 1024px. ➡️ The app's icon should be 1024px x 1024px. ➡️ The version number should exactly match the one in Xcode. ➡️ The version number should exactly match the one in Xcode. ➡️ The version number should exactly match the one in Xcode. ➡️ The version number should exactly match the one in Xcode. ➡️ The copyright info typically looks like this: "Copyright (c) 2017, Instabug, Inc.". ➡️ The copyright info typically looks like this: "Copyright (c) 2017, Instabug, Inc.". ➡️ The copyright info typically looks like this: "Copyright (c) 2017, Instabug, Inc.". ➡️ The copyright info typically looks like this: "Copyright (c) 2017, Instabug, Inc.". ➡️ The contact info here is what will be displayed to users. ➡️ The contact info here is what will be displayed to users. ➡️ The contact info here is what will be displayed to users. ➡️ The contact info here is what will be displayed to users. [ ] Click on Edit next to "Rating" and select the applicable options for our app - app can be rejected during the review if it doesn't match its rating. [ ] Edit [ ] Under the "App Review Information" section, enter your contact info (Marcos?), any notes you have for the reviewer, and set the version release date. ➡️ The contact information here is for the reviewer in case they need to reach you directly. ➡️ Notes for the reviewer can include information about specific hardware they might need to use or user account information they might need for access. ➡️ For first releases, you should typically leave the version release date as automatic. [ ] ➡️ The contact information here is for the reviewer in case they need to reach you directly. ➡️ Notes for the reviewer can include information about specific hardware they might need to use or user account information they might need for access. ➡️ For first releases, you should typically leave the version release date as automatic. ➡️ The contact information here is for the reviewer in case they need to reach you directly. ➡️ The contact information here is for the reviewer in case they need to reach you directly. ➡️ The contact information here is for the reviewer in case they need to reach you directly. ➡️ The contact information here is for the reviewer in case they need to reach you directly. ➡️ Notes for the reviewer can include information about specific hardware they might need to use or user account information they might need for access. ➡️ Notes for the reviewer can include information about specific hardware they might need to use or user account information they might need for access. ➡️ Notes for the reviewer can include information about specific hardware they might need to use or user account information they might need for access. ➡️ Notes for the reviewer can include information about specific hardware they might need to use or user account information they might need for access. ➡️ For first releases, you should typically leave the version release date as automatic. ➡️ For first releases, you should typically leave the version release date as automatic. ➡️ For first releases, you should typically leave the version release date as automatic. ➡️ For first releases, you should typically leave the version release date as automatic. [ ] In the top right-hand corner, click Save . [ ] Save App Store Connect App Store Connect App Store Connect App Store Connect [ ] Log in to App Store Connect (appstoreconnect.apple.com) using your developer account. [ ] Click on "Select a build before you submit your app." [ ] Choose the build that you uploaded through Xcode. Click Done in the bottom right-hand corner, then Save in the top-right-hand corner, then Submit for Review. [ ] Finally, answer the Export Compliance, Content Rights, and Advertising Identifier questions and click Submit. [ ] Log in to App Store Connect ( appstoreconnect.apple.com ) using your developer account. [ ] appstoreconnect.apple.com [ ] Click on "Select a build before you submit your app." [ ] [ ] Choose the build that you uploaded through Xcode. Click Done in the bottom right-hand corner, then Save in the top-right-hand corner, then Submit for Review. [ ] [ ] Finally, answer the Export Compliance, Content Rights, and Advertising Identifier questions and click Submit . [ ] Submit App Review and Release: App Review and Release: App Review and Release: [ ] Monitor the review progress and address any issues or requests from Apple's review team promptly - select Activity in the top horizontal menu, then App Store Versions in the left-hand panel. [ ] Once approved, set the release date for the app or release it immediately. [ ] Monitor the review progress and address any issues or requests from Apple's review team promptly - select Activity in the top horizontal menu, then App Store Versions in the left-hand panel. [ ] Activity App Store Versions [ ] Once approved, set the release date for the app or release it immediately. [ ] Here’s a guide by @CodeWithChris that helped us better understand the whole process: Here’s a guide by @CodeWithChris that helped us better understand the whole process: @CodeWithChris https://www.youtube.com/watch?v=YPLs3xrDcm0&embedable=true https://www.youtube.com/watch?v=YPLs3xrDcm0&embedable=true App Store Review Guidelines - Key Points to Avoid App Store Review Guidelines - Key Points to Avoid Inappropriate Content: Avoid including explicit, offensive, or illegal content in your app. Misleading Information: Ensure your app's description, screenshots, and metadata accurately represent its functionality. User Privacy: Obtain user consent for data collection and handle user data securely and responsibly. Crashes and Bugs: Thoroughly test your app to identify and fix any crashes, bugs, or performance issues. User Interface: Follow Apple's Human Interface Guidelines, provide a visually appealing design, and maintain a consistent user experience. App Functionality: Ensure your app works as intended and doesn't include hidden or undocumented features. Inappropriate Content: Avoid including explicit, offensive, or illegal content in your app. Misleading Information: Ensure your app's description, screenshots, and metadata accurately represent its functionality. User Privacy: Obtain user consent for data collection and handle user data securely and responsibly. Crashes and Bugs: Thoroughly test your app to identify and fix any crashes, bugs, or performance issues. User Interface: Follow Apple's Human Interface Guidelines, provide a visually appealing design, and maintain a consistent user experience. App Functionality: Ensure your app works as intended and doesn't include hidden or undocumented features. App Store Review Guidelines - Required Elements App Store Review Guidelines - Required Elements Ensure that all app information and metadata are complete and accurate Update your contact information in case App Review needs to reach you Provide App Review with full access to your app. Enable backend services so that they’re live and accessible during the review Include detailed explanations of non-obvious features and in-app purchases in the App Review notes, including supporting documentation where appropriate Functionality: Your app must function properly and provide a clear purpose and value to users. Legal Compliance: Comply with applicable laws, including intellectual property rights, privacy, and data protection regulations. Minimum User Experience: Your app should provide some level of functionality even without additional in-app purchases or subscriptions. In-App Purchases: Clearly communicate any in-app purchases or subscriptions to users and follow Apple's guidelines regarding their implementation. App Store Metadata: Provide accurate and relevant information in your app's metadata, including app name, description, screenshots, and keywords. Ensure that all app information and metadata are complete and accurate Update your contact information in case App Review needs to reach you Provide App Review with full access to your app. Enable backend services so that they’re live and accessible during the review Include detailed explanations of non-obvious features and in-app purchases in the App Review notes, including supporting documentation where appropriate Functionality: Your app must function properly and provide a clear purpose and value to users. Legal Compliance: Comply with applicable laws, including intellectual property rights, privacy, and data protection regulations. Minimum User Experience: Your app should provide some level of functionality even without additional in-app purchases or subscriptions. In-App Purchases: Clearly communicate any in-app purchases or subscriptions to users and follow Apple's guidelines regarding their implementation. App Store Metadata: Provide accurate and relevant information in your app's metadata, including app name, description, screenshots, and keywords. Other Guidelines Other Guidelines Development Guidelines: UIKit, AppKit, WatchKit, App Extensions, iOS Data Storage Guidelines, Apple File System, App Store Connect Help, Developer Account Help Design Guidelines: Human Interface Guidelines Brand and Marketing Guidelines: Marketing Resources and Identity Guidelines, Apple Pay Marketing Guidelines, Add to Apple Wallet Guidelines, Guidelines for Using Apple Trademarks and Copyrights Development Guidelines: UIKit, AppKit, WatchKit, App Extensions, iOS Data Storage Guidelines, Apple File System, App Store Connect Help, Developer Account Help Development Guidelines: UIKit , AppKit , WatchKit , App Extensions , iOS Data Storage Guidelines , Apple File System , App Store Connect Help , Developer Account Help Development Guidelines: UIKit AppKit WatchKit App Extensions iOS Data Storage Guidelines Apple File System App Store Connect Help Developer Account Help Design Guidelines: Human Interface Guidelines Design Guidelines: Human Interface Guidelines Design Guidelines: Human Interface Guidelines Brand and Marketing Guidelines: Marketing Resources and Identity Guidelines, Apple Pay Marketing Guidelines, Add to Apple Wallet Guidelines, Guidelines for Using Apple Trademarks and Copyrights Brand and Marketing Guidelines: Marketing Resources and Identity Guidelines , Apple Pay Marketing Guidelines , Add to Apple Wallet Guidelines , Guidelines for Using Apple Trademarks and Copyrights Brand and Marketing Guidelines: Marketing Resources and Identity Guidelines Apple Pay Marketing Guidelines Add to Apple Wallet Guidelines Guidelines for Using Apple Trademarks and Copyrights Important Notes Important Notes It takes about one to three days to receive approval, and it can take up to 24 hours for the app to appear in the App Store after approval. Please note, that starting April 2023, all iOS and iPadOS apps submitted to the App Store must be built with Xcode 14.1 and the iOS 16.1 SDK. iPhone apps will be published automatically on the Mac App Store on Apple silicon Macs, unless you update their availability in App Store Connect. Apple has big rejection rates for apps that show any type of bugs, slow apps, undetailed app descriptions, unfinished apps, etc. If you collect user’s information, you need to provide them with a clear privacy policy. You can’t use Apple images. Ensure the app works appropriately at each location and has a correct translation - though Apple loves global apps! It takes about one to three days to receive approval, and it can take up to 24 hours for the app to appear in the App Store after approval. Please note, that starting April 2023, all iOS and iPadOS apps submitted to the App Store must be built with Xcode 14.1 and the iOS 16.1 SDK. Please note, that starting April 2023, all iOS and iPadOS apps submitted to the App Store must be built with Xcode 14.1 and the iOS 16.1 SDK. iPhone apps will be published automatically on the Mac App Store on Apple silicon Macs, unless you update their availability in App Store Connect. Apple has big rejection rates for apps that show any type of bugs, slow apps, undetailed app descriptions, unfinished apps, etc. If you collect user’s information, you need to provide them with a clear privacy policy. You can’t use Apple images. Ensure the app works appropriately at each location and has a correct translation - though Apple loves global apps! Remember to refer to Apple's official documentation for detailed step-by-step instructions and guidelines to ensure a successful app submission process. Remember to refer to Apple's official documentation for detailed step-by-step instructions and guidelines to ensure a successful app submission process. Remember to refer to Apple's official documentation for detailed step-by-step instructions and guidelines to ensure a successful app submission process.