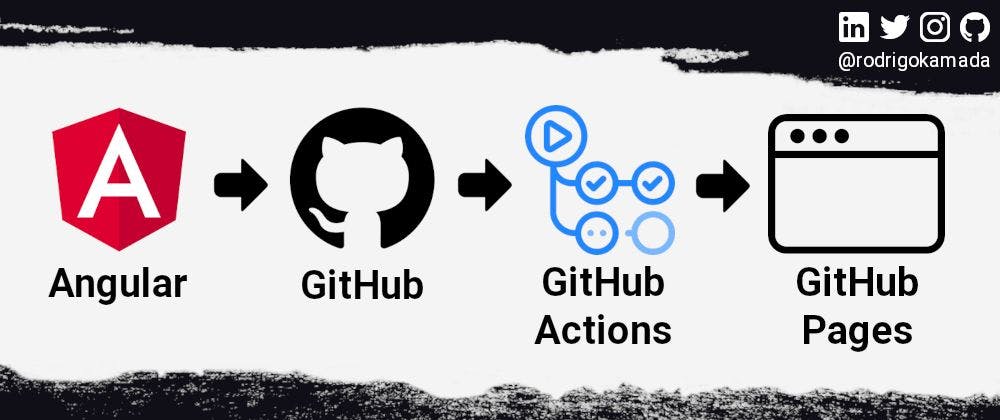
Detailed instructions on publishing a non-scoped public package using semantic release leveraging the power of GitHub Actions In the evolving software development landscape, maintaining version consistency and automating the release process is more important than ever. Enter : a tool designed to ensure clear and structured versioning. For developers leveraging public non-scoped packages, the process may seem daunting. However, with the power of GitHub actions at our fingertips, automation becomes a breeze. Semantic Release This article offers a detailed and comprehensive guide, providing step-by-step instructions to seamlessly integrate Semantic Release into your workflow, specifically tailored for those using public non-scoped packages. Dive in and discover the streamlined approach to software releases. When I created my , I encountered hurdles in publishing it seamlessly to NPM. It was a challenge to ensure the right configurations. public package To nail it, let’s go through a step-by-step experience for proper publishing public packages to . NPM Content Overview Name the package Create a package Package source Tokens GitHub Actions setup Semantic release Commit format Published package Conclusion Name the package Before jumping into implementing our package, it is better to find the proper name for it. To be sure the name is not taken already — check and take it for your package. I chose “tokky.” From that point, reserving the package's name is impossible. For the name in npm, you have to publish the package. my_package_name Create a package The objective is to develop a straightforward package that outputs content to the console. We need to make sure that we can install it and run it. For the build process, let’s use simple . esbuild During this article, I will use the name of the package . Let’s create with the initial data. tokky package.json mkdir tokky && cd tokky && npm init -y After executing the command, the system generated a default file for the project, which looks like this: package.json { "name": "tokky", "version": "1.0.0", "description": "", "main": "index.js", "scripts": { "test": "echo \"Error: no test specified\" && exit 1" }, "keywords": [], "author": "", "license": "ISC" } In this guide, the file plays a crucial role in ensuring the right configuration. At this juncture, let's specify the node version for our package: package.json echo "v18" > .nvmrc and activate the specified version with the following: nvm use For the file: README.md echo "# Tokky\n\nA simple zero dependency logger for node js." > README.md Finally, install the development dependencies: npm i -D esbuild eslint prettier In our initial configuration, we need to address several key points in the : package.json : This designates the primary entry point for the module. main : Here, you’ll specify any executables your module provides. bin : This should contain an array of file patterns that will be included when the package is packed and subsequently published to the npm registry. files : Ensure this is set to as our package is intended to be public. private false : The access for this should be set to . publishConfig public After these configurations, your should resemble the following: package.json { "name": "tokky", "version": "1.0.0", "description": "Node js logger package", "main": "dist/index.js", "scripts": { "build": "esbuild src/index.js --bundle --platform=node --format=cjs --minify --outfile=dist/index.js", }, "files": [ "dist" ], "bin": { "tokky": "./dist/index.js" }, "keywords": [ "logger", "nodejs", "tokky" ], "private": false, "author": { "name": "Anton Kalik", "email": "antonkalik@gmail.com", "url": "https://idedy.com" }, "publishConfig": { "access": "public" }, "license": "MIT", "engines": { "node": "18.x.x" }, "devDependencies": { "esbuild": "^0.19.2", "eslint": "^8.49.0", "prettier": "^3.0.3" } } package.json after initial setup Additionally, let’s add two ignore files: .idea node_modules dist .gitignore and for npm: .idea /src/ /node_modules/ /test/ /.nvmrc .github/ .npmignore Lastly, I’ll outline my setup for ESLint. However, remember that the configuration may vary based on the specific requirements of your package. module.exports = { env: { browser: true, commonjs: true, es2021: true, node: true, }, extends: "eslint:recommended", overrides: [ { env: { node: true, }, files: ["src/**/*.js", ".eslintrc.{js,cjs}"], parserOptions: { sourceType: "script", }, }, ], parserOptions: { ecmaVersion: "latest", }, rules: {}, }; .eslintrc.js config Next, head to GitHub and establish a new repository. Name it after your package. Proceed by executing the subsequent commands: git init git add . git commit -m "first commit" git branch -M main git remote add origin git@github.com:<your_github_username>/tokky.git git push -u origin main Package source Next, let’s craft a basic application and set it up for building. Inside the folder, generate an file and populate it with the following content: src index.js #!/usr/bin/env node const os = require('os'); const username = os.userInfo().username; if (process.argv[2] === 'hi') { console.log(`Hello ${username}`); } Simple script for package example The concept is straightforward: executing should display “Hello [username].” my_package_name hi To validate this functionality, execute the command directly from your repository using: node src/index.js hi If the output aligns with expectations, it’s time to build the source: npm run build Successfully running this command will produce a folder containing a minified file. dist index.js Tokens Execute Semantic Release, which will determine version bumps and handle the release process based on commit messages, requires environment variables ( , ) to operate correctly. The tokens are fetched from GitHub secrets, ensuring they remain confidential. GITHUB_TOKEN NPM_TOKEN To set , navigate here: GITHUB_TOKEN https://github.com/settings/tokens Generate the token using a dropdown. Click on the new personal access token (classic) and set permission as in the picture. Use your package name as shown below: Once generated, copy the token value and keep it confidential — it’s crucial not to share this with others. Temporarily store this token securely, as we’ll need it shortly for the Semantic Release CLI. To generate the , you first need an account on . If you haven't registered yet, go through the registration process. After that, navigate to: NPM_TOKEN npm's official website https://www.npmjs.com/settings/<your_user_name>/tokens/new and generate a “classic” token with the “publish” option. Copy the generated value of the token and navigate to GitHub secrets: https://github.com/<your_user_name>/<your_repo_name>/settings/secrets/actions/new and put new secret as to repository secrets: NPM_TOKEN With our secrets now set up, we can configure GitHub Actions. GitHub Actions setup To automate our processes, we are going to use GitHub Actions. This is a tool integrated within GitHub. It allows developers to automate workflows directly from their GitHub repositories, such as building, testing, and deploying applications. By defining workflows in YAML files, users can trigger actions based on specific events like push and pull requests or scheduled times, making the software development process more efficient and automated. CI/CD To begin, create a directory at the root of your project. Within this directory, establish a subfolder. .github workflows Here, craft our configuration file named and populate it with the following content: release.yml name: Release package on: push: branches: - main jobs: release: runs-on: ubuntu-latest if: ${{ github.ref == 'refs/heads/main' }} steps: - name: Checkout uses: actions/checkout@v3 - name: Set up Node.js uses: actions/setup-node@v3 with: node-version: "18" - name: Install dependencies run: npm ci - name: Build run: npm run build - name: Semantic Release run: npm run semantic-release env: GITHUB_TOKEN: ${{ secrets.GITHUB_TOKEN }} NPM_TOKEN: ${{ secrets.NPM_TOKEN }} This workflow triggers a push event to the main branch. It’s configured to run the job on the latest Ubuntu virtual machine GitHub offers. While it’s not imperative to delve into every job, let’s spotlight some specific ones. Toward the end, note how we invoke using the designated tokens. npm run semantic-release Semantic release For the automated release process, we are going to use Semantic Release. This tool handles versioning and package publishing based on commit message semantics. It follows the conventions of Semantic Versioning (SemVer) to determine version bumps (major, minor, or patch). By analyzing commit messages it eliminates the manual steps of versioning, ensures consistent version numbers, and streamlines the release process. Let’s set it up. For that setup, we will use and run it on your repository: this GitHub code npx semantic-release-cli setup And follow the questions: % npx semantic-release-cli setup ? What is your npm registry? https://registry.npmjs.org/ ? What is your npm username? your_user_name ? What is your npm password? [hidden] ? What is your NPM two-factor authentication code? 00000000 ? Provide a GitHub Personal Access Token (create a token at https://github.com/s ettings/tokens/new?scopes=repo) ghp_your_token_here ? What CI are you using? Github Actions You should already have your Personal Token. Simply input it when prompted. Similarly, the GitHub Actions we’ve set up will utilize the that we've previously established in the repository secrets. If you now check your , the version will display as: NPM_TOKEN package.json "version": "0.0.0-development", and new script: "semantic-release": "semantic-release" which was auto-generated by the Semantic Release CLI. We’ll need to enhance this script as follows: "semantic-release": "semantic-release --branches main" This indicates that releases will only be made from the main branch. Additionally, Semantic Release generates a description based on the field in your . This field offers details about the location of the package's source code. repository package.json "repository": { "type": "git", "url": "https://github.com/<your_github_username>/your_github_repo.git" } Now, let’s push all of our changes with: git add . && git commit -m "semantic release" && git push Commit format Semantic Release relies on the convention of structured commit messages to determine the type of version bump (major, minor, or patch) and generate changelogs. This commit convention is often called the “Conventional Commits” format. For this configuration, we’ll need several plugins. Ensure your contains the following content: package.json "release": { "branches": [ { "name": "main" } ], "plugins": [ [ "@semantic-release/commit-analyzer", { "releaseRules": [ { "type": "feat", "release": "minor" }, { "type": "fix", "release": "patch" }, { "type": "refactor", "release": "patch" }, { "type": "build", "release": "patch" }, { "type": "chore", "release": "patch" }, { "type": "minor", "release": "patch" } ] } ], "@semantic-release/release-notes-generator", "@semantic-release/npm", "@semantic-release/github", [ "@semantic-release/changelog", { "changelogFile": "CHANGELOG.md" } ] ] } package.json For the setup commit format tool, we are going to use . To install it, follow this command: commitizen npx commitizen init cz-conventional-changelog --save-dev --save-exact This command will take a few minutes. Then update your with a new script: package.json "scripts": { // ... "commit": "cz" }, and it’s time to utilize that script. Begin by executing , then run and provide the necessary details for your commit. git add . npm run commit Here’s what that looks like: ? Select the type of change that you're committing: feat: A new feature ? What is the scope of this change (e.g. component or file name): (press enter to skip) commit ? Write a short, imperative tense description of the change (max 86 chars): (14) add commitizen ? Provide a longer description of the change: (press enter to skip) ? Are there any breaking changes? No ? Does this change affect any open issues? No After that, do a . git push In GitHub actions, you will see that our commit failed because we still have not installed the rest of the packages for the automated commit message process. npm i -D @semantic-release/commit-analyzer @semantic-release/release-notes-generator @semantic-release/npm @semantic-release/changelog Navigate to and configure the permissions to allow GitHub actions to both read and write. A crucial step, often overlooked in most references, is setting the workflow permissions. https://github.com/<your_user_name>/tokky/settings/actions Next, let’s change things up a bit. Commit with a specific keyword, , followed by your message. feat: git add . && git commit -m "feat: my feature commit" && git push Do you recall the within the ? These rules dictate how we increment the version of our package release. With this in place, you can create a pull request using specific keywords like , , , and so on. Once this pull request is approved and subsequently merged into the main branch, it will initiate a trigger. This trigger then activates the GitHub action, automates the release process, and ensures your package is updated seamlessly. releaseRules package.json feat fix refactor Published package The package has been successfully published, and the entire process has been automated for efficiency. To confirm the publication, head to your npm settings and look under the packages section; there, you will find your newly published package. https://www.npmjs.com/settings/<your_user_name>/packages Now, with a simple command like , you can immediately see the results of our development tests. Additionally, the package can be globally installed using the command . npx your_package_name hi npm i -g your_package_name Conclusion As we’ve seen throughout this article, while initial setups can be riddled with challenges, the reward lies in establishing a streamlined and consistent release process. Leveraging GitHub Actions simplifies these complexities, ensuring developers can focus on code quality rather than logistical intricacies. Whether you’re just beginning your journey with public packages or have encountered setbacks in your publishing endeavors, there’s undeniable value in adopting a structured, automated workflow. By integrating Semantic Release, you’re ensuring consistent versioning and championing a future-forward approach to software development. Here’s to seamless publishing, fewer headaches, and more time spent perfecting the code that drives our digital world forward. Remember, it’s essential that both and are granted the appropriate permissions within GitHub Actions. Additionally, your should be correctly configured with settings for access, and ensure that the config is set to . If you encounter any issues or have insights, please don't hesitate to comment. NPM_TOKEN GITHUB_TOKEN package.json publishConfig private false References Repository: Semantic Release CLI: Commitizen: https://github.com/antonkalik/tokky https://github.com/semantic-release/cli https://github.com/commitizen/cz-cli Also published . here Thanks to from Unsplash for the lead image. Harper Sunday