


1,520 reads
How to Deploy a Django Application on AWS with Terraform
by Yevhen BondarSeptember 4th, 2022


Too Long; Didn't Read
The final goal of this guide is to create a scalable and reproducible setup of the Django Web Application on AWS using Terraform. Terraform is an infrastructure as code (IaC) tool that allows you to build, change, and version infrastructure safely and efficiently. In this guide, we will run through the basic setup of an AWS account, create a Django application, and define resources for our web application. We will deploy the Django application on the AWS ECS. It will respond in a browser by Load Balancer URL URL.Companies Mentioned


Introduction
The final goal of this guide is to create a scalable and reproducible setup of the Django Web Application on AWS using Terraform.
We'll use these services:
- VPC as a virtual networking environment.
- ECS + Fargate to run docker containers serverless.
- EC2 load balancer for traffic routing.
- Route53 for DNS management.
- Certificate Manager for SSL certificate.
- ECR container registry.
- IAM for managing AWS permissions.
- RDS Postgresql as DB.
- S3 as storage for media files.
- SQS as Celery worker backend.
- CloudWatch for logs and metrics.
- Namecheap for domain registration.
- GitLab for source code hosting.
- GitLab CI/CD for running tests, building docker images, and continuous deployment on AWS.
Local dependencies:
About Terraform
As official Terraform docs says:
Terraform is an infrastructure as code (IaC) tool that allows you to build, change, and version infrastructure safely and efficiently. This includes both low-level components like compute instances, storage, and networking, as well as high-level components like DNS entries and SaaS features.
Basically, Terraform project represents your current infrastructure state as a set of configuration files. You can easily create, update and delete parts of your cloud infrastructure by changing these files. After describing the new infrastructure state, you can review the plan of changes and apply them. We will create a separate project for Terraform using Git to preserve the history of changes and collaborative work in the future.
Creating a minimal working setup
In this part, we will run through the basic setup of an AWS account, create Terraform project, and define resources for our web application. As a result, we will deploy the Django application on the AWS ECS. It will respond in a browser by Load Balancer URL.


Creating Django project
Let's start with a Django application. Create a new folder and initialize a default Django project.
$ mkdir django-aws && cd django-aws
$ mkdir django-aws-backend && cd django-aws-backend
$ git init --initial-branch=main
$ python3.10 -m venv venv
$ . ./venv/bin/activate
(venv) $ pip install Django==3.2.13
(venv) $ django-admin startproject django_aws .
(venv) $ ./manage.py migrate
(venv) $ ./manage.py runserver
Check a Django greeting page at http://127.0.0.1:8000, ensure that Django is running, and kill the development server.


Now we are going to dockerize our application. First, add a requirements.txt file to the Django project:
Django==3.2.13
For testing purposes, enable debug mode and allow all hosts in settings.py
DEBUG = True

ALLOWED_HOSTS = ['*']
Then add Dockerfile in the current directory:
FROM python:3.10-slim-buster

# Open http port
EXPOSE 8000

ENV PYTHONUNBUFFERED 1
ENV PYTHONDONTWRITEBYTECODE 1
ENV DEBIAN_FRONTEND noninteractive

# Install pip and gunicorn web server
RUN pip install --no-cache-dir --upgrade pip
RUN pip install gunicorn==20.1.0

# Install requirements.txt
COPY requirements.txt /
RUN pip install --no-cache-dir -r /requirements.txt

# Moving application files
WORKDIR /app
COPY . /app
Build and run docker container locally.
$ docker build . -t django-aws-backend
$ docker run -p 8000:8000 django-aws-backend gunicorn -b 0.0.0.0:8000 django_aws.wsgi:application
Go to the http://127.0.0.1:8000 page and verify that we successfully build and run the docker image with a Django application. You should see exactly the same greeting page as for the runserver command.
Let's add a .gitignore file:
*.sqlite3
.idea
.env
venv
.DS_Store
__pycache__
static
media
and commit our changes:
$ git add .
$ git commit -m "initial commit"
For now, we are done with the Django part. In the following steps, we deploy this application on AWS. But first, we need to create an AWS account.
Creating an AWS account
Go to aws.amazon.com and create an account. This process required your personal contact information and your credit card. After you finish, sign in to the AWS Console.
AWS Console is a web application for managing AWS users, access policies, and other resources. Here you can see your infrastructure state, browse application logs and see the actual changes committed by Terraform.
Now, we need to create credentials for AWS CLI and Terraform. We'll create a new user with administration access to the AWS account. This user will be able to create and change resources on your AWS account.
Go to the IAM service, select the "Users" tab, and click "Add Users".


Enter your Username and choose the 'Access key - Programmatic access' option. This option means that your user will have an 'Access key' to use AWS API. Also, this user won't be able to sign in to the AWS web console.


Select the "Attach existing policies directly" tab and select "AdministratorAccess." Then click next and skip the "Add tags" step.


Review user details and click "Create user."


You successfully created the user! Now you need to save your Access key ID and Secret access key in some safe place. Be aware of committing these keys in public repositories or other public places. Anybody who owns these keys can manage your AWS account.


Now we can configure AWS CLI and check our credentials. We will use the us-east-2 region in this guide. Feel free to change it.
$ aws configure
AWS Access Key ID [None]: AKU832EUBFEFWICT
AWS Secret Access Key [None]: 5HZMEFi4ff4F4DEi24HYEsOPDNE8DYWTzCx
Default region name [us-east-2]: us-east-2
Default output format [table]: table
$ aws sts get-caller-identity
-----------------------------------------------------
|                 GetCallerIdentity                 |
+---------+-----------------------------------------+
|  Account|  947134793474                           |  <- AWS_ACCOUNT_ID
|  Arn    |  arn:aws:iam::947134793474:user/admin   |
|  UserId |  AIDJEFFEIUFBFUR245EPV                  |
+---------+-----------------------------------------+
Remember your AWS_ACCOUNT_ID. We'll use it in the next steps.
Now we are all set up to create Terraform project!
Creating Terraform Project
Let's create a new folder django-aws/django-aws-infrastructure for our Terraform project.
cd ..
mkdir django-aws-infrastructure && cd django-aws-infrastructure
git init --initial-branch=main
Add a file provider.tf:
provider "aws" {
  region = var.region
}
Here, we defined the AWS provider. We use Terraform variable for specifying an AWS region. Let's define region and project_name variables in the variables.tf file:
variable "region" {
  description = "The AWS region to create resources in."
  default     = "us-east-2"
}

variable "project_name" {
  description = "Project name to use in resource names"
  default     = "django-aws"
}
Run terraform init to create a new Terraform working directory and download the AWS provider.
Now we are ready to create resources for our infrastructure.
AWS Resources
Here is the plan, and what we are going to configure.
- ECR
- Networking:
- VPC
- Public and private subnets
- Routing tables
- Internet and NAT gateways
- Load Balancer:
- ECS:
To keep the code clean, we will follow this naming convention in this guide.
ECR
First, we'll create a Docker registry and push our image to it. Create a ecr.tf file:
resource "aws_ecr_repository" "backend" {
  name                 = "${var.project_name}-backend"
  image_tag_mutability = "MUTABLE"
}
Then run terraform plan. You'll see that Terraform is going to create an ECR repository.
Terraform will perform the following actions:

  # aws_ecr_repository.backend will be created
  + resource "aws_ecr_repository" "backend" {
      ...
    }

Plan: 1 to add, 0 to change, 0 to destroy.
Run terraform apply. You should see the same plan again. Type yes to confirm changes.
aws_ecr_repository.backend: Creating...
aws_ecr_repository.backend: Creation complete after 1s [id=django-aws-backend]

Apply complete! Resources: 1 added, 0 changed, 0 destroyed.
The repository is created. Now, let's push our Django image to this new registry. You need to build an image with tag ${AWS_ACCOUNT_ID}.dkr.ecr.${REGION}.amazonaws.com/django-aws-backend:latest, authorize in the ECR, and push an image:
$ cd ../django-aws-backend
$ docker build . -t 947134793474.dkr.ecr.us-east-2.amazonaws.com/django-aws-backend:latest
$ aws ecr get-login-password --region us-east-2 | docker login --username AWS --password-stdin 947134793474.dkr.ecr.us-east-2.amazonaws.com
$ docker push 947134793474.dkr.ecr.us-east-2.amazonaws.com/django-aws-backend:latest
Network
Now, let's create a network for our application. Add this block to the variables.tf file:
variable "availability_zones" {
  description = "Availability zones"
  default     = ["us-east-2a", "us-east-2c"]
}
And create a network.tf file with the following content:
# Production VPC
resource "aws_vpc" "prod" {
  cidr_block           = "10.0.0.0/16"
  enable_dns_support   = true
  enable_dns_hostnames = true
}

# Public subnets
resource "aws_subnet" "prod_public_1" {
  cidr_block        = "10.0.1.0/24"
  vpc_id            = aws_vpc.prod.id
  availability_zone = var.availability_zones[0]
  tags = {
    Name = "prod-public-1"
  }
}
resource "aws_subnet" "prod_public_2" {
  cidr_block        = "10.0.2.0/24"
  vpc_id            = aws_vpc.prod.id
  availability_zone = var.availability_zones[1]
  tags = {
    Name = "prod-public-2"
  }
}

# Private subnets
resource "aws_subnet" "prod_private_1" {
  cidr_block        = "10.0.3.0/24"
  vpc_id            = aws_vpc.prod.id
  availability_zone = var.availability_zones[0]
  tags = {
    Name = "prod-private-1"
  }
}
resource "aws_subnet" "prod_private_2" {
  cidr_block        = "10.0.4.0/24"
  vpc_id            = aws_vpc.prod.id
  availability_zone = var.availability_zones[1]
  tags = {
    Name = "prod-private-2"
  }
}

# Route tables and association with the subnets
resource "aws_route_table" "prod_public" {
  vpc_id = aws_vpc.prod.id
}
resource "aws_route_table_association" "prod_public_1" {
  route_table_id = aws_route_table.prod_public.id
  subnet_id      = aws_subnet.prod_public_1.id
}
resource "aws_route_table_association" "prod_public_2" {
  route_table_id = aws_route_table.prod_public.id
  subnet_id      = aws_subnet.prod_public_2.id
}

resource "aws_route_table" "prod_private" {
  vpc_id = aws_vpc.prod.id
}
resource "aws_route_table_association" "private_1" {
  route_table_id = aws_route_table.prod_private.id
  subnet_id      = aws_subnet.prod_private_1.id
}
resource "aws_route_table_association" "private_2" {
  route_table_id = aws_route_table.prod_private.id
  subnet_id      = aws_subnet.prod_private_2.id
}

# Internet Gateway for the public subnet
resource "aws_internet_gateway" "prod" {
  vpc_id = aws_vpc.prod.id
}
resource "aws_route" "prod_internet_gateway" {
  route_table_id         = aws_route_table.prod_public.id
  gateway_id             = aws_internet_gateway.prod.id
  destination_cidr_block = "0.0.0.0/0"
}

# NAT gateway
resource "aws_eip" "prod_nat_gateway" {
  vpc                       = true
  associate_with_private_ip = "10.0.0.5"
  depends_on                = [aws_internet_gateway.prod]
}
resource "aws_nat_gateway" "prod" {
  allocation_id = aws_eip.prod_nat_gateway.id
  subnet_id     = aws_subnet.prod_public_1.id
}
resource "aws_route" "prod_nat_gateway" {
  route_table_id         = aws_route_table.prod_private.id
  nat_gateway_id         = aws_nat_gateway.prod.id
  destination_cidr_block = "0.0.0.0/0"
}
Here, we've defined the following resources:
- Virtual Private Cloud.
- Public and Private subnets in different Availability zones
- Internet Gateway for internet access for public subnets.
- NAT Gateway for internet access for private subnets.
Run terraform apply to apply changes on AWS.
Load Balancer
Next, create a load_balancer.tf file with the following content:
# Application Load Balancer for production
resource "aws_lb" "prod" {
  name               = "prod"
  load_balancer_type = "application"
  internal           = false
  security_groups    = [aws_security_group.prod_lb.id]
  subnets            = [aws_subnet.prod_public_1.id, aws_subnet.prod_public_2.id]
}

# Target group for backend web application
resource "aws_lb_target_group" "prod_backend" {
  name        = "prod-backend"
  port        = 80
  protocol    = "HTTP"
  vpc_id      = aws_vpc.prod.id
  target_type = "ip"

  health_check {
    path                = "/"
    port                = "traffic-port"
    healthy_threshold   = 5
    unhealthy_threshold = 2
    timeout             = 2
    interval            = 5
    matcher             = "200"
  }
}

# Target listener for http:80
resource "aws_lb_listener" "prod_http" {
  load_balancer_arn = aws_lb.prod.id
  port              = "80"
  protocol          = "HTTP"
  depends_on        = [aws_lb_target_group.prod_backend]

  default_action {
    type             = "forward"
    target_group_arn = aws_lb_target_group.prod_backend.arn
  }
}

# Allow traffic from 80 and 443 ports only
resource "aws_security_group" "prod_lb" {
  name        = "prod-lb"
  description = "Controls access to the ALB"
  vpc_id      = aws_vpc.prod.id

  ingress {
    from_port   = 80
    to_port     = 80
    protocol    = "tcp"
    cidr_blocks = ["0.0.0.0/0"]
  }

  ingress {
    from_port   = 443
    to_port     = 443
    protocol    = "tcp"
    cidr_blocks = ["0.0.0.0/0"]
  }

  egress {
    from_port   = 0
    to_port     = 0
    protocol    = "-1"
    cidr_blocks = ["0.0.0.0/0"]
  }
}
Here we are going to create:
- Application Load Balancer
- LB Listener to receive incoming HTTP requests.
- LB Target group to route requests to the Django application.
- Security Group to control incoming traffic to load balancer.
Also, we want to know the load balancer URL. Add a outputs.tf file with the following code and run terraform apply to create a load balancer and see its hostname.
output "prod_lb_domain" {
  value = aws_lb.prod.dns_name
}
You should see your ALB domain in the output.
Outputs:

prod_lb_hostname = "prod-57218461274.us-east-2.elb.amazonaws.com"
Visit this domain in your browser. It should respond with 503 Service Temporarily Unavailable error because there are no targets associated with the target group yet. In the next step, we'll deploy the Django application that will be accessible by this URL.
Application
Finally, we'll create the application ECS Service. Add a ecs.tf file with the following content:
# Production cluster
resource "aws_ecs_cluster" "prod" {
  name = "prod"
}

# Backend web task definition and service
resource "aws_ecs_task_definition" "prod_backend_web" {
  network_mode             = "awsvpc"
  requires_compatibilities = ["FARGATE"]
  cpu                      = 256
  memory                   = 512

  family = "backend-web"
  container_definitions = templatefile(
    "templates/backend_container.json.tpl",
    {
      region     = var.region
      name       = "prod-backend-web"
      image      = aws_ecr_repository.backend.repository_url
      command    = ["gunicorn", "-w", "3", "-b", ":8000", "django_aws.wsgi:application"]
      log_group  = aws_cloudwatch_log_group.prod_backend.name
      log_stream = aws_cloudwatch_log_stream.prod_backend_web.name
    },
  )
  execution_role_arn = aws_iam_role.ecs_task_execution.arn
  task_role_arn      = aws_iam_role.prod_backend_task.arn
}

resource "aws_ecs_service" "prod_backend_web" {
  name                               = "prod-backend-web"
  cluster                            = aws_ecs_cluster.prod.id
  task_definition                    = aws_ecs_task_definition.prod_backend_web.arn
  desired_count                      = 1
  deployment_minimum_healthy_percent = 50
  deployment_maximum_percent         = 200
  launch_type                        = "FARGATE"
  scheduling_strategy                = "REPLICA"

  load_balancer {
    target_group_arn = aws_lb_target_group.prod_backend.arn
    container_name   = "prod-backend-web"
    container_port   = 8000
  }

  network_configuration {
    security_groups  = [aws_security_group.prod_ecs_backend.id]
    subnets          = [aws_subnet.prod_private_1.id, aws_subnet.prod_private_2.id]
    assign_public_ip = false
  }
}

# Security Group
resource "aws_security_group" "prod_ecs_backend" {
  name        = "prod-ecs-backend"
  vpc_id      = aws_vpc.prod.id

  ingress {
    from_port       = 0
    to_port         = 0
    protocol        = "-1"
    security_groups = [aws_security_group.prod_lb.id]
  }

  egress {
    from_port   = 0
    to_port     = 0
    protocol    = "-1"
    cidr_blocks = ["0.0.0.0/0"]
  }
}

# IAM roles and policies
resource "aws_iam_role" "prod_backend_task" {
  name = "prod-backend-task"

  assume_role_policy = jsonencode({
    Version = "2012-10-17",
    Statement = [
      {
        Action = "sts:AssumeRole",
        Principal = {
          Service = "ecs-tasks.amazonaws.com"
        },
        Effect = "Allow",
        Sid    = ""
      }
    ]
  })
}

resource "aws_iam_role" "ecs_task_execution" {
  name = "ecs-task-execution"

  assume_role_policy = jsonencode(
    {
      Version = "2012-10-17",
      Statement = [
        {
          Action = "sts:AssumeRole",
          Principal = {
            Service = "ecs-tasks.amazonaws.com"
          },
          Effect = "Allow",
          Sid    = ""
        }
      ]
    }
  )
}

resource "aws_iam_role_policy_attachment" "ecs-task-execution-role-policy-attachment" {
  role       = aws_iam_role.ecs_task_execution.name
  policy_arn = "arn:aws:iam::aws:policy/service-role/AmazonECSTaskExecutionRolePolicy"
}

# Cloudwatch Logs
resource "aws_cloudwatch_log_group" "prod_backend" {
  name              = "prod-backend"
  retention_in_days = var.ecs_prod_backend_retention_days
}

resource "aws_cloudwatch_log_stream" "prod_backend_web" {
  name           = "prod-backend-web"
  log_group_name = aws_cloudwatch_log_group.prod_backend.name
}
Also, add the ecs_prod_backend_retention_days variable to the variables.tf file:
variable "ecs_prod_backend_retention_days" {
  description = "Retention period for backend logs"
  default     = 30
}
and add a container definition in a new templates/backend_container.json.tpl file and run terraform apply.
[
  {
    "name": "${name}",
    "image": "${image}",
    "essential": true,
    "links": [],
    "portMappings": [
      {
        "containerPort": 8000,
        "hostPort": 8000,
        "protocol": "tcp"
      }
    ],
    "command": ${jsonencode(command)},
    "logConfiguration": {
      "logDriver": "awslogs",
      "options": {
        "awslogs-group": "${log_group}",
        "awslogs-region": "${region}",
        "awslogs-stream-prefix": "${log_stream}"
      }
    }
  }
]
Here we've created:
- ECS Cluster
- ECS Task Definition
- ECS Service to run tasks with the specified definition in the ECS cluster
- IAM Policies to allow tasks access to resources.
- Cloudwatch Log group and stream for log collection.
Now, go to the AWS Console and look at your running service and tasks.


Check the Load Balancer domain in a browser to ensure that our setup works. You should see Django's starting page.


Our setup is working, so it's time to commit our changes in the django-aws-infrastructure repo. Add a .gitignore file and commit changes:
# Local .terraform directories
**/.terraform/*

# .tfstate files
*.tfstate
*.tfstate.*

# Crash log files
crash.log
crash.*.log

# Exclude all .tfvars files, which are likely to contain sensitive data, such as
# password, private keys, and other secrets. These should not be part of version
# control as they are data points which are potentially sensitive and subject
# to change depending on the environment.
*.tfvars
*.tfvars.json

# Ignore override files as they are usually used to override resources locally and so
# are not checked in
override.tf
override.tf.json
*_override.tf
*_override.tf.json

# Include override files you do wish to add to version control using negated pattern
# !example_override.tf

# Include tfplan files to ignore the plan output of command: terraform plan -out=tfplan
# example: *tfplan*

# Ignore CLI configuration files
.terraformrc
terraform.rc

.idea/
.DS_Store
.env
$ git add .
$ git commit -m "initialize infrastructure"
Bottom line
Congratulations! Now we have deployed the Django web application with ECS Service + Fargate. But now it works with SQLite file database. This file will be recreated on every service restart. So, our app cannot persist any data for now. In the next article, we'll connect Django to AWS RDS PostgreSQL.
Connect with me directly on LinkedIn.
Also published here.

L O A D I N G
. . . comments & more!
. . . comments & more!
About Author

TOPICS
THIS ARTICLE WAS FEATURED IN...


RELATED STORIES


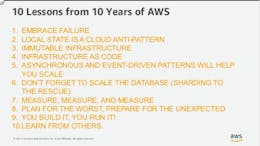
10 Lessons from 10 Years of AWS (part 1) #aws
Dec 02, 2017

