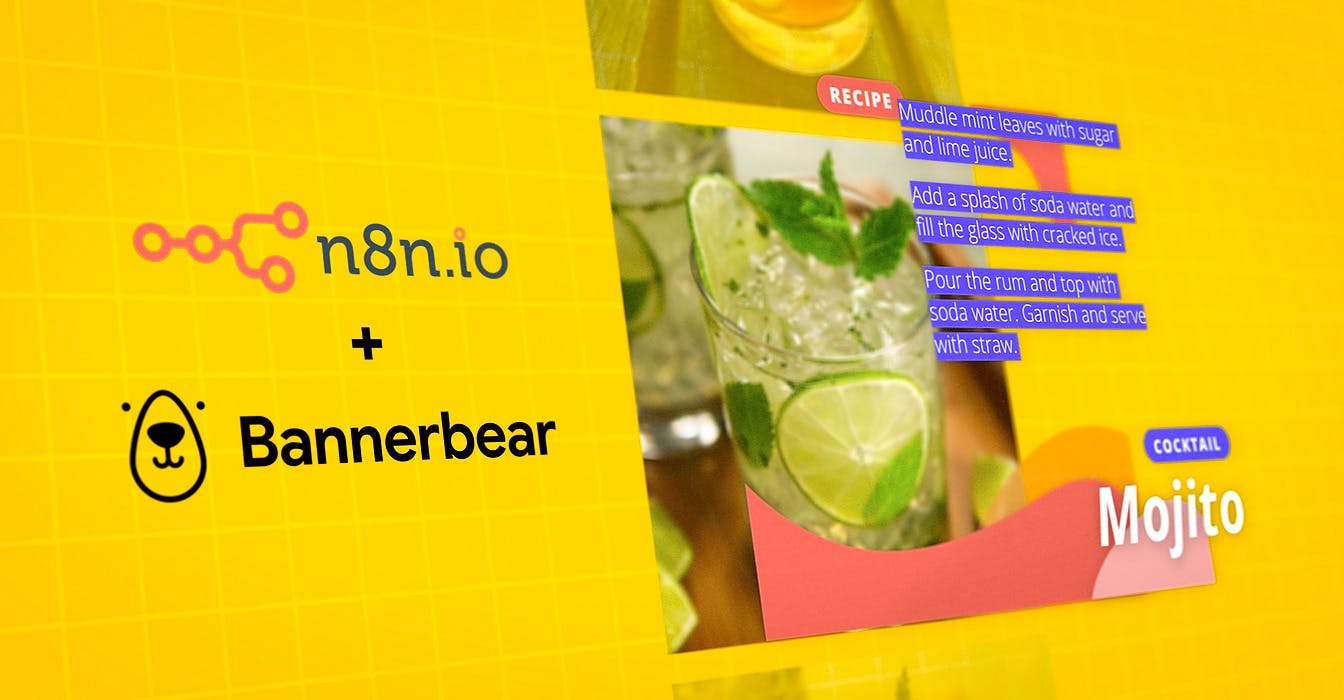
As a designer and self-proclaimed data nerd, I’ve been involved in creative deliverables for some time. Up until now however, my concepts always had to reconcile with the limitations of macros or my coding skills. n8n empowers me to apply my basic understanding of data objects and the interwebs to create some pretty slick automations with minimal effort. proceduralizing InDesign When it comes to creativity in a design context, many tasks don’t involve a whole lot of creativity — for example, updating a daily quote post graphic. What piques my interest is how do we empower designers to stay creative and leave the grunt work to automation. In this tutorial, I will teach you how to create your very own procedural graphic banner workflow. Using a styled template, we’ll automate modifying image and text layers to generate creative graphics on-demand. In the interest of fun, we’ll create some Cocktail Recipe banners. However, this workflow can easily be tweaked to be very useful in marketing, e-commerce, and beyond. Creating the workflow in five parts We’ll use n8n integrations for and to get this workflow up and running. Rocket.Chat is a scalable and open-source alternative to messaging app Slack, and Bannerbear is a simple REST API that automatically generates variations of graphic templates at scale. Bannerbear Rocket.Chat To accomplish this, we’ll go through five steps: Creating a Cron node Creating an HTTP Request node Designing a Bannerbear template Creating a Bannerbear node Creating a Rocket.Chat node I have also submitted the on n8n.io, in case you’d like to skim through it. Please note that you’ll still need to configure a couple of things like your credentials as well as the settings of the Bannerbear and Rocket.Chat node. You can find information on how to set up n8n in the . workflow documentation 1. Cron node: Trigger the workflow every Friday evening First of all, start n8n with the following command: n8n start In the Node Editor view, add a new node by clicking on the + button on the top right of the Editor UI. Select the node under the section. Click on the button, select ‘Every Week’ as the ‘18’ as the , and ‘Friday’ as the . You can set the cron job to trigger whenever you like. Cron Triggers Add Cron Time Mode, Hour Weekday In my case, it’ll trigger at 6 PM, giving me enough time to prepare the cocktail before enjoying it. Unfortunately, the workflow can’t make the actual cocktail for you … yet 🙃 Here’s a GIF of me following the steps above. 2. HTTP Request node: Get random cocktail recipe data Next, let’s add an HTTP Request node. It can be used to query an API so that we can fetch a random cocktail recipe whenever the workflow is triggered. We’ll use to get information about a random cocktail recipe. They offer a free test API key and each Cocktail comes with an image, name and recipe which will be perfect for our use case. Create the HTTP Request node by clicking on the + button on the top right of the Editor UI. In the node configuration view, enter the following URL: TheCocktailDB https://www.thecocktaildb.com/api/json/v1/1/random.php When you click on the button, you’ll see that the node will pull in the details of a random cocktail for you. Here’s a GIF of me following the steps mentioned above. Execute Node 3. Bannerbear app: create a template First of all, create a free account. Now, create a new Project. I named mine ‘Cocktail Recipes’. Each project in Bannerbear can house many templates. Create a new template by clicking on the button. Next, select ‘Square (1000x1000)’ as your size format and hit . Bannerbear Create a Template Save Now, click on to open the template designer — if you’ve ever used Photoshop or Sketch, this should look familiar. It’s a typical layer-based design tool, where you add layers of images, text, and shapes to create your graphic template. Edit Template CocktailDB provides a square image for each cocktail entry, so let’s use that as a background image for our template. Click the + icon next to on the left-hand side panel, and select “Image Rectangle (API)”. New Layer Don’t select ‘Image’ as we need the API functionality to be able to modify this image programmatically and use Bannerbear’s fancy auto-resizing logic. Note: On your canvas, click on the newly added image and resize it to fit the entire canvas. Here’s a GIF of me following the steps mentioned above. With the ‘Image Rectangle’ still selected, set the to ‘fill’. Set AnchorX and AnchorY to ‘center’ from the Layer property panel (located on the right-hand side of your canvas). This will ensure that images scale to fit the whole canvas while maintaining their aspect ratio — to avoid it looking “squished”. Type Lastly, set the layer’s name to — we’ll use this later to access the layer from n8n. cocktail-image Next, add another new layer and select ‘Text (API)’ from the dropdown. Set the layer’s name to . Increase the font size to ±80 as we’ll use this layer for our Cocktail name. Feel free to style or position it how you like. title Repeat this step and create another text layer, this time naming it . In my template, I’m overlaying the recipe instructions over the Cocktail image. To ensure it’s always legible, for example, when the background image has lots of light colors, you can opt to assign a “Background color” to the text. Here’s a GIF of me following the steps mentioned above. recipe Lastly, I created some overlay graphics in Illustrator to give our banner some visual oomph. This is a great way to incorporate a visual identity into the template and offload the “heavy lifting” of design into more advanced tools. I created or design your own (free templates are available for personal use on ). In the template editor, Add a new layer, select “Image” then upload your image via the Layer property panel. Download the assets vecteezy.com Below is a photo reference of our final template in the Bannerbear editor. 4. Bannerbear node: Automate the image design Before switching back to the n8n editor, click on the button in Bannerbear and copy the . Back in the n8n editor, we will add a Bannerbear node to automate creating variations of our template. Settings / API Key Project API Key In the Bannerbear node, add a new credential and paste the there. Select ‘Cocktail Recipe’ as the from the dropdown. Now, click on the button, select ‘Wait for Image’ and toggle the button to activate it. Since Bannerbear takes a few seconds to generate the image, this option makes sure that the node waits until the image has been created and passes the image URL in the result. Project API Key Template ID Add Field Now, under the section, click on the button. First of all, let’s specify the background image by selecting the cocktail-image layer. Since the Image URL is a dynamic piece of information, click on the Add Expression button by clicking on the gears icon. In the Variable Selector, choose the following variable: Modifications Add Modification Nodes > HTTP Request > Output Data > JSON > drinks > [Item: 0] > strDrinkThumb Add another modification, select the title layer and in the field, select the following from the Variable Selector: Text Nodes > HTTP Request > Output Data > JSON > drinks > [Item: 0] > strDrink Finally, add another modification, select the recipe layer and in the field, select the following from the Variable Selector: Text Nodes > HTTP Request > Output Data > JSON > drinks > [Item: 0] > strInstructions Now, click on the button, you’ll see that the node will output the prepared image’s URL as well. Here’s a GIF of me following the steps mentioned above. Execute Node 5. Rocket.Chat node: Post the image in a channel Add a Rocket.Chat node by clicking on the + button on the top right and selecting the node. In the Node Editor, enter your Rocket.Chat credentials. Here’s some detailed on how to create an and for the credentials. While creating your personal access tokens, don’t forget to select ‘Ignore (Two Factor Authentication)’ before clicking on the button. Rocketchat information User ID Auth Key Add Next, we need to enter the . I entered #general, feel free to enter a channel of your choosing. Now, we can send a picture of the delicious cocktail by clicking on ‘Add attachment’ under Attachments. Click on ‘Add attachment item’ and select ‘Image URL’. To fill the field, select the option. Once you have the editor open, select the following in the variable selector: Channel Image URL Add Expression Nodes > Bannerbear > Output Data > JSON > image_url Don’t forget to activate the workflow by toggling the activate button on the top right. Here’s a GIF of me following the steps mentioned above. Next Steps You can apply the steps in this walkthrough to build far more powerful use cases than our fun Cocktail Recipe banners. Especially for marketing, e-commerce, and content calendar needs. Below I’ve listed some ways in which this workflow could be expanded — feel free to try these out and drop a comment if you’d like for us to cover them: You could design different versions of the banner template, each optimized for their intended delivery channel — like an Instagram Story (9:16) or a Facebook post (1.91:1) and attach them to a new card in a Trello board. Use IF logic nodes in n8n to pass a predefined image to a Bannerbear template. In our Cocktail banner, this could be used to add the correct drinkware icon depending on the glass type of the cocktail (like “Highball” or “Collins”). Create a Bannerbear template for a mockup of your SaaS solution and generate variations with your leads’ name, photo and company logo. Conclusion We’ve created a nifty proof of concept to demonstrate procedurally modifying graphics. A similar setup using the Sketch command-line tool is also possible. But from my experience, this is a much longer process that requires a lot more lines of code. The biggest takeaway for designers and programmers alike is how simple yet potentially powerful the actual mechanics of this whole workflow are. I am really curious to see what kinds of workflows you cook up with Bannerbear and n8n. What types of use cases do you think would be most valuable? Drop a comment below — I love to discuss use case ideas or get feedback on what you’d like to see next. In case you’ve run into an issue while following the tutorial, feel free to reach out to me on or ask for help on our 💙 LinkedIn forum Previously published at https://medium.com/n8n-io/automate-designs-with-bannerbear-and-n8n-2b64c94b54db