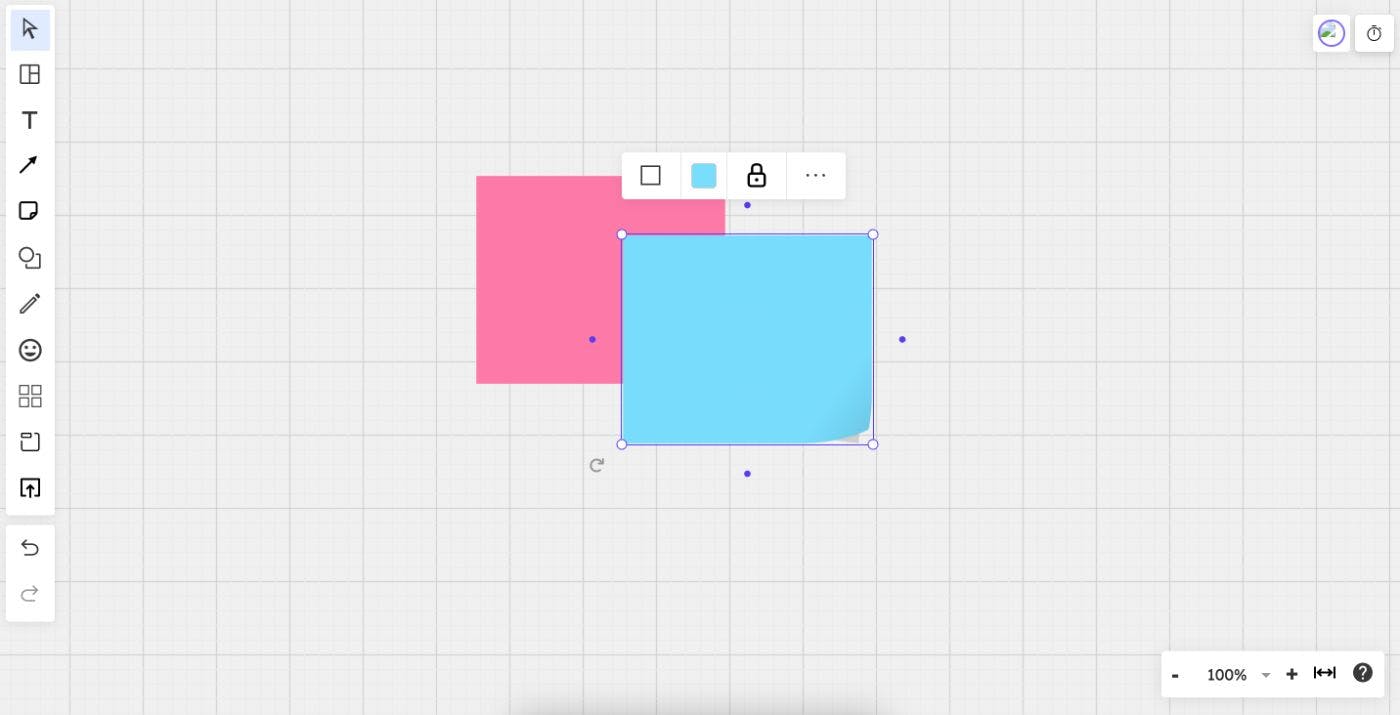
In the world of web design and development, achieving pixel-perfect alignment of objects on a canvas is crucial for creating visually appealing and polished user interfaces. Object snapping, which allows objects to align to predefined guidelines or other objects, plays a vital role in ensuring precise positioning and spacing. Fabric.js, a powerful and feature-rich JavaScript library for working with HTML5 canvas, provides various tools and functionalities to facilitate object snapping. In this article, we will delve into the concept of object snapping and introduce the SnappyRect class, a custom implementation that extends the functionality of Fabric.js. A. Importance of Object Snapping in Web Design and Development When designing user interfaces or working on graphic-intensive web projects, aligning elements accurately is key to achieving a professional and visually pleasing outcome. Object snapping simplifies this process by automatically aligning objects to specific guidelines or nearby objects, making it easier to maintain consistent spacing and alignments. By incorporating object snapping into your web design workflow, you can save valuable time that would otherwise be spent manually adjusting and aligning objects. Additionally, object snapping helps ensure a seamless and cohesive user experience by eliminating small visual inconsistencies that may arise due to misaligned elements. B. Overview of the SnappyRect Class in Fabric.js Fabric.js offers a wide range of tools and utilities for . Nevertheless, the library doesn't have a built-in object snapping feature. To overcome this restriction, we can use the flexibility of Fabric.js to develop our personalized object snapping system. handling canvas objects The SnappyRect class is an extension of the base fabric.Rect class in Fabric.js. It enhances the functionality of a rectangular object by adding custom guide lines that assist in object snapping. These guides, represented by lines, indicate the , , , , , and positions of the SnappyRect object. top bottom left right center horizontal center vertical In the next sections, we will explore the inner workings of the SnappyRect class and understand how it leverages Fabric.js to create and manipulate these custom guides. We will also learn how to integrate the SnappyRect class into our projects, enabling us to achieve precise object snapping in our canvas-based applications. II. Understanding the SnappyRect Class In this section, we will explore the structure and inner workings of the SnappyRect class. Understanding how the class is implemented will provide insights into how the custom guides are created and managed for object snapping. Complete code: https://github.com/dinesh-rawat-dev/fabricjs-prodeasy-snappy-rect Demo: https://codesandbox.io/s/fabric-js-smart-guides-snappy-rect-z9xd67 A. Overview of the SnappyRect Class Structure The SnappyRect class is created as an extension of the base fabric.Rect class provided by Fabric.js. It inherits all the properties and methods of the base class and adds custom functionality specific to object snapping. const SnappyRect = fabric.util.createClass(fabric.Rect, { // Custom properties and methods go here }); B. The initialize Method and Guide Initialization The initialize method is called when a new instance of the SnappyRect class is created. It overrides the base initialize method to initialize the custom properties of the object. One such property is guides, which is an empty object used to store references to the guide lines. SnappyRect initialize: function(options) { options || (options = {}); this.callSuper("initialize", options); this.guides = {}; }, C. The _render Method and Guide Rendering The method is responsible for rendering the SnappyRect object on the canvas. It overrides the base method to ensure that the custom guides are also rendered alongside the rectangular shape. _render _render _render: function(ctx) { this.callSuper("_render", ctx); this._drawObjectGuides(); }, D. The _drawObjectGuides Method and Guide Positioning The method is where the actual positioning and rendering of the guide lines take place. It calculates the width and height of the object and calls the _drawGuide method for each guide, passing the appropriate position. _drawObjectGuides SnappyRect _drawObjectGuides: function() { const w = this.getScaledWidth(); const h = this.getScaledHeight(); this._drawGuide("top", this.top); this._drawGuide("left", this.left); this._drawGuide("centerX", this.left + w / 2); this._drawGuide("centerY", this.top + h / 2); this._drawGuide("right", this.left + w); this._drawGuide("bottom", this.top + h); this.setCoords(); }, E. The _drawGuide Method and Guide Creation The method is responsible for creating and positioning individual guide lines based on the given side and position. It uses the fabric.Line class to create a line object, and the lineProps object defines the common properties shared by all guide lines. _drawGuide _drawGuide: function(side, pos) { let ln; const color = "rgb(178, 207, 255)"; const lineProps = { left: 0, top: 0, evented: true, stroke: color, selectable: false, opacity: 1 }; // Guide line creation based on side and position // ... if (this.guides[side] instanceof fabric.Line) { // Remove the existing line if it already exists this.canvas.remove(this.guides[side]); delete this.guides[side]; } // Add the new guide line to the canvas this.guides[side] = ln; this.canvas.add(ln); }, F. Managing Guide Updates and Interactions To ensure that the guides are updated and interact properly with the SnappyRect object, various methods and event handlers need to be implemented. These may include methods for guide , , and handling object . dragging updating positions transformations By effectively managing these guide interactions, the class enables precise object snapping on the canvas, providing a seamless user experience when aligning and positioning objects. SnappyRect III. Using the SnappyRect Class To make use of the SnappyRect class in your code, follow these instructions: 1. Import the SnappyRect class: import { SnappyRect } from "./fabric-guidelines"; 2. Create an instance of SnappyRect by providing the necessary parameters, such as , , , , and : width height fill top left var snappy = new SnappyRect({ width: 150, height: 150, fill: "yellow", top: 10, left: 10 }); 3. Add the SnappyRect object to the canvas: canvas.add(snappy).renderAll(); With these steps, you have successfully added a SnappyRect object to your canvas. The SnappyRect class will handle the snapping functionality and provide smart guides to align and position the object accurately. In the code, we have already implemented event handlers such as , , and . These event handlers trigger the necessary actions when an object is added or moved on the canvas. The class takes care of drawing the smart guides and performing the snapping behavior. onObjectAdded onObjectMoved onObjectMoving SnappyRect You can customize the appearance and behavior of the SnappyRect object by modifying the parameters passed to the SnappyRect constructor. For example, you can adjust the width, height, fill color, top position, and left position to match your requirements. Feel free to experiment with different parameters and test the snapping behavior of the SnappyRect object on the canvas.