paint-brush
Lightweight CSS Animations with Figma & Figmotionby@mikefrederick
5,145 reads
5,145 reads

Lightweight CSS Animations with Figma & Figmotion

by Flatirons DevelopmentDecember 17th, 2021
Read on Terminal Reader
Read this story w/o Javascript
tldt arrow

Too Long; Didn't Read

How to create lightweight animations in CSS/HTML/SVGs using Figma and Figmotion.

People Mentioned

Mention Thumbnail

Companies Mentioned

Mention Thumbnail
Mention Thumbnail
featured image - Lightweight CSS Animations with Figma & Figmotion
Flatirons Development HackerNoon profile picture

Traditionally, creating animations with CSS is, well, a pain. Animations in general are complex in nature and the issue with creating beautiful animations is further complicated by the fact that many UX/UI designers use tools that aren’t typically intended to create animations. This makes it hard for developers to translate an idea from a designer's head to the page.

Over the years, collaboration between designers and developers has accelerated increasingly with the introduction of tools like Figma and Zeplin. In this article, I want to explore how designers and developers can leverage Figma to create lightweight, beautiful animations with CSS and HTML using a plugin called Figmotion.

Step 1: Installing & Launching Figmotion

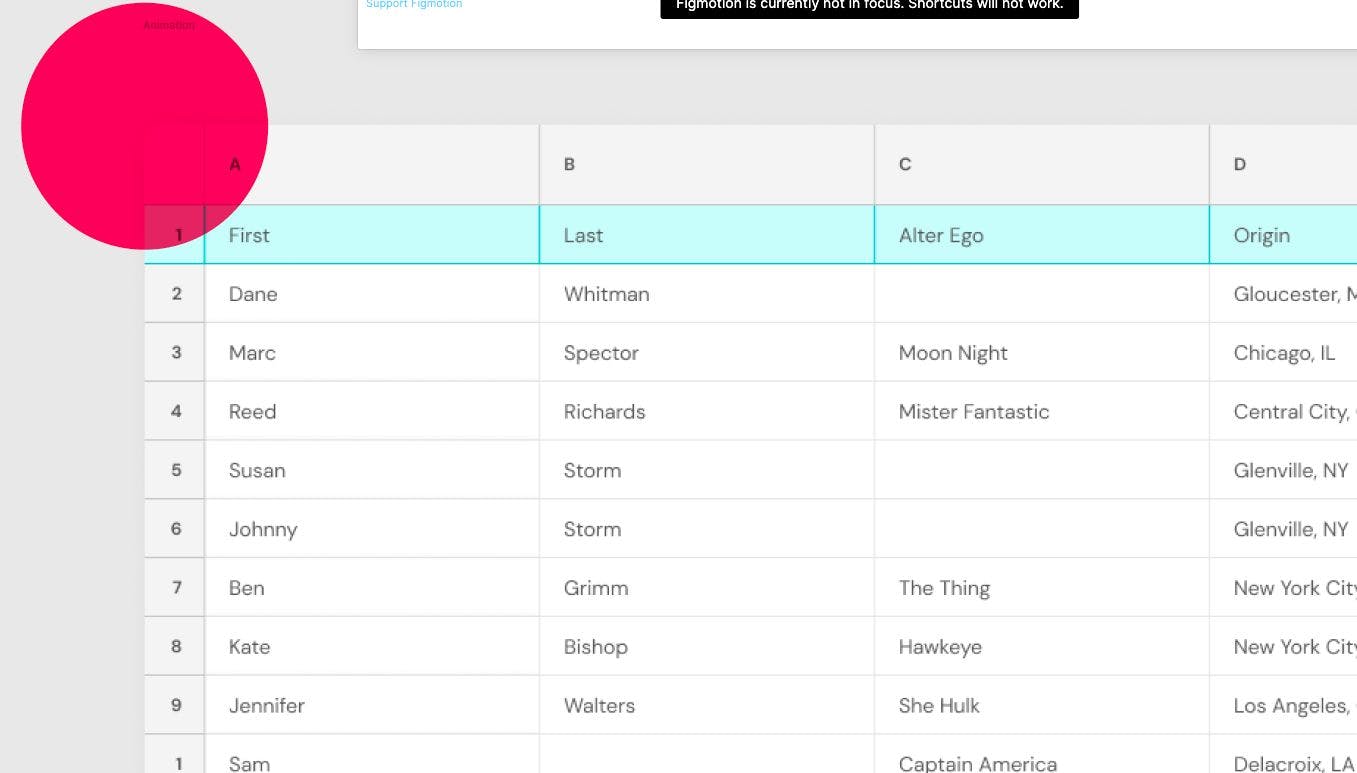
First, we will need a tool called Figmotion. Let’s start with an existing Figma design.  If you don’t already have one, you’ll have to create an account on Figma and login to interact with the design. It contains a spreadsheet and a ball. You will need to install Figmotion, which you can do here.

To launch Figmotion, within Figma navigate to Plugins → Figmotion → Open Figmotion. You should see a box similar to the one below.

Select the Animation frame and you will see the Ball and the Spreadsheet within Figmotion on top of the design. 

Step 2: Creating your First Animation in Figma and Figmotion

Now that we have Figmotion setup, we are going to create our animation. For the sake of this tutorial, we will animate the ball around the edge of the spreadsheet over the course of 2 seconds (0.5 seconds per edge of the spreadsheet). To do so, we will use the Ball layer in Figmotion and change its position at different time intervals. In order to do this, we need to know the dimensions of the spreadsheet. Click on the spreadsheet in Figma, and record the width and height values in the top right of the screen:

Great! It looks like the width of the spreadsheet is 434, and the height is 276. Now, let’s return to Figmotion. Click on the Ball layer in Figmotion. This will expand a set of animatable properties like so:

For our sake, since we are only animating the position of the ball, we will only need to worry about the X and Y values within Figmotion. Let’s start by animating the ball across the top of the spreadsheet. Click on the 500ms marker at the top of Figmotion, and then click the little icons next to the X and Y properties of the ball. I have annotated the three areas to click below:

Now, since we are only animating the top edge of the ball, only the X value of the ball needs to change. Click the X property at 500ms and enter 434 next to “linear” (the width of the spreadsheet above). You should see something like this after hitting OK.

Cool! The ball moved to the right-hand side of the spreadsheet. We need to repeat this step 3 more times:At the 1000ms marker, change the Y property of the ball to the height of the spreadsheet (276). The X value can remain at 434. At the 1500ms marker, change the X property of the ball 0. The Y value can remain at 276. This will position the ball in the bottom right hand corner of the spreadsheet. At the 2000ms marker, we will animate the ball back to the original position of 0, 0. Change the X and Y values in Figmotion to 0, 0.

Step 3: Preview your Animation

In the top left of Figmotion, click the play button. You should see the ball animate around the edge of the spreadsheet.

Step 4: Exporting your Animation to HTML/CSS

To convert this animation to HTML/CSS, we will end with 4 files: an index.html file, an animation.css file, an SVG for the ball, and an SVG for the spreadsheet. Export ball.svg and the spreadsheet.svg from Figma. In order to do so, select the ball, and in the right panel of Figma expand the Export box and choose to save it to a folder as ball.svg. Repeat for the spreadsheet.

To export the animation, click “Export” from within the Figmotion box. Choose to export As CSS and save the file as animation.css.

Create an index.html file that imports the animation.css file. In our index.html file, we will need to position the ball.svg and spreadsheet.svg elements together. This is the code I added to index.html and to the bottom of the animation.css that Figmotion generated:


index.html

<!doctype html>
<html lang="en">
<head>
  <meta charset="utf-8">
  <meta name="viewport" content="width=device-width, initial-scale=1">
  <link rel="stylesheet" href="animation.css">
</head>

<body>
  <div id="content">
    <img src="spreadsheet.svg" />
    <img src="ball.svg" id="Ball" />
  </div>
</body>
</html>

animation.css

#content {
  position: relative;
  margin-top: 150px;
  margin-left: 150px;
}

#content img {
  position: absolute;
  top: 0;
  left: 0;
}

Step 5: View Your Animation!

Open index.html. That’s it! You should be able to see your animation like so:

Hopefully, this tutorial helps others with the creation of their own animations! You can see my code and the final gif above on GitHub here. And always, for beautiful CSS and products visit us at Flatirons Development.