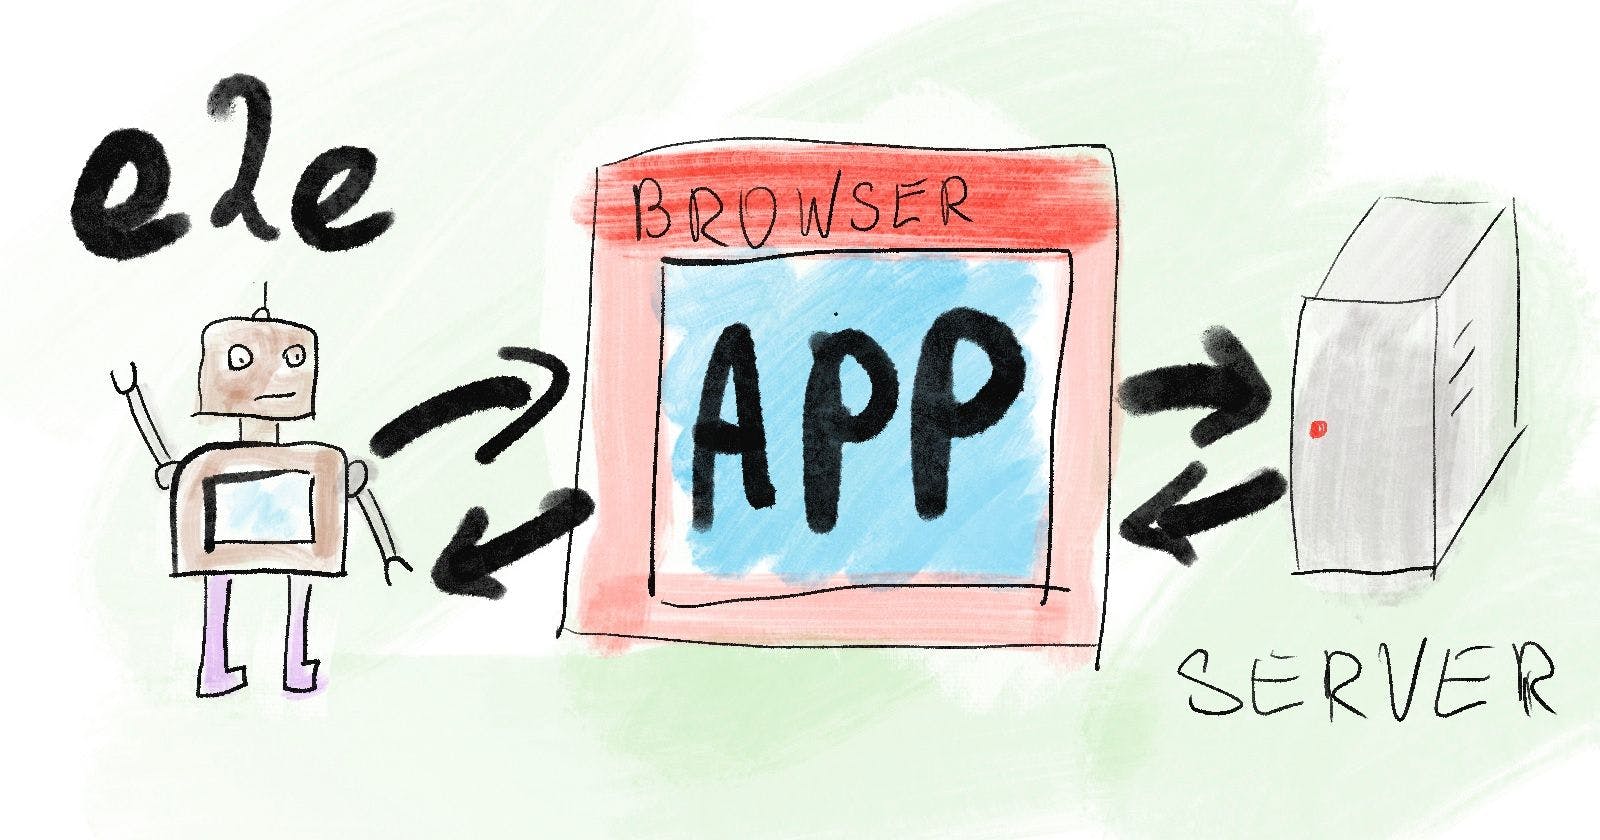
My name is Vladimir, I live and work in Ukraine. I am a beginning QA engineer, and sooner or later I will have to face such concept as “test automation” because for me it is necessary for my further development in this professional field. And on the way to the implementation of this stage, I’ve encountered many problems. And one of the most important problems, in my opinion, for a beginner Automator is the lack of understanding of where to start. This is probably the problem that every newcomer faces when starting to learn test automation. This post is for those of you who were also dreaming of testing automation but did not know where to start. I will show you a real example of how to write the first test using minimal knowledge of JavaScript. This will be browser testing of a simple application. To run and create tests, I will use the ), because this is still the simplest and most understandable, as for a beginner, a test framework that I’ve found. CodeceptJS framework ( https://codecept.io/ with a special BDD-style syntax. The test is written as a linear scenario of a user’s action on a site. CodeceptJS is a multi-backend testing framework. It can execute tests using Webdriverio, Puppeteer, Protractor, Nightmare (for our testing, Google Chrome Puppeteer will be used as a driver for browsers). It’s very simple since you just describe your actions on the site and then you execute them. CodeceptJS is a modern ‘end to end’ testing framework For example: Step 1. Node.js Installation First, install Node.js v.12.4.0. I’ve tried running tests at 10.16 — nothing happened. Therefore, I recommend the 12.4.0 version. ! I use Windows 7 in this tutorial. But it should work on Windows 10, Linux, and Mac as well! Step 2. The installation of CodeceptJS with Puppeteer Run the “ ” and in the command line enter “ ”. The installation of CodeceptJS with Puppeteer begins. Node.js command prompt npm install codeceptjs puppeteer 'npm install codeceptjs puppeteer' Step 3. Initializing CodeceptJS in the current directory Run the command “ ” (Initialize CodeceptJS in the current directory by running it). npx codeceptjs init 'npx codeceptjs init' Step 4. Answer simple questions Decide on defaults, when asked to select helpers — choose Puppeteer. When asked to specify the URL, specify ( I’ve chosen this application because it is simple and uses React.). http://jspears.github.io/subschema Step 5. Create the first test in your root directory When everything is installed, create your first test using the command “ ” and enter the name of your test. npx codeceptjs gt 'npx codeceptjs gt' A file is generated in your root directory (the name of your test.js). For example — “login.js” Step 6. First Test Code Tests are written from a user’s perspective. There is actor object (represented as ‘I’) contains action methods taken from helpers OR: represents user’s actions. A test is written as a sequence of actions performed by an actor. Open a generated file in your favorite javascript editor. For example, I am using Visual Studio Code. Your first test will look something like this: Scenario ( , (I) => { I.amOnPage ( ); I.click ( ); pause (); }); 'try react app' '/' // This is command to open a webpage (accepts relative or absolute url) 'Login' // This is command to locate a button or link and click on it // This command is prescribed when writing or debugging a test Step 7. The validation of written code Run a test using the command “ ” npx codeceptjs run --steps 'npx codeceptjs run --steps' The output should be similar to this: open login page and print value - react app • I am on page • I click try "/" "Login" Step 8. Start a test browser Puppeteer starts a browser without opening a window. To see the browser, edit “ ” and set “ ” value for Puppeteer: codecept.json config show: true 'show: true' exports.config = { : , : , : { : { : , : , } }, : { : }, : , : {}, : } tests './*_test.js' output './output' helpers Puppeteer url 'http://jspears.github.io/subschema' show true include I './steps_file.js' bootstrap null mocha name 'User' Step 9. Rerun the browser. One more time, enter the command “ ”. npx codeceptjs run --steps On the screen, we have a browser and terminal windows. In the terminal, the test has stopped running and waiting for commands from us. Step 10. Receiving test data While the command is being executed in our code, we can enter any commands in the terminal window and watch how they are executed while the browser is running. To get the test data, you need to enter “ ” commands in the terminal window and, simultaneously, you can also watch the test execution in an open browser. It turns out to be not so difficult, for this test it is not necessary to use locators like XPath, codeceptjs perfectly recognizes fields with labels like “User Name”, “Password”, “Repeat Password”. Unlike Selenium, where you need to spend extra time on the recognition of fields with the help of “locators” so that our test would work. pause () I.fillField 'I.fillField' Now, you see that our fields are filled with data. Next, scroll down the page and see our previously entered values in the form of a script. Step 11. The layout of the code-obtained data Copy the resulting script with our data and paste it into your JS file in the editor (For example, my file name is ‘ ’). Login_test.js A few changes and it should turn out to be this: Feature ( ); Scenario ( , (I) => { I.amOnPage ( ); I.click ( ); pause(); I.fillField ( , ) I.fillField ( , ), I.fillField ( , ) }); 'open login page and print value' 'try react app' '/' 'Login' 'username' 'test@gmail.com' 'password' 'test' 'confirmPassword' 'test' Step 12. Final test and verification Now we run our test again using the command “ ” npx codeceptjs run --steps You should have the following: At the end of the test, it is imperative to make a check that not just the actions were performed, but the result was achieved. For example, you can check that the form under the input fields at the bottom of the browser contains the text. To do this, we add the following commands in the terminal window: I.see ( ) I.see ( ); I.see ( ) '"username": "test@gmail.com"' '"password": "test"' '"confirmPassword": "test"' These commands are called , and it is believed that any test should include them. Assertions The test we’ve created is working and is now verified. Congratulations. You, as a beginner, in 12 simple steps conducted a test which automatically fills in the fields on the site and “authenticates”. This has been the first experience of test automation for me, and, finally, the tests don’t scare me anymore. And I will think about how to improve my skills in test automation. I hope that CodeceptJS will help me with this.