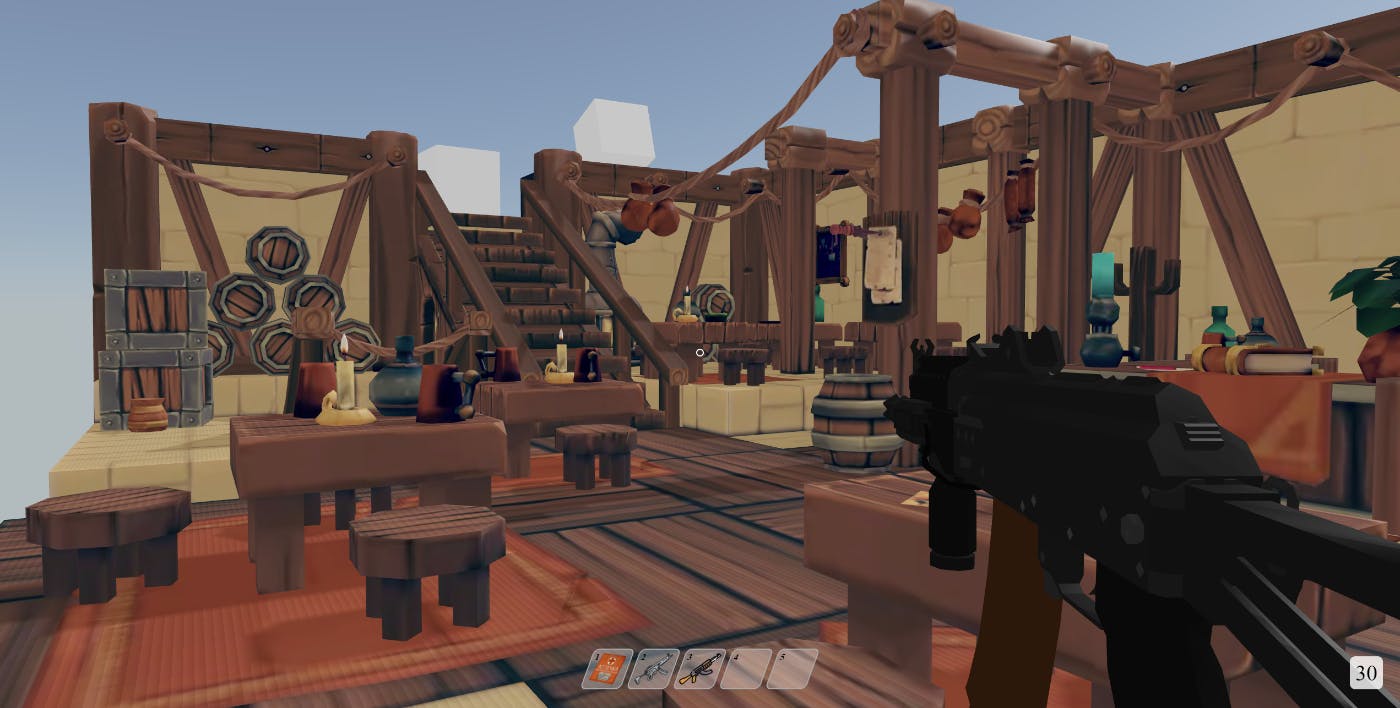
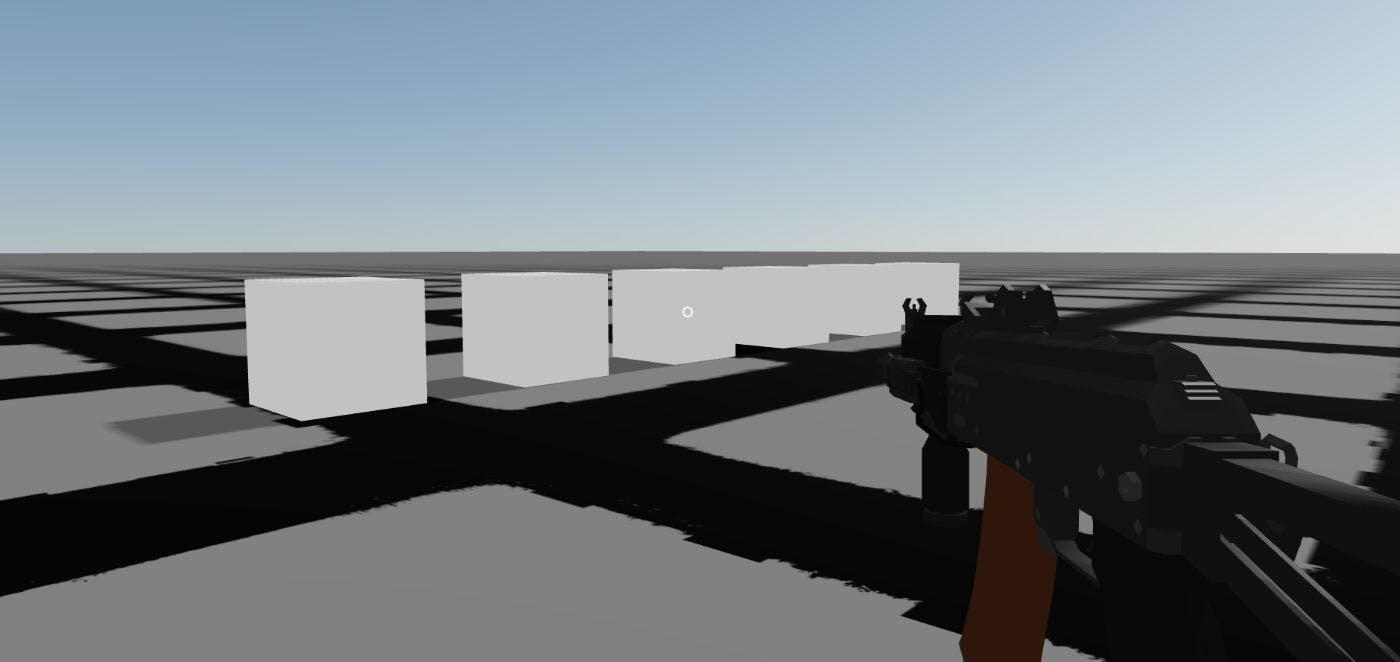
Introduction In modern web development, the boundaries between classic and web applications are blurring every day. Today, we can create not only interactive websites but also full-fledged games right in the browser. One of the tools that makes this possible is the library - a powerful tool for creating 3D graphics based on using technology. React Three Fiber Three.js React In today's article, we will implement: add a new territory; connect typescript and configure absolute file paths; add an ammo counter; add reloading; hide the aiming point during aiming; work with sounds when firing and when the magazine is empty; add quick access slots interface with icons. Repository on GitHub Final demo: https://www.youtube.com/watch?v=XtL33-0fihc&embedable=true https://codesandbox.io/p/github/JI0PATA/fps-game?embedable=true Adding new territory In order to slightly diversify the territory through which the character can move, it was decided to replace it. There is a list on the official website. I chose this . From it, I took the territory model and imported it into my project. Since this room model already contains everything we need, we can immediately use it in our project. To do this, you will need to remove everything unnecessary in the file and use the imported model. I'll add it to the path . This (clicking on the link will download it) can be taken directly from the repository. of examples React Three Fiber demo Ground.jsx public/territory.glb model And at the same time, you can remove the floor surface texture from the project. floor.png Code section Connecting TypeScript and SCSS To make it more convenient to develop and maintain the application, let's connect . In this part, I will use it exclusively to develop some parts of the interface, but not yet to work with . TypeScript Three.js For example, how to add to an already created project can be found . TypeScript here Let's add two configuration files: and , as stated in the article above. tsconfig.json tsconfig.node.json tsconfig.json { "compilerOptions": { "target": "ES2020", "useDefineForClassFields": true, "lib": ["ES2020", "DOM", "DOM.Iterable"], "module": "ESNext", "skipLibCheck": true, "baseUrl": ".", "paths": { "@/*": ["./src/*"] }, "types": ["node"], /* Bundler mode */ "moduleResolution": "bundler", "allowImportingTsExtensions": true, "resolveJsonModule": true, "isolatedModules": true, "noEmit": true, "jsx": "react-jsx", /* Linting */ "strict": true, "noUnusedLocals": true, "noUnusedParameters": true, "noFallthroughCasesInSwitch": true }, "include": ["src"], "references": [{ "path": "./tsconfig.node.json" }] } tsconfig.node.json { "compilerOptions": { "composite": true, "skipLibCheck": true, "module": "ESNext", "moduleResolution": "bundler", "allowSyntheticDefaultImports": true }, "include": ["vite.config.js"] } To simplify imports, we will make them with an absolute path. For example, these articles describe configs for and files. For files, the necessary rule has already been added (lines 8-11 in the file ). For regular JS files, you need to create a new file and add the appropriate rules there. JS TS TS tsconfig.json jsonconfig.json jsconfig.json { "compilerOptions": { "baseUrl": ".", "paths": { "@/*": ["./src/*"] } } } In the file, you can now change the paths to absolute ones, starting the paths with “ ” and making sure that everything works correctly. App.jsx @/ To avoid errors while working with for designs from , you will need to edit the file. And also install the appropriate packages. ESLint TypeScript .eslintrc.cjs npm i -D @types/node @typescript-eslint/eslint-plugin @typescript-eslint/parser To connect you will need to install it first. SCSS, npm i -D sass file to . We will also change the file extension of to and correct the path to the component and the styles file in accordance with the absolute path. Let's rename the index.css index.scss main.jsx main.tsx App After renaming to the extension, you will need to replace the path to the root file in the file. .tsx index.html To correct these errors, you will need to create a file with the following lines in the root of the declaration.d.ts src folder. declaration.d.ts declare module '*.scss'; declare module '*.jsx'; Let's get back to styles. Let's create a new file along the path . Let’s transfer the “sight” styles to the created file and use “modular classes.” src/UI/UI.module.scss Now we can use and in our project, and also use to import files. It is also necessary to change the paths in the remaining files to absolute ones for everything to work correctly. SCSS TypeScript absolute paths Code section Ammo counter Now, our weapons can fire indefinitely since they have no shot limit. To implement this limit, we will use to store states. zustand Let's create a new file along the path . In this file, we will use . Let's set the default number of cartridges, describe the interface of our storage, and create the storage itself. In it, we will describe the current number of cartridges (by default, the value is set from the variable ), a function for decreasing by one cartridge, and a function for reloading (setting the current number of cartridges to the default number). src/store/RoundsStore.ts TypeScript defaultCountOfRounds RoundsStore.ts import {create} from "zustand"; const defaultCountOfRounds = 30; export interface IRoundsStore { countRounds: number; decreaseRounds: () => void; reloadRounds: () => void; } export const useRoundsStore = create<IRoundsStore>()((set) => ({ countRounds: defaultCountOfRounds, decreaseRounds: () => set(({ countRounds }) => { return { countRounds: Math.max(countRounds - 1, 0) } }), reloadRounds: () => set(() => { return { countRounds: defaultCountOfRounds } }) })); Now, we can visually show the current state of the number of cartridges. Using the following path, we create two files: and . src/UI/NumberOfRounds/NumberOfRounds.tsx src/UI/NumberOfRounds/styles.module.scss Let's add styles for the counter element. styles.module.scss .rounds { display: flex; align-items: center; justify-content: center; width: 60px; height: 60px; position: absolute; right: 40px; bottom: 40px; background: rgba(255, 255, 255, .8); font-size: 40px; border-radius: 10px; } Now, let’s implement the counter-visual element itself. In the state and get the current number of rounds. And then we will display either the number of remaining cartridges or the button that needs to be pressed. To make the application more flexible, it would be good to add the “button name” to the project configuration. Let's add two new fields to : one for the displayed name of the button and the second with the code of the key that needs to be pressed. NumberOfRounds.tsx file you will need to use the useRoundsStore .env Now, let's implement the file. NumberOfRounds.tsx import {useRoundsStore, IRoundsStore} from "@/store/RoundsStore.ts"; import styles from "@/UI/NumberOfRounds/styles.module.scss"; const RELOAD_BUTTON_NAME = import.meta.env.VITE_RELOAD_BUTTON_NAME; const NumberOfRounds = () => { const countOfRounds = useRoundsStore((state: IRoundsStore) => state.countRounds); const isEmptyRounds = countOfRounds === 0; return ( <div className={styles.rounds}> {!isEmptyRounds ? countOfRounds : RELOAD_BUTTON_NAME} </div> ); }; export default NumberOfRounds; However, because strictly checks everything, it currently does not know that such a configuration file can exist at all. There is also a chance that this variable may not be in the file, and then an error will appear while the application is running. Therefore, you will need to make some changes in order for code validation to start working correctly. TypeScript .env Let's add another value for to the file . types tsconfig.json Also, in the declaration.d.ts file, we will add an interface that will describe the structure of our .env so that TypeScript can perceive everything correctly. After the changes are made, all errors from the file should disappear. Now, you need to display the counter on the screen. At the same time, we currently have one more interface element - a sight. So now we can separate the UI elements from the 3D elements. To do this, let's create a new file . src/UI/UI.tsx Since we now have a separate folder for storing states, we can now move one of the states there, which we will need right now, namely: . Let's create a file in and bring it to the following form. Let's remove this state from the file and add imports of this state in the and files. A small digression. useAimingStore src/store/AimingStore.ts Weapon.jsx Weapon.jsx Player.jsx AimingStore.ts import {create} from "zustand"; export interface IAimingStore { isAiming: boolean; setIsAiming: (value: boolean ) => void; } export const useAimingStore = create<IAimingStore>()((set) => ({ isAiming: false, setIsAiming: (value) => set(() => ({ isAiming: value })) })); And now, let's implement the file. Let's move the crosshair into it, which will be displayed only if the player does not aim using the mouse button, and also add the newly created component there. UI.tsx NumberOfRounds UI.tsx import NumberOfRounds from "@/UI/NumberOfRounds/NumberOfRounds.tsx"; import {IAimingStore, useAimingStore} from "@/store/AimingStore.ts"; import styles from "@/UI/UI.module.scss"; const UI = () => { const isAiming = useAimingStore((state: IAimingStore) => state.isAiming); return ( <div className="ui-root"> {!isAiming && <div className={styles.aim} />} <NumberOfRounds/> </div> ); }; export default UI; Now, with each shot, you need to reduce the number by one cartridge. To do this, you will need to call the function from . And while the number of cartridges is equal to 0, then call the function. At the same time, at the moment, two shots will be fired per click, so it is necessary to correct the logic of the start of shots. decreaseRounds useRoundsStore reloadRounds Code section Reload Let's start implementing recharging. In this section, we implement the following logic: as long as there are cartridges, the weapon can fire, but as soon as they run out, the shooting stops, and when you press a given key, the default number of cartridges is restored. All changes will occur only in the file. You will need to import the reload key code from Then, get the state and function from , add a keypress event handler, and compare the pressed key with the key that is set to reload. And in the function, check the number of cartridges, and if it is 0, then do not perform any action. Accordingly, if you fire all the cartridges and then press the R key, then all actions and sounds will begin to play again. Weapon.jsx .env. useRoundsStore startShooting Code section Sounds when firing and when the magazine is empty Let's take a look at weapon sounds. At the moment, the sound of a shot has already been implemented. But when I try to shoot with an empty magazine, there is no sound. I have already selected the sound, so (clicking on the link will start downloading) can be downloaded from the commit of the current section. it Also, instead of using , you can use spatial audio, which is added to the scene and changes dynamically depending on various factors. To do this, you need to add the tag. You will also need to add several attributes: HTMLAudio PositionalAudio - indicates a link to the audio file; url - specify false, since this sound is called only during a certain action; autoplay - specify false since single playback is required; loop - set in order to gain access to an object for playing sound at a certain point in time. ref Code section Quick Access Slots Interface Now, we will implement the interface of quick access slots, into which the player can assign the necessary items. Let's start with the implementation of the storage. Let's create a file . Let's describe the slot type QuickAccessSlotsType, which stores some element in the form of a string (in this case, it will only be an item icon for now), as well as the IQuickAccessSlotsStore interface, which indicates that slots are an array of types. We also create the storage itself. src/store/QuickAccessSlotsStore.ts QuickAccessSlotsStore.ts import {create} from "zustand"; import default_slots from "@/quick_access_slots.json"; const SLOTS_COUNT = 5 as const; type QuickAccessSlotsType = { item: string; } interface IQuickAccessSlotsStore { slots: QuickAccessSlotsType[]; } export const useQuickAccessSlotsStore = create<IQuickAccessSlotsStore>()(() => ({ slots: default_slots.concat(Array(SLOTS_COUNT - default_slots.length).fill({ item: null })) })); Let's create a sample file that will contain an array of some of the added items. We will also download several icons that we will use in the future. JSON quick_access_slots.json [ { "item": "medicine/aid.png" }, { "item": "weapons/mp5.png" }, { "item": "weapons/ak.png" } ] Now, we need to create the user interface itself. This will be a number of slots with an icon inside and a number to activate this item. Let's create two files for styles and layout: and . src/UI/QuickAccessSlots/styles.module.scss src/UI/QuickAccessSlots/QuickAccessSlots.tsx Let's write styles. .slots { position: fixed; bottom: 40px; left: 50%; transform: translateX(-50%); display: flex; align-items: center; column-gap: 10px; .slot { position: relative; width: 60px; height: 60px; border-radius: 10px; border: 2px solid darkgray; background: rgba(255, 255, 255, .3); padding: 5px; transform: skew(-20deg, 0); img { width: 100%; height: 100%; } .key { position: absolute; z-index: 2; font-weight: bold; } } } In file, we extract slots from storage and display them through a loop, adding a number inside each slot (element index + 1), and also check whether the slot is filled with something and, if so, display the image. the tsx QuickAccessSlots.tsx import {useQuickAccessSlotsStore} from "@/store/QuickAccessSlotsStore.ts"; import styles from "@/UI/QuickAccessSlots/styles.module.scss"; const QuickAccessSlots = () => { const slots = useQuickAccessSlotsStore((state) => state.slots); return ( <div className={styles.slots}> {slots.map((slot, key) => ( <div key={key} className={styles.slot}> <span className={styles.key}>{key + 1}</span> {slot.item && <img src={`/images/icons/${slot.item}`} alt={`${slot.item} ICON`}/>} </div> ))} </div> ); }; export default QuickAccessSlots; And at the end we add the created component to the root component . UI.tsx Code section Conclusion In this article, we added new territory, worked with sound, added an ammo counter with reloading, and also added quick access slots. In the next part, we will continue to improve our game, adding new functionality. Thanks for reading, and I'm happy to respond to comments! Also published . here