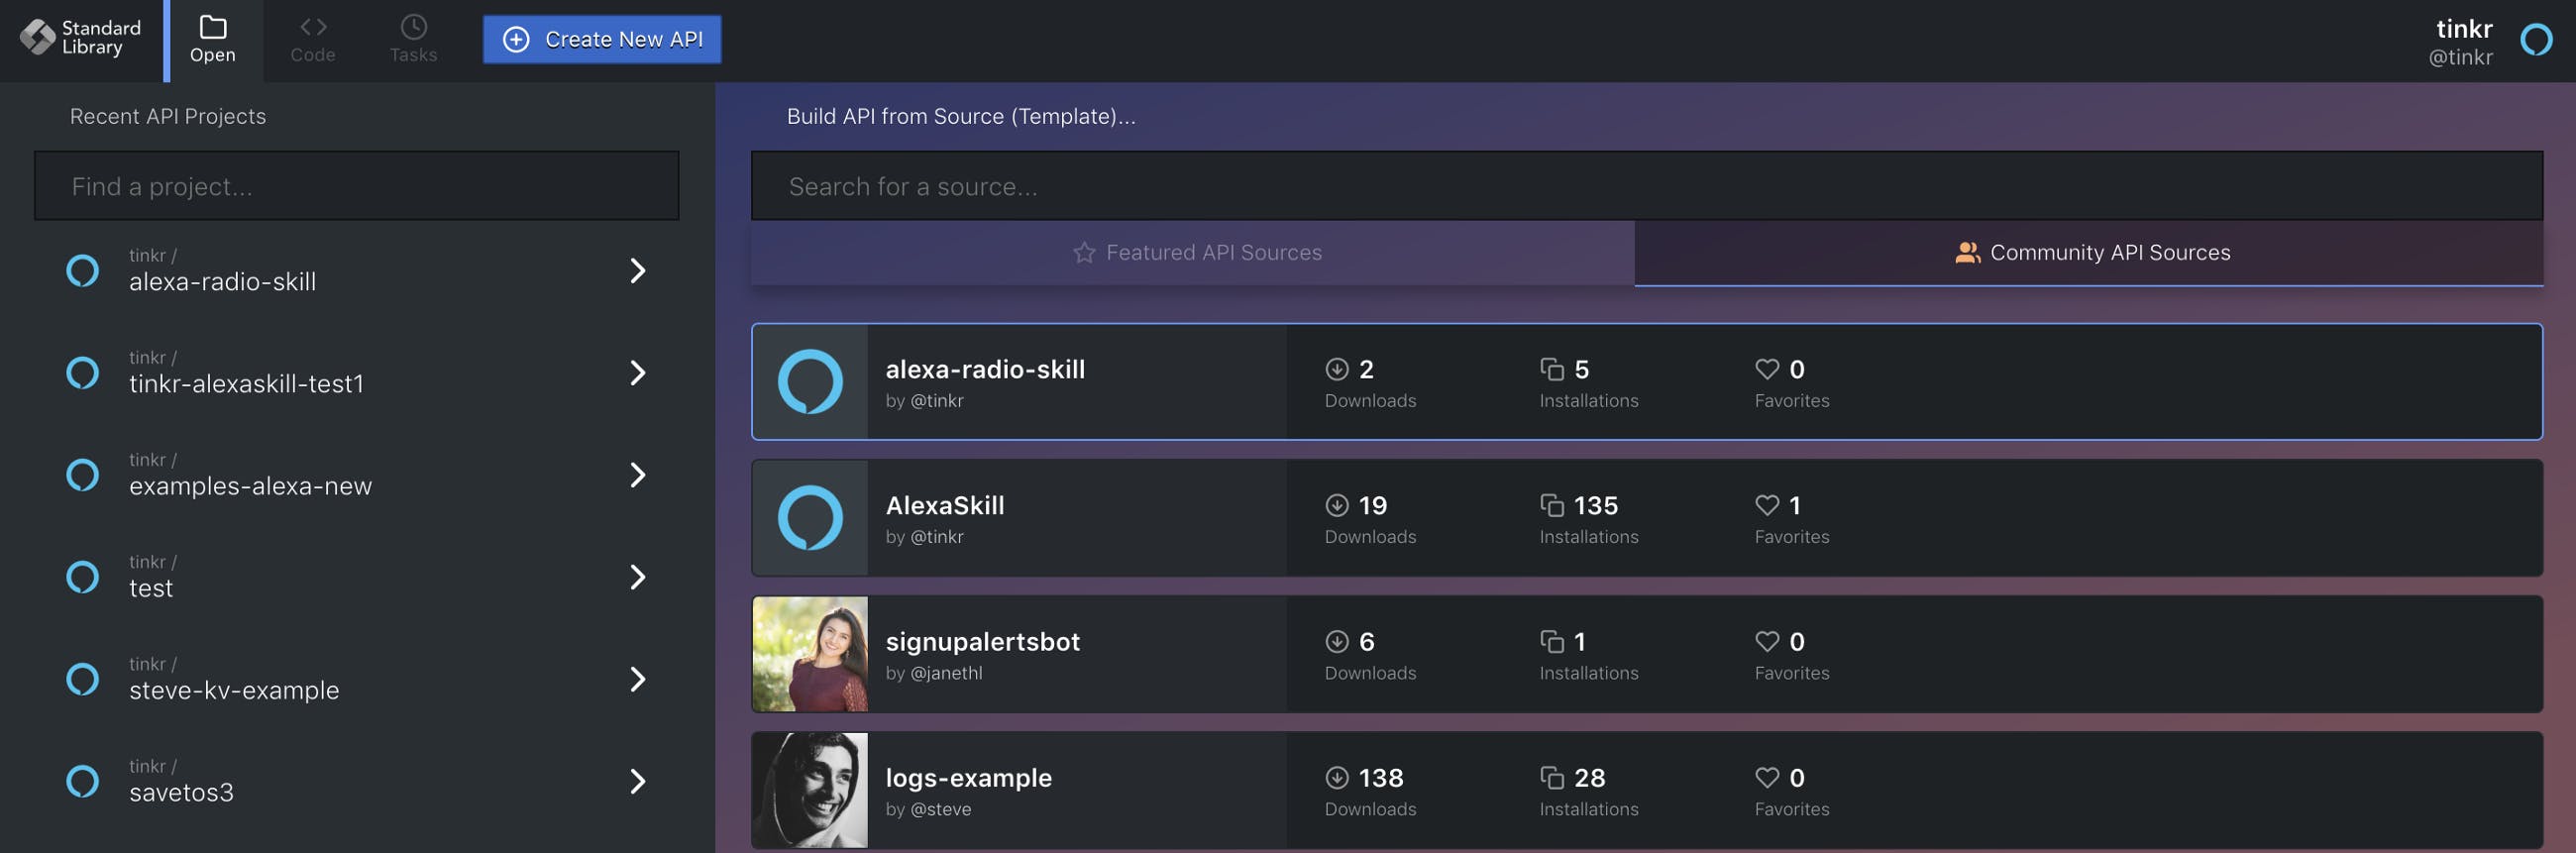
This tutorial has been updated on 6th September, 2019. If you have done the tutorial before, . The biggest change is now you get a to . you’ll need to do it again responsive web page add channels and stations Create with your favourite streaming stations or audiobooks. Once deployed, you can say “ and Alexa will start streaming your custom station. your own Alexa Radio Skill Alexa, open radio” Adding and deleting your stations is a breeze with a your API will automatically serve. Add , which are , easily. If you’re adding an audiobook, the channel name will be and each station would be the . responsive web page channels a collection of stations Game of Thrones individual books You can ask Alexa for a . If you say “Alexa, ask radio to play Blues”, the skill will first search for a channel with that name and then the stations. If a channel is found, a random station from that channel is played. If it’s an audiobook, it would where you last stopped. channel or a station by name resume playing You can also when you go to the next station or when encountering an error, using the web page. customise what Alexa will say Feature list A to add and delete your channels and stations. responsive web page Alexa using the web page. Change what the skill says for Now playing, Next etc. Change them as often as you wish. responses can be customised Support for . If the streaming link is an MP3 file, progress is saved. If your channel contains multiple MP3 files, the audiobooks skill will queue up the next file automatically. Alexa Interaction model updated to use a and fuzzy search is enabled. If your channel is called The Hitchhiker’s Guide to the Galaxy, you can say Alexa, ask radio to play guide to the galaxy custom slot You can see the on the web page, like unplayed, streamable and failed status of each station Check out a live demo — Alexa Radio Usage Deploying it is incredibly easy thanks to . It involves lots of button clicking and some copy pasta. Standard Library two steps, Step 1 The first step is to deploy your code to . on the button below and open the link, to deploy. Standard Library Right-Click to deploy to Standard Library Click here On the new page, click on the button. Once that’s done, click on the button under it to deploy the code. Generate Identity Deploy Project After the code is deployed, you’ll be taken to your project page. Here you can and add your own description. change your project name Now click on the button to see all the . dev endpoints of your project . You’ll need it for the next step. If you are curious, click on the first link and you can see the web page to add and delete your custom stations. Note down the second URL Step 2 Go to to . If you haven’t signed up for an Amazon Developer account yet, do so now. Once logged in, you should see the button. developer.amazon.com create a new Alexa Skill Create Skill Give your skill a name like and choose your Default Language. Choose for model to add to your skill and click on . radio Custom Create Skill On the next screen, choose . Start from scratch Once you have created the Alexa Skill, click on at the bottom left. Delete everything inside it. JSON Editor Replace the entire contents with the contents from the AlexaInteractionModel.json on the GitHub repo Right-click and open the AlexaInteractionModel.json file on the repo. Copy the file contents. Github Go back to the Alexa developer portal, and paste it into the JSON Editor. Click on , to save the model. Save Model invocation name The is set as radio . To change the name, just change the invocationName value at the top of the JSON file. We are almost done. Click on to link our Standard Library deployed code to the Alexa skill. Enter the you noted earlier. Endpoint Standard Library API URL Your endpoint should look like https://[username].api.stdlib.com/alexa-radio@dev/alexa. Make sure you choose option from the drop down menu. My development endpoint is a sub-domain of a domain Next, click on and turn on the interface. The skill will not work without this being enabled. Interfaces Audio Player That’s all the setup you need to do. In the Alexa Development portal, click on . This might take a couple of minutes. Build Model Once you get the pop-up saying that the , click on the tab next to on the Alexa Developer console. and type in . You should get a reply asking you to to add your stations. Build Succeeded Test Build Turn on testing open radio go to the web page If you get a reply on the console, it means the skill is also . Ask the same question to your device and you should get the same reply. active on your Alexa device Now with stations. Go to your main Standard Library URL, which is the noted below. let’s add some channels first URL Adding your stations Clicking on the above link will open a web page where you can , as well as customise Alexa responses. add channels and stations Let’s add a channel first. , based on a mood or genre. In the case of an audiobook, it would be the book series name. Click on the button to add a new channel. Channels are like playlists Channel This will open a modal where you can add details of your channel. You can here. A few things to note: add multiple stations The station URL has to start with https If you’re adding MP3 files as part of an audiobook, make sure is off shuffle Go to to get your favourite radio stations. Use the link. Add an if needed for the URL so it is a link shoutcast.com Any player(.m3u) s https Try for some awesome that you can add. Use the MP3 direct download link as the station URL archive.org audiobooks Click on the button once you’ve added your channel. You can of course add more channels if you want. Save You can also any of the channels, stations or by clicking on them. rename edit the URL Customising Alexa responses You can customise Alexa responses by clicking the on the top right of the main page. Here you can add or remove the responses. gear icon Use SSML if you want, to give it more personality. Notes All streaming URLs should be https. If the URL fails to play, your skill will say stream failed to play. The status of the channel on the web page will be updated to show failed. If playing is successful, the status would say streamable The test simulator on Alexa Developer portal any audio. does not play Anybody who knows your station URL can change your library contents. The skill doesn’t need to be published for you to use it. If you get stuck anywhere, or if you have any feedback, to me. write You can find the code repository here . Thanks to Janeth Ledezma and Jacob Lee.