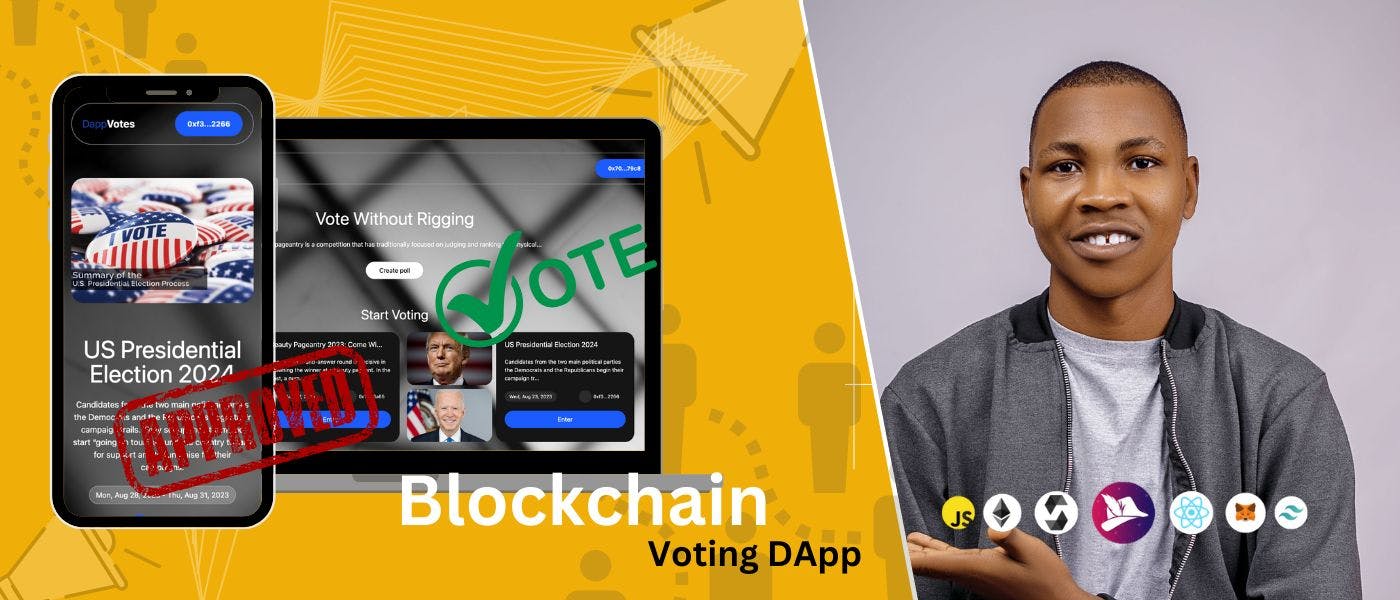
What you will be building: see the at Sepolia Test Net and the . live demo git repo Introduction Imagine a world where technology and democracy intersect, where the power of decentralized systems meets the voice of the people. This is the future of voting, and you can help shape it. In this guide, we will teach you how to build your own decentralized voting dApp using Next.js, TypeScript, Tailwind CSS, and CometChat. These cutting-edge technologies will allow you to create a secure, user-friendly, and engaging voting system that anyone can use. Whether you're a coding beginner or a seasoned developer, this guide has something for you. We'll start by explaining the basics of decentralized voting and then walk you through the process of building your own dApp step-by-step. By the end of this guide, you'll have the skills you need to create a decentralized voting dApp that can change the world. What you'll learn How to set up your development workspace for Dapp development. How to use Next.js, TypeScript, Tailwind CSS, and CometChat to build a decentralized voting dApp How to secure your Dapp with smart contract logic How to make your Dapp user-friendly using Tailwind CSS How to enhance your Dapp code base with TypeScript How to integrate your Dapp with NextJs SSR How to engage users with your Dapp using real-time chat This guide is for anyone who wants to learn how to build a decentralized voting dApp. Whether you're a coding beginner or a seasoned developer, you'll find something useful in this guide. Who this guide is for We're excited to help you build the future of voting. Let's get started! Prerequisites You will need the following tools installed to build along with me: Node.js Yarn MetaMask React Solidity CometChat SDK Tailwind CSS Please check out this video to learn how to set up your MetaMask for this project. It will be an important step to follow through this tutorial. https://www.youtube.com/watch?v=qnudOwva0fM&embedable=true Installing Dependencies Clone the starter kit and open it in VS Code using the command below: git clone https://github.com/Daltonic/tailwind_ethers_starter_kit dappVote cd dappVote Next, update the with the snippet below. package.json https://gist.github.com/Daltonic/25de1303d3135651121349978917f436?embedable=true Next, run the command in your terminal to install the dependencies for this project. yarn install Configuring CometChat SDK To configure the CometChat SDK, please follow the steps provided below. Once completed, make sure to save the generated keys as environment variables for future use. Head to CometChat Dashboard and create an account. STEP 1: Log in to the CometChat dashboard, only after registering. STEP 2: From the dashboard, add a new app called STEP 3: Play-To-Earn Select the app you just created from the list. STEP 4: From the Quick Start copy the , , and , to your file. See the image and code snippet. APP_ID REGION AUTH_KEY .env Replace the placeholder keys with their appropriate values. NEXT_PUBLIC_COMET_CHAT NEXT_PUBLIC_COMET_CHAT_APP_ID=**************** NEXT_PUBLIC_COMET_CHAT_AUTH_KEY=****************************** NEXT_PUBLIC_COMET_CHAT_REGION=** The file should be created at the root of your project. .env Configuring the Hardhat script Navigate to the root directory of the project and open the " " file. Replace the existing content of the file with the provided settings. hardhat.config.js https://gist.github.com/covelitein/316a79b2c830256f35ec60a7926a47af?embedable=true This code configures Hardhat for your project. It does this by importing essential plugins, setting up networks (with localhost as the default), specifying the Solidity compiler version, defining paths for contracts and artifacts, and setting a timeout for Mocha tests. The Smart Contract File The subsequent sections outline the process of crafting the smart contract file for the DappVotes project. Before you delve into the steps below, create a new folder called at the root of this project and a new file inside of it called . contracts DappVotes.sol Next, do the following inside the just-created file: Begin by initiating a new contract named , adhering to the MIT licensing standards. DappVotes Employ the Counters library from OpenZeppelin to facilitate the management of counters for polls and contestants. Define two Counter instances: and , privately tracking the overall count of polls and contestants. totalPolls totalContestants Here is the smart contract logic, and we will look at what each function and variables do. https://gist.github.com/Daltonic/bebd9c89648958a1bdd1f379152c55f5?embedable=true The DappVotes contract comprises essential structures that underlie its functionality: : A structure encapsulating details of a poll, including its ID, image URL, title, description, vote count, contestant count, deletion status, director address, start and end timestamps, and more. PollStruct : This structure holds information about contestants, such as their ID, image URL, name, associated voter, vote count, and an array of voter addresses. ContestantStruct Mappings play a crucial role in managing the contract's data: : A mapping linking poll IDs to a boolean value indicating their existence. pollExist : A mapping connecting poll IDs to their respective data, recording comprehensive poll information. polls PollStruct : A mapping linking poll IDs and voter addresses to indicate whether a voter has cast their vote. voted : A mapping connecting poll IDs and contestant addresses to indicate whether a contestant has contested. contested : A nested mapping associating poll IDs and contestant IDs to their respective data, storing contestant-related details. contestants ContestantStruct To facilitate user interaction and transparency, the contract emits the event whenever a vote is cast, capturing the voter's address and the current timestamp. Voted The contract consists of various functions that enable the creation, management, and retrieval of poll and contestant data: : This function facilitates the creation of a new poll by initializing a with relevant information, ensuring the provided data is valid. createPoll PollStruct : Allows the director of a poll to update its details, ensuring authorization and valid input. updatePoll : Enables the director of a poll to mark it as deleted, given certain conditions are met. deletePoll : Retrieves detailed information about a specific poll using its ID. getPoll : Returns an array of active polls, excluding deleted ones. getPolls : Enables users to contest in a poll by adding contestant information to the contract. contest : Retrieves detailed information about a specific contestant in a poll. getContestant : Returns an array of contestants for a particular poll. getContestants : Allows users to cast their votes for contestants in a poll, considering eligibility, timing, and conditions. vote : An internal utility function that returns the current timestamp with adjusted precision. currentTime By following these steps, you will establish a functional structure for the DappVotes smart contract, ready to manage polls, contestants, and voting interactions seamlessly. Unleash your web3 potential with Dapp Mentors Academy! Learn from expert blockchain developers Access over 40 hours of premium content Get exclusive NFT insights Join our vibrant Discord community Start your journey today for just $8.44/month! The Test Script The DappVotes test script has been meticulously designed to comprehensively assess and validate the functionalities and behaviors of the DappVotes smart contract. Below is a systematic breakdown of the primary tests and functions covered within the script: Test Setup: Before executing any tests, the script prepares essential contract instances and sets up addresses for testing purposes. It initializes parameters and variables that will be used throughout the test cases. The contract is deployed, and several signers (addresses) are assigned for simulated user interactions. Poll Management: This section encompasses the testing of poll creation, update, and deletion within the DappVotes smart contract. Under the category, a series of tests evaluate different scenarios to confirm the successful execution of these poll management functions. Success The test validates the creation of a poll by checking the list of polls before and after creation and confirming the attributes of the created poll. should confirm poll creation success The test demonstrates the successful update of a poll's attributes and validates the change. should confirm poll update success The test ensures the proper deletion of a poll by verifying the list of polls before and after deletion and confirming the deletion status of the poll. should confirm poll deletion success Poll Management Failure: This section encompasses negative test scenarios where poll creation, update, and deletion should fail. The tests under confirm that the contract correctly reverts with appropriate error messages when invalid or unauthorized actions are attempted. Failure Poll Contest: Within this section, the test cases focus on contesting in a poll, which involves entering as a contestant. Under , the test verifies that contestants can successfully enter a poll, and the number of contestants is accurately recorded. It also checks the retrieval of contestants' information. Success should confirm contest entry success The tests address scenarios where contest entry should fail, such as attempting to contest a non-existent poll or submitting incomplete data. Failure Poll Voting: This section evaluates the process of casting votes in a poll for specific contestants. Under , the test demonstrates successful voting by contestants and validates the accuracy of vote counts, voter addresses, and associated avatars. Success should confirm contest entry success The tests address scenarios where voting should fail, such as trying to vote in a non-existent poll or voting in a deleted poll. Failure Through this organized and detailed breakdown, the critical functionalities of the DappVotes test script are explained, illustrating the purpose and expected outcomes of each test scenario. The test script, when executed, will comprehensively validate the behavior of the DappVotes smart contract. At the root of the project, create a folder, if not existing, called “ ” and copy and paste the code below inside of it. test https://gist.github.com/Daltonic/c6a91aa385853802ee5160c0ab9aa304?embedable=true Run the following commands to have your local blockchain server running and also test the smart contract: yarn hardhat node yarn hardhat test By running these commands on two separate terminals, you will test out all the essential functions of this smart contract. The Deployment Script The DappVotes deployment script is designed to deploy the DappVotes smart contract to the Ethereum network using the Hardhat development environment. Here's an overview of the script: Import Statements: The script imports the required dependencies, including for Ethereum interaction and for file system operations. ethers fs main() Function: The function serves as the entry point for the deployment script and is defined as an asynchronous function. main() Deployment Parameters: The script specifies the parameter, which represents the name of the smart contract to be deployed. contract_name Contract Deployment: The script uses the method to obtain the contract factory for the specified . ethers.getContractFactory() contract_name It deploys the contract by invoking the method on the contract factory, which returns a contract instance. deploy() The deployed contract instance is stored in the variable. contract Contract Deployment Confirmation: The script waits for the deployment to be confirmed by awaiting the function on the contract instance. deployed() Writing Contract Address to File: The script generates a JSON object containing the deployed contract address. It writes this JSON object to a file named in the directory, creating the directory if it doesn't exist. contractAddress.json artifacts Any errors during the file writing process are caught and logged. Logging Deployed Contract Address: If the contract deployment and file writing processes are successful, the deployed contract address is logged to the console. Error Handling: Any errors that occur during the deployment process or file writing are caught and logged to the console. The process exit code is set to 1 to indicate that an error occurred. This DappVotes deployment script streamlines the process of deploying the smart contract and generates a JSON file containing the deployed contract address for further utilization within the project. In the root of the project, create a folder called “ ” and another file inside of it called if it doesn’t yet exist. Copy and paste the code below inside of it. scripts, deploy.js https://gist.github.com/Daltonic/bf39404280fd94b0dff1b76cff7b89b2?embedable=true To execute the script, run in the terminal, ensure that your blockchain node is already running in another terminal. yarn hardhat run scripts/deploy.js If you require additional support with setting up Hardhat or deploying your Fullstack DApp, I recommend watching this informative video that provides guidance and instructions. https://www.youtube.com/watch?v=zP1kWDGrxW4&embedable=true Developing the Frontend To start developing the frontend of our application, we will create a new folder called at the root of this project. This folder will hold all the components needed for our project. components For each of the components listed below, you will need to create a corresponding file inside the folder and paste its codes inside it. components The Navbar Component The component provides navigation and wallet connection. It displays a navigation bar with the title "DappVotes" and a button to connect a wallet. The button changes appearance on hover. The component uses Redux and blockchain services for wallet connectivity and state management. Observe the codes below: Navbar https://gist.github.com/Daltonic/60bcdfa13efd3d7965c22968fed5201b?embedable=true Banner Component The component is a React component that displays a centered banner with a main title and description. The title emphasizes the concept of "Vote Without Rigging." The description explains the nature of a beauty pageantry competition. Banner Below the description, there's a button labeled "Create poll." Upon clicking this button, if a wallet is connected, it triggers an action to open a create poll modal. If no wallet is connected, a warning toast is shown, reminding the user to connect their wallet. The component uses Redux for state management and React Toastify for displaying notifications. See the code below: https://gist.github.com/Daltonic/429601d79d9d3bda5a6ec3533aa6e929?embedable=true Create Poll Component The component presents a modal form for users to create polls. It collects inputs for poll details such as title, start and end dates, banner URL, and description. Upon submission, it validates, converts data, displays creation status with animations, and handles errors. The user-friendly interface aids in creating polls within the application. CreatePoll See the code below: https://gist.github.com/Daltonic/10ff9618572c668db97700067604ed8f?embedable=true Polls Component The component displays a list of polls in a grid layout. Each poll includes the title, truncated description, start date, poll director's address, and an "Enter" button. Poll avatars are displayed alongside the information. Clicking the "Enter" button redirects the user to a detailed page for the poll. The component also uses helper functions for formatting and truncating text. Polls The component takes an array of objects as a prop and maps through them to create individual components with the relevant poll data. Polls PollStruct Poll See the codes below: https://gist.github.com/Daltonic/2fdd8ee3eef80d6862b91114c168f42c?embedable=true Footer Component The component displays social media icons and copyright information for a webpage. The icons link to LinkedIn, YouTube, GitHub, and Twitter profiles. The copyright text shows the current year and the message "With Love ❤️ by Daltonic." The component's layout is responsive and visually appealing. Footer https://gist.github.com/Daltonic/41164e03383d4537aa8ad861fdc04064?embedable=true Details Component The component displays detailed information about a poll, including the poll image, title, description, start and end dates, director, vote and contestant counts, and edit and delete buttons (if the user is the director and there are no votes). It also displays a "Contest" button if there are no votes, which opens the contest modal. The component uses Redux for global state management, and the component from Next.js for responsive images. Details Image See the image below: https://gist.github.com/Daltonic/5f7d83da123b91733ade4caea319868d?embedable=true Update Poll Component The component presents a modal form to edit the details of an existing poll. Users can modify the poll's image, title, description, start date, and end date. The component fetches and displays the current data of the selected poll. UpdatePoll Upon submission, it validates inputs, updates the poll information on the blockchain, and provides transaction status feedback through toast notifications. This component efficiently interacts with blockchain services, Redux state, and user inputs to facilitate poll updates. See the code below: https://gist.github.com/Daltonic/156c78cd0388590e4f583fc94dba1090?embedable=true Delete Poll Component The component offers a confirmation modal to delete a specific poll. When the user clicks the delete button, the component interacts with blockchain services to delete the selected poll's data. It utilizes Redux state for user authentication and modal state management. DeletePoll After deleting the poll, the component redirects the user to the home page and provides transaction status feedback through toast notifications. This component effectively handles poll deletion, interacts with blockchain services, manages modal display, and provides user notifications. See the code below: https://gist.github.com/Daltonic/35c5cd7bb8d43cefb53b3c27e6477e46?embedable=true Contest Poll Component The component displays a modal form for users to enter a contest for a specific poll. Users input their contestant name and an avatar URL. Upon submission, it validates the inputs, initiates the contest transaction, and displays the transaction status with animations. ContestPoll The component interacts with the application's blockchain services and Redux state management, providing a seamless contest entry experience. See the code below: https://gist.github.com/Daltonic/6b30cf179640d1a1875dff7d284f312d?embedable=true Contestants Component The component renders a list of contestants for a poll, including their images, names, voter information, voting buttons, and vote counts. It uses the array and object to render each contestant's information. Contestants contestants poll Each sub-component represents an individual contestant and includes the following: Contestant Image: The contestant's image. Name: The contestant's name. Voter information: A truncated version of the voter's wallet address who voted for the contestant. Voting button: A button to vote for the contestant. The button is disabled if the user has already voted, the poll has not started, or the poll has ended. Vote count: The number of votes the contestant has received. The component also includes error handling and visual feedback to prevent voting in specific scenarios. This component allows users to view and participate in the voting process for contestants in the poll. See the code below: https://gist.github.com/Daltonic/fd8428e39483b28b198dc81d092192a8?embedable=true Chat Button Component The component provides a dynamic dropdown menu for various chat-related actions based on the user's authentication status and the poll's group status. **ChatButton** Users can perform actions like signing up, logging in, creating a group, joining a group, viewing chats, and logging out. These actions interact with CometChat services for user and group management, and the component ensures proper feedback through toast notifications. It also uses Redux to manage the global state for user and group data, enhancing user interaction with chat functionalities within the application. See the code below: https://gist.github.com/Daltonic/b560e3048c17d31ae741d16c66979bf1?embedable=true Chat Modal Component The component provides a user-friendly interface for real-time chat within a group. It fetches and displays existing messages, listens for new messages, and allows users to send and receive messages. It also provides message timestamps, sender identification, and identicons. The component integrates with Redux to manage the chat modal's display state and maintains proper UX through toast notifications. See the code below: ChatModal https://gist.github.com/Daltonic/45277140d936fc55b1b085e0e57a747a?embedable=true CometChat NoSSR Component Lastly, for the components, is the component, which initializes CometChat and checks the user's authentication state on the client-side. It dispatches the user data to Redux for further use in the application. CometChatNoSSR See the code below: https://gist.github.com/Daltonic/bf6c176e52493ca256faa241ebe2e810?embedable=true Want to learn how to build an Answer-To-Earn DApp with Next.js, TypeScript, Tailwind CSS, and Solidity? Watch this video now! https://www.youtube.com/watch?v=Ubom39y5jX8&embedable=true This video is a great resource for learning how to build decentralized applications and earn ether. Now that we have covered all the components of this application, it is time to start connecting the different pages. Let's start with the homepage. To start developing the pages of our application, go to the folder at the root of your project. This folder will contain all the pages needed for our project. pages Home Page The component renders the home page of this application. It uses Redux to manage the global state, fetches poll data from the server, and defines the HTML structure of the page. This page bundles the Navbar, Banner, CreatePoll, Polls, and Footer components together. Home To follow up with this component, replace the content of the file in the folder with the code below: index.tsx pages https://gist.github.com/Daltonic/52dd3e91564cb050029d5ae892f37a1c?embedable=true Polls Page The component is a dynamic page that displays details about a specific poll. It uses Redux to manage global state, fetches poll and contestant data from the server, and defines the HTML structure of the page. Polls This component bundles the , , , , , , , , and , making up the structure of the poll page. **Footer** **Navbar** **Details** **Contestants** **UpdatePoll** **DeletePoll** **ContestPoll** **ChatModal** **ChatButton** To proceed, create a new folder called inside the directory. Then, create a file named . Make sure to use the exact pattern, as this is required by Next.js to create a dynamic page. See the code below: polls pages [id].tsx https://gist.github.com/Daltonic/211556502656a8bba7948dd69a37b471?embedable=true The Redux Store Managing data from the blockchain and smart contracts across components and pages can be difficult. That's why we use Redux Toolkit to manage data across all components and scripts. Here is the unique setup of the Redux Toolkit: Create a global states script to manage all states Create a global actions script to manage all states mutations Bundle the states and actions in a global slices script Configuring the global slices as a store service Wrap the store provider into your application Create a folder called at the root of the project. Create another folder called inside the folder. Create a file called inside the folder and paste the code below into it. Step 1: Defining the Redux States store states store globalState.ts states https://gist.github.com/Daltonic/6cfefcf0787aa22fbfba8610db902c7d?embedable=true This code defines the initial state for Redux. It includes properties like for user Ethereum wallet info, various modals' visibility states, an array for , for selected poll data, for chat group info, for poll contestants, and for the logged-in user details. These properties store data that can be accessed and updated globally across the application. wallet polls poll group contestants currentUser Create another folder called inside the folder. Create a file called inside the folder and paste the code below into it. Step 2: Defining the Redux Actions actions store globalActions.ts actions https://gist.github.com/Daltonic/0d1a851fe8580b76fa2c369202f6ceec?embedable=true These Redux actions define functions to modify the global state. They receive a state object and a payload from an action. Each action corresponds to a specific state property and sets it to the payload's value. These actions are used throughout the application to update various global state properties like , states, , , , and , enabling dynamic changes to the application's state as needed. wallet modal polls group contestants currentUser Create a file called inside the folder and paste the code below into it. Step 3: Bundling the states and actions in a slice globalSlices.ts store https://gist.github.com/Daltonic/011944ecf355f6a24aaae99c5376f181?embedable=true This Redux slice named combines initial state and reducers from and . It creates actions and a reducer for the global state. The object contains action creators and the handles state updates based on these actions, simplifying state management for the slice of the application. global globalActions GlobalStates globalActions globalSlices.reducer global Create a file called inside the folder and paste the code below into it. Step 4: Configuring the slices as a store service index.ts store https://gist.github.com/Daltonic/2aecf556d40bde4e83d5d0f079c698ea?embedable=true This Redux store is configured using . It incorporates the reducer into the store, allowing access to global state management throughout the application. The function initializes the store with the specified reducer, enabling efficient state handling via Redux. @reduxjs/toolkit globalSlices configureStore TypeScript Interfaces The interfaces used across this application are defined in the file in the folder at the root of the project. This file defines the data structures used in the application. Create a folder called and within it a file called and past the codes below into it. type.d.ts utils utils type.d.ts https://gist.github.com/Daltonic/6e4826c03eee0803fbea9c3bffaa3335?embedable=true : Contains parameters for truncating text, including the input text, the number of characters to keep at the start and end, and the maximum length. TruncateParams : Represents parameters for creating a poll, including image, title, description, start and end times. PollParams : Describes the structure of a poll object with attributes like id, image, title, description, votes, contestants count, deletion status, director, start and end times, timestamp, avatars, and voters. PollStruct : Represents the structure of a contestant in a poll, including attributes like id, image, name, voter, votes, and a list of voters who voted for them. ContestantStruct : Defines the shape of the global application state with properties for wallet, modal states (create, update, delete, contest, chat), and poll-related data (polls, poll, group, contestants, current user). GlobalState : Specifies the root state structure, primarily containing the property, which encapsulates the global application state. RootState globalStates The App Services To add Web3 and chat features to our application, we will need to create some services. Create a folder called at the root of the project and create the following scripts inside of it: services : This script will connect to the Ethereum blockchain and manage web3-related tasks. blockchain.ts : This script will handle chat-related tasks, such as connecting to CometChat and sending/receiving messages. chat.ts Ensure to copy and paste the codes below to their respective files. This blockchain service interacts with a smart contract using Ethereum. It includes functions like connecting to the Ethereum wallet, creating, updating, and deleting polls, contesting polls, voting for contestants, and fetching poll-related data. See the code below: Blockchain Service https://gist.github.com/Daltonic/8bcedf4d66664a3218de5260b572a80c?embedable=true The key components of this service include: It connects to the user's Ethereum wallet using MetaMask or a JSON-RPC provider if MetaMask is not available. Ethereum Connection: It allows creating, updating, and deleting polls, contesting polls, and voting for contestants, with error handling. Poll and Contestant Operations: Functions for fetching poll data, poll lists, and contestant data from the smart contract. Fetching Data: Utility functions like truncating text, formatting timestamps, and structuring poll and contestant data for consistency. Utilities: It uses Redux to manage the global state, enabling components throughout the application to access and modify data like the user's wallet, polls, and contestants. Global State Management: This service plays a crucial role in the application's interaction with the Ethereum blockchain, enabling users to participate in polls and contests securely and transparently. This chat service integrates the CometChat SDK into the application for real-time chat functionality. See the codes below: Chat Service https://gist.github.com/Daltonic/f47ab6667674683f2908b07400584efd?embedable=true It performs several key functions: The service initializes CometChat with the provided application ID and region, subscribing to user presence updates and establishing a socket connection. Initialization: It provides functions for user login and signup, which are essential for accessing chat features. Authentication: Functions for checking the user's authentication state and logging out are included. User Management: The service allows the creation of new groups, fetching group information, and joining groups. Group Management: It supports sending and receiving text messages in groups, providing a real-time chat experience. The function enables the app to react to incoming messages. Messaging: listenForMessage Throughout these functions, error handling is implemented to manage and report errors effectively. Error Handling: The CometChat SDK is loaded lazily (only when the application is running in the browser), ensuring efficient resource utilization. Lazy Loading: This service enables users to engage in real-time group chat within the application, enhancing the user experience and facilitating communication between participants. The App Component This component manages both the pages and the sub-components in this NextJs application. It conditionally renders child components based on the state. It initializes CometChat, provides Redux store access, and displays toast notifications via the . This conditional rendering ensures that CometChat initializes only on the client side. showChild ToastContainer Head to the folder, open the file and replace its content with the code below: pages _app.tsx https://gist.github.com/Daltonic/6c344f7cb08c0aa591a0264551a3d408?embedable=true Before you finish up the project, create a folder called and to this folder. assets/images add the images found in this link Congratulations on following this tutorial on how to build a decentralized voting dApp with Next.js, TypeScript, Tailwind CSS, and CometChat! You can run on another terminal to see that every aspect of the app works correctly and then to build the application. Also, ensure that your local blockchain node is running and the smart contract deployed already to the network. yarn dev yarn build The video tutorial is also available below. https://www.youtube.com/watch?v=QdomOLGBTdY&embedable=true I hope you found the tutorial helpful. If you did, please , for more tutorials like this, and . subscribe to my YouTube channel, Dapp Mentors visiting our website for additional resources Till next time, all the best! Conclusion In conclusion, this comprehensive tutorial has walked you through the process of developing a decentralized voting dApp with Next.js, TypeScript, Tailwind CSS, and CometChat. The objective of this article was to provide a step-by-step guide to building a feature-rich and interactive application, enabling users to create, participate in, and manage polls while also facilitating real-time group chat functionality. Key highlights of this tutorial include the development of various frontend components, setting up a robust Redux store for global state management, defining TypeScript interfaces for structured data, and creating essential app services for blockchain interaction and chat integration. The tutorial's culmination is the App Component, which orchestrates the seamless operation of pages and subcomponents. By following this tutorial and leveraging the provided resources, you are well-equipped to embark on your journey in Web3 development, harnessing the power of blockchain and chat technologies to create innovative and engaging decentralized applications. About Author I am a Web3 developer and the founder of , a company that helps businesses and individuals build and launch decentralized applications. I have over seven years of experience in the software industry, and I am passionate about using blockchain technology to create new and innovative applications. I run a where I share tutorials and tips on Web3 development, and I regularly post articles online about the latest trends in the blockchain space. Dapp Mentors , YouTube channel called Dapp Mentors Discord: Twitter: LinkedIn: GitHub: Website: Stay connected with us, and join communities on Join Follow Connect Explore Visit