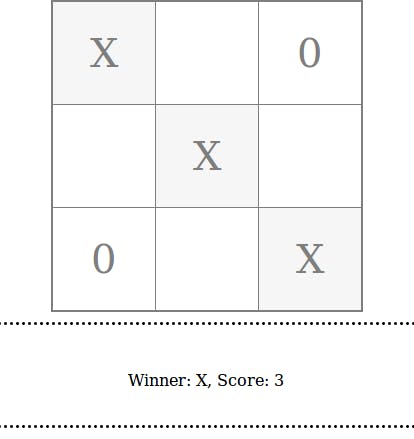
Hello guys! We are going to develop a plugin/library in step by step manner. At the end of the article we will finish building a Js plugin which will generate a UI for playing Tic-Tac-Toe game. Also after this workshop is finished you will have efficient knowledge of the following: JavaScript Most used core features ES6(es2015) How to convert your into a library which can be consumed through script tag ES6 code A Build system width npm and webpack Knowledge of building any Js Plugin using next generation JavaScript with singleton design pattern You can find the code base for this workshop at https://github.com/debabrata100/tic-tac-toe.git Let’s have look on the final version: Our library would be capable of generating a user interface for Tic-tac-toe game to play on a web server. We are going to use our library as below after building it: In the above file, an external script (we are going to generate eventually) would expose a global object . **index.html** **_game-lib.js_** Game Following code snippet in the file would initialize the game using object: index.html Game Game.init({ container:"game\_container", cellHeight: 100, cellWidth: 100 }); : This takes name of the css id selector of the html element which will contain the game UI provided by the game library. container : This takes the height of each cell of game in pixels cellHeight : This takes the width of each cell of game in pixels cellWidth Steps to follow: Project directory structure Setup webpack Develop Library Directory Structure: We will create our project with following directory structure + -- app| +-- index.js| -- build| +-- game-lib.js| +-- game-lib.min.js| +-- index.html The folder contains source files/modules required to generate the library. The folder contains which we discussed above and two library files lib.js and lib.min.js which are generated after bundling up the source files. app build index.html Setup Webpack Before ES6(2015), there were so many module systems came into place to achieve modularity in JavaScript. Let’s have look at the . In order to achieve modularity in native JavaScript, I believe ES6 Module system is most brilliant discovery so far. But most of its features are supported by . There comes the role of most popular tool called a javascript module bundler which takes the modules with dependencies as input, resolve all dependencies and generates a static Javascript file, in this case game-lib.js/game-lib.min.js. evolution of JavaScript modularity only a few modern browsers webpack , Webpack module bundler There is another pain point. Most of the ES6 features notably are not supported by all browser. Therefore we need a transpiler to convert our ES6 code to a lower version which can be supported by all browsers. does this job in a most effective way. It comes as a extension of webpack also called as Both babel and Webpack are together used by popular JavaScript frameworks such as , , . Arrow function expression, spread operators, destructuring Babel loader . Angular React Vue js Develop Library Getting started Webpack conventions: Webpack works best with NPM Uses a module system (ES6, , ) CommonJs AMD Before going forward, make sure you have installed node and npm in your system. In case you have not, check this . link To check whether node and npm installed $ node -v$ npm -v Let’s start our work by creating the project directory as ‘tic-tac-toe’ and initialize npm $ mkdir tic-tac-toe$ cd tic-tac-toe$ npm init -y{"name": "learn","version": "1.0.0","description": "","main": "index.js","scripts": {"test": "echo \"Error: no test specified\" && exit 1"},"keywords": [],"author": "","license": "ISC"} $ command creates a node project with a package.json file with default configurations. This file is a json object. We will install our dependencies which will be mapped to this json object. npm init -y Install Webpack $ npm install webpack --save-dev Now open your project in a editor. It would be looking like this project opened in atom editor Now within root folder create a folder called . Within build create our first file called index.html. Quickly insert html tags. Provide a title Tic-Tac-Toe to the title tag. And in the head section include a script tag and mention a relative path to the src attribute as Aslo provide a container(game_container) for the game as shown below build game-lib.js. <!DOCTYPE html><html><head><meta charset="utf-8"><title>Tic Tac Toe</title><script src="game-lib.js" type="text/javascript"></script></head><body><div id="game_container"> </div> </body></html> Create another folder in the root directory. Within app create a file called and write our first JavaScript code as shown below app index.js let fun = ()=> {console.log("We are ready for Tic-Tac-Toe");}fun(); Now before setting up let’s install a couple of things here webpack $ npm install babel-core babel-loader babel-preset-es2015 webpack-dev-server babel-polyfill --save-dev Here will actually transform ES6 code, allows us to specify a preset that allows ES6 conversion, allows us to have automatic live code updates. To understand , have a look about these great articles and , you will have a concrete knowledge on these. babel-loader babel-preset-es2015 webpack-dev-server babel-polyfill what is polyfill shim Now to get webpack working we need to add a very specific file called in the root directory. Add the following code into this file webpack.config.js In the above config file there is an object called . It holds 5 properties. Let’s discuss one by one config : ‘./path/to/my/entry/file.js’. In our case entry file is index.js, as we have mentioned the relative path as ‘./app/index.js’ entry : Here we need to mention the options related to how webpack emits results. We mentioned name of the final compiled file (game library) as property and location of the file in property. The value should be a . Here is a global variable in the current module scope which provides absolute path of the parent directory of current module. output filename path absolute path __dirname : Here we need to mention the configuration regarding modules. We have given configuation for loader. We have used babel-loader to transpile our code. property takes a regular expression which tells which kind of file will run through this loader and is which files the modules should exclude. We have added node_modules to exclude. module test exclude : This lets us use es2015(ES6). We can mention if we want to parse jsx code. presets react : This is used create a webpack development server which allows us to run a web server at . property as true allows us to run automatic live code updating. devserver http://localhost:3000 inline Now we are ready with webpack. Run the following command and see the magic $ webpack You will be able to see a new file called under build folder which is a compiled version of our code written in index.js file under app folder game-lib.js The above code is not a minified version, We will create a minified version at the end of this workshop by introducing a webpack-production-config.js file. If you want to learn more about webpack, and learn about latest webpack-4.0 features and configuration go here Now let’s run the following code $ webpack-dev-server This will generate a dev server. Navigate to and open up the browser console. You will be able to see the message ‘ ’ in the browser console. http://localhost:3000/ We are ready for Tic-Tac-Toe If you are following my git repository the then run the following codes to see the version the code so far we have reached $ git clone $ cd tic-tac-toe$ git checkout b350603 https://github.com/debabrata100/tic-tac-toe.git Adding a library template Now open you ‘index.js’ file in editor. We are supposed to create a object and add a method to it Game init (function(window){let _init = ()=>{};window.Game = {init:_init}})(window) In the above code we used an IIFE(Immediately-Invoked Function Expression). This pattern is often used when trying to avoid polluting the global namespace, because all the variables used inside the IIFE (like in any other normal function) are not visible outside its scope. Therefore we are storing to variable because window variable is globally available. Game object window If you are confused with , visit this to get an inside about ES6 magic keyword against let link let var So we added a Window object and init method to init. But we are supposed to receive some parameters at the game initilization. Let’s receive container param in init method in the ES6 way (function(window){ const _init = ({container = ''})=>{let gameBody = document.getElementById(container);if(gameBody === undefined)gameBody = document.getElementsByTagName("body")[0];console.log("Game Initialised");}window.Game = {init:_init}})(window) You will be wondering about receiving the param container=’ ’ instead of receiving like container: ‘ ’ inside an object. So this is the Es6 syntax aka which accept the the param as a variable. Here we have assigned a default value as empty string. destructuring We are getting a DOM reference of this element as and we are also checking that in case this is undefined, we take document body as a reference where we can push the game UI. Update your index.js with the above code. gameBody Initializing Game Open index.html and initialize the game in the body section <script type="text/javascript">Game.init({container:"game_container"});</script> Then run $ webpack-dev-server Navigate to , you will be seeing a message ‘Game Initialised’ in the console http://localhost:3000 At this point your code should be matching with the following commit of my repository $ git checkout 74c3dac Prepare a playing board with html table We will create a html table element with document.createElement() method and adding tbody, rows and columns to it using plain javascript const _init = ({container = '',cellHeight = 50, cellWidth = 50})=>{let gameBody = document.getElementById(container);if(gameBody === undefined) // check whether element existgameBody = document.getElementsByTagName("body")[0]; const tbl = document.createElement("table"); const tblBody = document.createElement("tbody"); for (let i = 0; i < 3; i++) { var row = document.createElement("tr"); for (let j = 0; j < 3; j++) { let cell = document.createElement("td"); cell.setAttribute("width",cellHeight+"px"); cell.setAttribute("height",cellWidth+"px"); //setting styles for table cells cell.style.textAlign = "center"; cell.style.cursor = "pointer"; cell.style.fontSize = (cellHeight\*0.4) + 'px'; row.appendChild(cell); // insert each cell to row } tblBody.appendChild(row); } tbl.appendChild(tblBody); gameBody.appendChild(tbl); // insert table to dom tbl.setAttribute("border", "1"); // setting styles for table tbl.style.borderCollapse = 'collapse'; tbl.style.border = '2px solid #000'; tbl.style.height = "auto"; tbl.style.width = "auto"; tbl.style.margin = "0 auto"; } In the above code we have created 9 columns and applied some styles to it. We have added height and width of each cell to cellHeight and cellWidth variable which are other two parameters we receive during game initialization. We have set font size as 40% of cellHeight. Open index.html file and update the initialization Game.init({container:"game_container",cellHeight: 100,cellWidth: 100}); Run $ `webpack-dev-server`now and on the browser window you will notice a table created table for tic-tac-toe game created by the game library At this point your code should be matching with the following commit of my repository $ git checkout 0fdebc2 Create webpack build and dev server with npm NPM provide a excellent tool to execute script. We can run both $ webpack and $ webpack-dev-server command replacing with a single command Open package.json and under script property write the following commands "scripts": {"start": "webpack && webpack-dev-server"} Now run $ npm start You will notice our build has been created and a web server started at http://localhost:3000 To learn more about npm scripts visit https://docs.npmjs.com/misc/scripts At this point your code should be matching with the following commit of my repository $ git checkout c7d5ca7 Updating board on click event let’s initialize three variables // Put this code above outer for looplet gameState = 0;let cellIndex = 0;let inputArray = []; will be incremented on every click on a cell, which can give us the info about which player (‘X’ or ‘0’) has clicked. gameState // Put this code inside inner 'for' loopcell.setAttribute("index",(cellIndex++));cell.addEventListener("click",()=>{let inputState = gameState % 2? 0: 1;let cellText = inputState == 1? 'X':'0';cell.innerHTML = cellText;inputArray[index] = inputState;gameState++;}) In each cell we stored index of each cell as attribute which is equal to gameState of the current cell. is used to store state of each cell when clicked. Both and will be used to determine the winner. inputArray cellIndex inputArray Run $ npm start, at this point you should be able to enter 0 or X into the board Next we will determine the winner. At this point your code should be matching with the following commit of my repository $ git checkout 5c944a0 Declaring Winner Create a new file called winner.js under app folder. This will be a new ES6 module. We calculate the winner here in this module. We will export this module to use it inside index.js, where we can create instance of this module and use it to determine the winner. We will make use of another excellent feature of ES6 i.e class. In order to present the concept of classes in ES6, I have used class here, Otherwise to maintain Singleton design pattern we should avoid classes. Here is a nice . atricle Let’s create Winner class class Winner {constructor(){this._name = null;this._score = 0;}}export default Winner In the above code we have create a class called Winner and added two properties _name and _score which will be eventually storing name(0 or X) and score of the winner There are two types of export in ES6 Default Export Named Export If you want to learn more about ES6 import, export is a here great article Add getters to access name and score get name(){return this._name;}get score(){return this._score;} Now go to index.js file and write code for declaring winner Import the module at top as follows winner import Winner from './winner'; Now Create a instance of winner module (function(window){ let W = new Winner(); --------- cell.addEventListener("click",()=>{let index = cell.getAttribute("index");if(inputArray[index] !== undefined || W.name)return;let inputState = gameState % 2? 0: 1;let cellText = inputState == 1? 'X':'0';cell.innerHTML = cellText;inputArray[index] = inputState;gameState++;let winner = W.findWinner(inputArray);if(winner.state == 0 || winner.state == 1){console.log("Winner",W.name);}}) We are determining the winner in this statement let winner = W.findWinner(inputArray); This means, we need to define a method inside winner class which takes inputArray as param findWinner findWinner(inputLines){const winningLines = [[0, 1, 2],[3, 4, 5],[6, 7, 8],[0, 3, 6],[1, 4, 7],[2, 5, 8],[0, 4, 8],[2, 4, 6],];for (let i = 0; i < winningLines.length; i++) {const [a, b, c] = winningLines[i];// console.log(inputLines);if (inputLines[a] !== undefined && inputLines[a] === inputLines[b] && inputLines[a] === inputLines[c]) {this._name = inputLines[a] == 1 ? 'X': '0';this.calculateScore(inputLines,inputLines[a]);return {state:inputLines[a],lines:[a, b, c]};}}return {state:null,lines:[]};}calculateScore(inputLines,player){for(let i=0;i<inputLines.length;i++){if(inputLines[i] == player){this._score++;}}} In the above code winningLines stores all the 8 combinations of winning cells. We have traversed the winningLine array. For every iteration we are storing each three winning lines to a,b,c variables by applying destructuring const [a, b, c] = winningLines[i]; We have defined calculateScore() method which takes two params as ‘inputLines’ and ‘player’ and update the score of the player in the following line this._score++; findWinner() method will update the name of the winner in the following line this._name = inputLines[a] == 1 ? 'X': '0'; and returns both state of the winning lines (0 or 1) and winning lines as an object as shown below return {state:inputLines[a],lines:[a, b, c]}; Now run $ npm start and play the game. You can see the winner printed in the console Ideally you should not put any code in the entry module which involve game play. This module should only contain the code meant for exposing the Game Api(Game.init). Try separating this code to a separate module called which will be eventually be imported in the winner module used for determining the winner. In that case no need of passing param to the method because this can be available through module. I leave this work for you. index.html GameBoard inputArray findWinner GameBoard We have only one task left now that is Update a score board because we are supposed to see the score on the webpage itself instead of browser console Update Score Board Create a new file called score-board.js and Write a module inside as shown below ScoreBoard const ScoreBoard = {drawScore: ()=> { }, declareWinner: ()=> { } };export default ScoreBoard; This will have two method drawScore and declareWinner. One should tell which cells are the winning lines and the later should print a score to the webpage Check the following code for method definition drawScore: (table, inputArray, winner)=>{table.style.opacity = "0.5";let cells = table.getElementsByTagName("td");let cellIndex;for(let c = 0;c < cells.length;c++){cellIndex = parseInt(cells[c].getAttribute("index"));if(inputArray[cellIndex] == winner.state && winner.lines.indexOf(cellIndex)!=-1 ){cells[c].style.backgroundColor = "#eee";}}},declareWinner: (W)=>{let scoreboard = document.createElement("div");scoreboard.style.margin = "auto";scoreboard.style.height = '100px';scoreboard.style.lineHeight = '110px';scoreboard.style.border = 'dotted';scoreboard.style.marginTop = '10px';scoreboard.style.width = (window.innerWidth-window.innerWidth*0.02)+'px';scoreboard.style.backgroundColor = "transparent";scoreboard.style.textAlign = "center";scoreboard.innerHTML = "Winner: "+W.name +", Score: "+W.score;document.body.appendChild(scoreboard);} The code above is self explanatory. Import this module in index.js module and update the score board as shown below let winner = W.findWinner(inputArray);if(winner.state == 0 || winner.state == 1){ScoreBoard.declareWinner(W);ScoreBoard.drawScore(tbl, inputArray, winner);} We have successfully created a TIC-TAC-TOE game library at this point. One task is left. We need to create a minified version of our library. Let’s create it. Create a minified library Open your terminal and install these two dependencies $ npm install yargs strip-loader --save-dev helps you build interactive command line tools, by parsing arguments and generating an elegant user interface. Yargs is a webpack loader which helps you strip custom functions or debug statements strip-loader Now create a new file within root folder called webpack-production.config.js and add the following code var WebpackStripLoader = require('strip-loader');var devConfig = require('./webpack.config.js');var stripLoader = {test: [/\.js$/, /\.es6$/],exclude: /node_modules/,loader: WebpackStripLoader.loader('console.log')}devConfig.module.loaders.push(stripLoader);module.exports = devConfig; In the above code we have written how to strip down console.log statements from your library by using webpack strip loader. devConfig = require('./webpack.config.js'); The above statement includes webpack.config inside production-config, this means in production mode, we will be using webpack-production.config Open your webpack.config.js file add the following In the above code the uglify plugin hepls to minify the library and yargs helps to determine whether current excution in production mode, if so then uglify takes care of minifying during the webpack compilation and bundling. Let’s update the package.json to accept production config as shown below "scripts": {"build": "webpack --config webpack-production.config.js --env dev && webpack --config webpack-production.config.js --env build","serve": "webpack --env dev && webpack --env build","start": "webpack-dev-server"}, We have added two more script commands : To run in production mode build : To run in development mode serve We can run the new npm commands in the following way $ npm run build$ npm run serve I hope now, you will be definitely ready to write a standard plugin. javaScript You can clone my repository to see the final version. $ git clone https://github.com/debabrata100/tic-tac-toe.git Thank you :)