paint-brush
Mastering CI/CD: A Simplified Guide for Entry and Mid-Level Full-Stack Developersby@forison
113 reads

Mastering CI/CD: A Simplified Guide for Entry and Mid-Level Full-Stack Developers

by Addo Boakye ForisonJanuary 30th, 2024
Read on Terminal Reader
Read this story w/o Javascript
tldt arrow

Too Long; Didn't Read

This article is meant for Full-stack developers who are the entry or mid level who would want to add some extra skills to their sleeves. GitLab CI/CD can catch bugs early in the development cycle, and help ensure that all the code deployed to production complies with your established code standards.
featured image - Mastering CI/CD: A Simplified Guide for Entry and Mid-Level Full-Stack Developers
Addo Boakye Forison HackerNoon profile picture


There are several skills we can add to our existing repository as full-stack developers, especially when you are progressing from junior, to mid to senior level. Areas like CI/CD, AWS, DevOps, Kubernetes, etc tend to be the least of worries for entry-level developers since writing quality code is the paramount focus at that point. I have come to realize that all code can be critiqued depending on who is reviewing it.


This article is meant for Full-stack developers who are entry or mid-level and want to add some extra skills to their sleeves. I have simplified it as much as possible to the best of my knowledge for those looking to hit the ground running ASAP with CI/CD.


What is CI/CD?

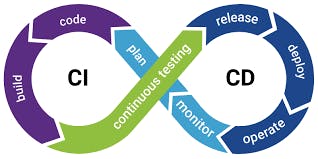
CI/CD is a continuous method of software development, where you continuously build, test, deploy, and monitor iterative code changes. More here: https://docs.gitlab.com/ee/ci/


Why do we need CI/CD?

This iterative process helps reduce the chance that you develop new code based on buggy or failed previous versions. GitLab CI/CD can catch bugs early in the development cycle, and help ensure that all the code deployed to production complies with your established code standards.


This technique is very important when you have more than one developer working on the same code base.


For example: “developer A” makes changes to the code bases and merges the branch which he(developer A) worked on.


Now “developer B” also makes changes that break the code but pushes changes to the branch without rebasing the branch with the notion that “developer A” has not merged or there are no errors.


This mechanism will flag the error in the pipeline as soon as “Developer B” tries to rebase and merge.


This maintains the integrity of the code at all times as different developers keep making changes to the code base. Developer B will not be able to merge until he/she researches the cause of the error and fixes it.


How to implement CI/CD on Gitlab

We are going to build a simple React application and use that as an example to help us understand the concept properly.


  1. Visit Gitlab and create a repository, the repository will contain a readme and .gitlab-ci.ym

    For the sake of this tutorial let's focus on .gitlab-ci.yml


  2. Clone the repository and check into it

git clone my-tutorial

cd my-tutorial


  1. Create a simple react application in the directory
npx create-react-app my-app


In this tutorial we will build 2 simple CI and 1 simple CD these are: Build, Test, and Deploy respectively.


Before we proceed to build our first CI, Build, let us first study how the syntax .gitlab-ci-yml works. .gitlab-ci-yml uses YAML format.


To do so let’S visit: https://docs.gitlab.com/ee/ci/yaml


Now, let us build our first CI called Build. The purpose of this is to make sure the application still runs even after developers make changes to it.


  1. Visit .gitlab-ci-yml and add the following properties.

variable:
  HEROKU_APP_NAME: "MyHerokuAppName"
  HEROKU_PRODUCTION_KEY: "MyHerokuAppKey"
  LATEST_NODE: node:latest
/* Stages determines the order in which the application should run, if not defined,
the runners will run in parallel. When defined the runners follow the order defined in the stages
In our case build runs before test and test runs before deploy.*/
stages:
  - build
  - test
  - deploy
// build, jest and deploy properties represent the name of the runners in the pipeline.
build:
  image: $LATEST_NODE
  stage: build // maps to the order in which the pipeline should run as specified in stages
  before_script:
  - yarn install
  script:
  - yarn run build
  - echo Build successful !
  allow_failure: true // if you don't want pipeline to fail when this job fails
jest:
  image: LATEST_NODE
  stage: test
  script: yarn run jest
  allow_failure: true
deploy:
  stage: deploy
  script:
    - yarn install dpl
    - dpl --provider=heroku --app=$HEROKU_APP_NAME --api-key=$HEROKU_PRODUCTION_KEY


That’s it for now!


In our subsequent article, we shall look into the implementation of the same concept using Jenkins