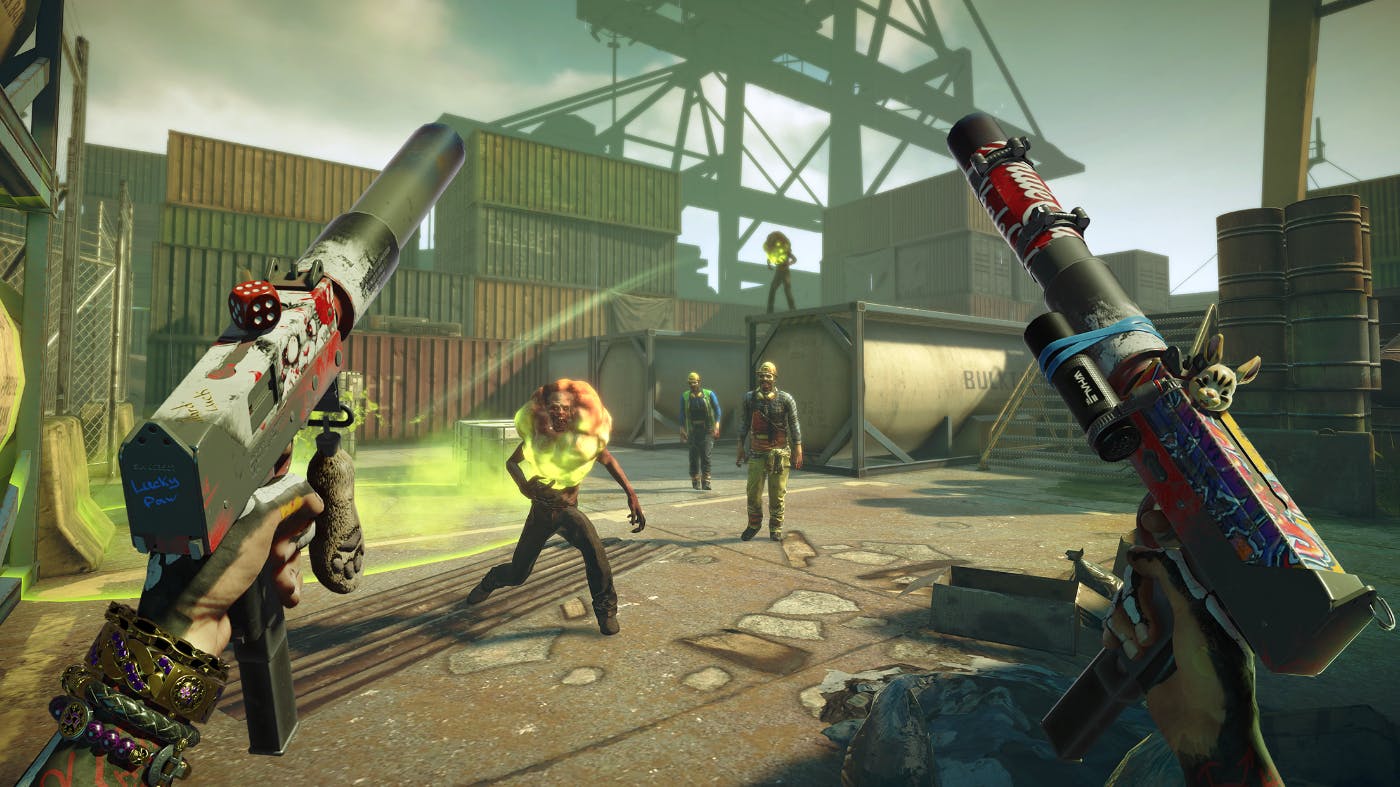
Perhaps you’re familiar with procedural level generation; well, in this post, it’s all about procedural mission generation. We’ll walk through the big picture of generating missions using classic machine learning and recurrent neural networks for roguelike games. Hi all! My name is Lev Kobelev, and I’m a Game Designer at MY.GAMES. In this article, I’d like to share my experience of using classical ML and simple neural networks as I explain how and why we settled on procedural mission generation, and we’ll also take a deep dive into the implementation of the process in Zombie State. Disclaimer: This article is for informational/entertainment purposes only, and when using a particular solution, we advise you to carefully check the terms of use of a particular resource and consult with the legal staff! The basics of the mission “box”: waves, spawns, and more ☝🏻 First up, some terminology: “arenas”, “levels”, and “locations” are synonymous in this context, as well as “area”, “zone” and “spawn area”. Now, let’s define “mission”. A mission is a predetermined order in which enemies appear at a location according to certain rules. As mentioned, in Zombie State locations are generated, so we’re not creating a “staged” experience. That is, we don’t place enemies at predetermined points – in fact, there are no such points. In our case, an enemy appears somewhere near a player or a specific wall. Further, all the arenas in the game are rectangular, so any mission can be played on any of them. Let's introduce the term “spawn”. Spawning is the appearance of several enemies of the same type according to predetermined parameters at points in a designated zone. One point – one enemy. If there aren’t enough points inside an area, then it is expanded according to special rules. It’s also important to understand that the zone is determined only when a spawn is triggered. The area is determined by the spawn parameters, and we’ll consider two examples below: a spawn near the player and one near a wall. The first type of spawn is near the player. The appearance near the player is specified through a sector, which is described by two radii: external and internal (R and r), the width of the sector (β), the angle of rotation (α) relative to the player, and the desired visibility (or invisibility) of the enemy’s appearance. Inside a sector are the necessary number of points for enemies – and that’s where they come from! The second type of spawn is near the wall. When a level is generated, each side is marked with a tag – a cardinal direction. The wall with the exit is always in the north. The appearance of an enemy near a wall is specified by the tag, the distance from it (o), the length (a), width of a zone (b), and the desired visibility (or invisibility) of the enemy’s appearance. The center of a zone is determined relative to the player's current position. Spawns come in waves. A wave is the manner in which spawns appear, namely the delay between them – we don’t want to pummel players with all of the enemies at once. Waves are combined into missions and are launched after each other, according to certain logic. For example, a second wave can be launched 20 seconds after the first (or if more than 90% of the zombies inside it are killed). So, an entire mission can be considered as a large box, and inside that box, there are medium-sized boxes (waves), and inside of the waves, there are even smaller boxes (spawns). So, before even working on the missions proper, we’ve already defined some rules: To maintain a constant sense of action, make sure to frequently spawn regular zombies close to the player at visible points. In order to highlight the exit or push the player from a certain side, strive to primarily spawn long-range battle enemies near walls On occasion, spawn special enemies in front of the player, but at invisible points. Never spawn enemies closer than X meters from the player Never spawn more than X enemies at the same time At one point, we had about a hundred missions ready, but after a while, we needed even more of them. The other designers and I didn’t want to spend a lot of time and effort creating another hundred missions, so we started searching for a quick and cheap method for mission generation. Mission Generation Mission decomposition All generators operate according to some set of rules, and our manually-created missions were also done according to certain recommendations. So, we came up with a hypothesis about the patterns within the missions, and those patterns would act as rules for the generator. ✍🏻 Some terms that you’ll find in the text: Clustering is the task of dividing a given collection into non-overlapping subsets (clusters), so that similar objects belong to the same cluster, and objects from different clusters are significantly different. Categorical features are data that take a value from a finite set and don’t have a numerical representation. For example, the spawn wall tag: North, South, etc. Coding of categorical features is a procedure for converting categorical features into a numerical representation according to some previously specified rules. For example, North → 0, South → 1, etc. Normalization is a method of preprocessing numerical characteristics in order to bring them to some common scale without losing information about the difference in ranges. They can be used, for example, to calculate the similarity of objects. As mentioned earlier, object similarity plays a key role in clustering problems. Searching for all of these patterns manually would be extremely time-consuming, so we decided to use clustering. This is where machine learning comes in handy, as it handles this task well. Clustering works in some N-dimensional space, and ML works specifically with numbers. Therefore all spawns would become vectors: Categorical variables were coded All data was normalized So, for example, the spawn that was described as “spawn 10 zombie shooters at the northern wall in an area with an indentation of 2 meters, a width of 10, and a length of 5” became the vector [0.5, 0.25, 0.2, 0.8, …, 0.5] (←these numbers are abstract). Additionally, the power of the set of enemies was reduced by mapping specific enemies to abstract types. For starters, this kind of mapping made it easy to assign a new enemy to a certain cluster. This also made it possible to reduce the optimal number of patterns and, as a result, increase generation accuracy – but more on that later. The clustering algorithm There are many clustering algorithms: K-Means, DBSCAN, spectral, hierarchical, and so on. They are all based on different ideas but have the same goal: to find clusters in the data. Below, you see different ways of finding clusters for the same data, depending on the chosen algorithm. The K-Means algorithm performed best in the case of spawns. Now, a small digression for those who know nothing about this algorithm (there will be no strict mathematical reasoning since this article is about game development and not about the basics of ML). K-Means iteratively divides the data into K clusters by minimizing the sum of squared distances from each feature to the mean value of its assigned cluster. The average is expressed by the intracluster sum of squared distances. It's important to understand the following about this method: It does not ensure the same size of clusters — for us, this was not a problem since the distribution of clusters within a mission can be uneven. It does not determine the number of clusters inside the data, but it does require a certain K number as an input, that is, the desired number of clusters. Sometimes, this number is determined in advance, and sometimes, it is not. Moreover, there is no generally accepted method for finding the “best” number of clusters. Let's look at that second point in a little more detail. The number of clusters The elbow method is often used to select the optimal number of clusters. The idea is very simple: we run the algorithm and try all K from 1 to N, where N is some reasonable number. In our case, it was 10 – it was impossible to find more clusters. Now, let's find the sum of the squared distances within each cluster (a score known as WSS or SS). We’ll display all of this on a graph and select a point after which the value on the y-axis stops significantly changing. To illustrate, we’ll use a well-known dataset, the Iris flower data set. Let's run the algorithm with K from 1 to 10 and see how the above estimate changes depending on K. At approximately K=3, the estimate stops changing much — and that’s exactly how many classes there were in the original dataset. If you can’t see the elbow, then you can use the Silhouette method, but it is beyond the scope of the article. All of the calculations above and below were done in Python using standard libraries for ML and data analysis: pandas, numpy, seaborn, and sklearn. I’m not sharing the code since the main purpose of the article is to illustrate capabilities rather than going into the technical details. Analyzing each cluster After obtaining the optimal number of clusters, each of them should be studied in detail. We need to see what spawns are included in it and the values they take. Let's create our own settings for each cluster for further generation use. The parameters include: Enemy weights to calculate probability. For example, a normal zombie = 5, and a zombie with a helmet = 1. Therefore, the probability of a normal one is 5/6, and a zombie with a helmet is 1/6. Weights are more convenient to operate. Value limits, for example, the minimum and maximum angle of rotation of the zone or its width. Each parameter is described by its own segment, any value of which is equally probable. Categorical values, for example, a wall tag or point visibility, are described as enemy settings, and this is via weights. Let's consider the cluster settings, which can be verbally described as “the spawning of simple enemies somewhere near the player at a short distance and, most likely, in visible points.” Cluster 1 table Enemies Type r R-delta rotation width visibility zombie_common_3_5=4, zombie_heavy=1 Player 10-12 1-2 0-30 30-45 Visible=9, Invisible=1 Here are two useful tricks: It is not a fixed number of the enemy that is specified, but a segment from which its number will be selected. This helps to operate with the same enemy in different clusters but in different quantities. It is not the outer radius (R) that is specified, but the delta (R-delta) relative to the inner radius (r), so that the rule R > r is respected. Thus, R-delta is added to random r, r+R-delta > r for any R-delta > 0, which means everything is good. This was done with each cluster, and there were less than 10 of them, so it didn't take long. Some interesting things about clustering We’ve only touched upon this topic a little, but there is still a lot of interesting stuff to study. Here are some articles for reference; they provide a good description of the processes of working with data, clustering, and analyzing results. Pokmean — KMean Clusting in Pokedex Clustering League of Legends Games FIFA20 Field Players Clustering Time for a mission In addition to spawn patterns, we decided to study the dependence of the total health of enemies within a mission on the expected time of its completion in order to use this parameter during generation. In the process of creating manual missions, the task was to build a coordinated pace for the chapter — a sequence of missions: short, long, short, short again, and so on. How can you get the total health of enemies within a mission if you know the player’s expected DPS and its time? 💡 Linear regression is a method of reconstructing the dependence of one variable on another or several other variables with a linear dependence function. The examples below will consider exclusively linear regression from one variable: f(x) = wx + b. Let’s introduce the following terms: HP is the total health of enemies in the mission DPS is the expected player damage per second Action time is the number of seconds the player spends destroying enemies in the mission Free time is the additional time within which the player can, for example, change the target Expected mission time is the sum of action and free time So, HP = DPS * action time + free time. When creating a manual chapter, we recorded the expected time of each mission; now, we need to find action time. If you know the expected mission time, you can calculate action time and subtract it from expected time to get free time: free time = mission time - action time = mission time - HP * DPS. This number can then be divided by the average number of enemies in the mission, and you get free time per enemy. Therefore, all that remains is to simply build a linear regression from the expected mission time to free time per enemy. Additionally, we will construct a regression of the share of action time from mission time. Let's look at an example of calculations and see why these regressions are used: Enter two numbers: mission time and DPS as 30 and 70 See the regression of the share of action time from mission time and get the answer, 0.8 Calculate the action time as 30*0.8=6 seconds Calculate HP as 6*70=420 See the regression of free time per enemy from mission time and get the answer, which is 0.25 seconds. Here’s a question: why do we need to know free time for the enemy? As mentioned earlier, spawns are arranged by time. Therefore, the time of the i-th spawn can be calculated as the sum of the action time of the (i-1)th spawn and free time within it. And here comes another question: why isn’t the share of action time and free time constant? In our game, the difficulty of a mission is related to its duration. That is, short missions are easier, and long ones are more difficult. One of the difficulty parameters is free time per enemy. There are several straight lines in the graph above and they have the same slope coefficient (w), but a different offset (b). Thus, to change difficulty, it’s enough to change the offset: increasing b makes the game easier, decreasing makes it more difficult, and negative numbers are allowed. These options help you change the difficulty from chapter to chapter. I believe all designers should delve into the problem of regression, as it often helps in deconstructing other projects: Linear Regression Tutorial Machine Learning Project Basic - Linear Regression Beginner Scikit-learn Linear Regression Generating new missions So, we managed to find the rules for the generator, and now we can move on to the generation process. If you think abstractly, then any mission can be represented as a sequence of numbers, where each number reflects a specific spawn cluster. For example, mission: 1, 2, 1, 1, 2, 3, 3, 2, 1, 3. This means that the task of generating new missions comes down to generating new numerical sequences. After generation, you simply need to “expand” each number individually in accordance with the cluster settings. Basic approach If we consider a trivial method of generating a sequence, we can calculate the statistical probability of a particular spawn following any other spawn. For example, we get the following diagram: The top of the diagram is a cluster it leads to, a vertex, and the edge weight is the cluster probability of being next. Walking through such a graph, we could generate a sequence. However, this approach has a number of disadvantages. These include, for example, lack of memory (it only knows the current state) and the chance of “getting stuck” in one state if it has a high statistical probability of turning into itself. ✍🏻 If we consider this graph as a process, we get a simple Markov chain. Recurrent neural networks Let's turn to neural networks, namely recurrent ones since they don’t have the disadvantages of the basic approach. These networks are good at modeling sequences like characters or words in natural language processing tasks. To put it very simply, the network is trained to predict the next element of the sequence based on the previous ones. A description of how these networks work is beyond the scope of this article, as this is a huge topic. Instead, let's look at what is needed for training: A set of N sequences of L length The answer to each of N sequences is a one-hot vector, that is, a vector of C length consisting of C-1 zeros and one 1, indicating the answer. C is the power of the set of answers. A simple example with N=2, L=3, C=5. Let’s take the sequence 1, 2, 3, 4, 1 and look for subsequences of L+1 length inside it: [1, 2, 3, 4], [2, 3, 4, 1]. Let’s divide the sequence into an input of L characters and an answer (target) - the (L+1)th character*.* For example, [1, 2, 3, 4] → [1, 2, 3] and [4]. We encode the answers into one-hot vectors, [4] → [0, 0, 0, 0, 1]. Next, you can sketch out a simple neural network in Python using tensorflow or pytorch. You can see how this is done using the links below. All that remains is to start the training process on the data described above, wait, and... then you can go into production! Machine learning models have certain metrics, such as accuracy. Accuracy shows the proportion of correctly given answers. However, it must be viewed with caution as there may be class imbalances in the data. If there are none (or almost none), then we can say that the model works well if it predicts answers better than at random, that is, accuracy > 1/C; if close to 1, it works great. In our case, the model showed good accuracy. One of the reasons for these results is the small number of clusters that were achieved thanks to mapping enemies to their types and their balance. Here are more materials on RNN for those interested: Beginners Guide to Text Generation using LSTMs Tackling Toxic Using Keras Exploring Gameboy Advanced Games Generation Process Generator setup The trained model is easily serialized, so you can use it as an asset in the engine, in our case, Unity. Accordingly, the generator accesses the model via an API and iteratively creates a sequence. The result is expanded and saved into a separate CSV file. To interact with the model, a custom window is created in Unity where the game designers can set all the necessary mission parameters: Name Duration Available enemies, as enemies appear gradually Number of waves in the mission and the distribution of health across them Enemy-specific weight modifiers, which help to select certain enemies more often, for example, new ones And so on After entering the settings, all that’s left is to press a button and get a file that can be edited if necessary. Yes, I wanted to generate missions in advance, and not during the game, so that they could be tweaked. The stages of generation Let’s look into the generation process: The model receives a sequence as input and produces an answer — a vector of probabilities that the i-th cluster will be next. The algorithm rolls the dice, if the number is greater than the error chance, then we take the most probable one, otherwise random. This trick adds a little creativity and variety. The process continues until a given number of iterations. It’s greater than the number of spawns in any of the manually created missions. The sequence goes on; that is, each number accesses the saved data of the cluster and receives random values from them. The health inside the data is summed up, and everything that is greater than the expected health is thrown out of the sequence (its calculation was discussed above) Spawns are divided into waves depending on the specified health distribution and then divided into groups (so that several enemies appear at once), and their appearance time is given as the sum of action and free time of the previous group of spawns. The mission is ready! Conclusions So, this is a good tool that helped us speed up the creation of missions by several times. Additionally, it helped some designers to overcome the fear of ”writer’s block,” so to speak, since now you can get a ready-made solution in a few seconds. In the article, using the example of mission generation, I tried to demonstrate how classical machine learning methods and neural networks can help in game development. There is a huge trend towards generative AI these days –but don't forget about other branches of machine learning, as they are also capable of a lot. Thanks for taking the time to read this article! I hope you get the idea of both the approach to missions in generated locations and the generation of missions. Don't be afraid of learning new things, develop yourself, and make good games! Illustrations by shabbyrtist Perhaps you’re familiar with procedural level generation; well, in this post, it’s all about procedural mission generation. We’ll walk through the big picture of generating missions using classic machine learning and recurrent neural networks for roguelike games. Perhaps you’re familiar with procedural level generation; well, in this post, it’s all about procedural mission generation. We’ll walk through the big picture of generating missions using classic machine learning and recurrent neural networks for roguelike games. Hi all! My name is Lev Kobelev, and I’m a Game Designer at MY.GAMES. In this article, I’d like to share my experience of using classical ML and simple neural networks as I explain how and why we settled on procedural mission generation, and we’ll also take a deep dive into the implementation of the process in Zombie State. Disclaimer: This article is for informational/entertainment purposes only, and when using a particular solution, we advise you to carefully check the terms of use of a particular resource and consult with the legal staff! Disclaimer: This article is for informational/entertainment purposes only, and when using a particular solution, we advise you to carefully check the terms of use of a particular resource and consult with the legal staff! Disclaimer: This article is for informational/entertainment purposes only, and when using a particular solution, we advise you to carefully check the terms of use of a particular resource and consult with the legal staff! The basics of the mission “box”: waves, spawns, and more ☝🏻 First up, some terminology: “ arenas ”, “ levels ”, and “ locations ” are synonymous in this context, as well as “ area ”, “ zone ” and “ spawn area ”. arenas levels locations area zone spawn area Now, let’s define “ mission ”. A mission is a predetermined order in which enemies appear at a location according to certain rules . As mentioned, in Zombie State locations are generated, so we’re not creating a “staged” experience. That is, we don’t place enemies at predetermined points – in fact, there are no such points. In our case, an enemy appears somewhere near a player or a specific wall. Further, all the arenas in the game are rectangular, so any mission can be played on any of them. mission A mission is a predetermined order in which enemies appear at a location according to certain rules Let's introduce the term “ spawn ”. Spawning is the appearance of several enemies of the same type according to predetermined parameters at points in a designated zone . One point – one enemy. If there aren’t enough points inside an area, then it is expanded according to special rules. It’s also important to understand that the zone is determined only when a spawn is triggered. The area is determined by the spawn parameters, and we’ll consider two examples below: a spawn near the player and one near a wall. spawn Spawning is the appearance of several enemies of the same type according to predetermined parameters at points in a designated zone The first type of spawn is near the player . The appearance near the player is specified through a sector, which is described by two radii: external and internal (R and r), the width of the sector (β), the angle of rotation (α) relative to the player, and the desired visibility (or invisibility) of the enemy’s appearance. Inside a sector are the necessary number of points for enemies – and that’s where they come from! The first type of spawn is near the player The second type of spawn is near the wall . When a level is generated, each side is marked with a tag – a cardinal direction. The wall with the exit is always in the north. The appearance of an enemy near a wall is specified by the tag, the distance from it (o), the length (a), width of a zone (b), and the desired visibility (or invisibility) of the enemy’s appearance. The center of a zone is determined relative to the player's current position. The second type of spawn is near the wall Spawns come in waves . A wave is the manner in which spawns appear, namely the delay between them – we don’t want to pummel players with all of the enemies at once. Waves are combined into missions and are launched after each other, according to certain logic. For example, a second wave can be launched 20 seconds after the first (or if more than 90% of the zombies inside it are killed). So, an entire mission can be considered as a large box, and inside that box, there are medium-sized boxes (waves), and inside of the waves, there are even smaller boxes (spawns). waves So, before even working on the missions proper, we’ve already defined some rules: To maintain a constant sense of action, make sure to frequently spawn regular zombies close to the player at visible points. In order to highlight the exit or push the player from a certain side, strive to primarily spawn long-range battle enemies near walls On occasion, spawn special enemies in front of the player, but at invisible points. Never spawn enemies closer than X meters from the player Never spawn more than X enemies at the same time To maintain a constant sense of action, make sure to frequently spawn regular zombies close to the player at visible points. In order to highlight the exit or push the player from a certain side, strive to primarily spawn long-range battle enemies near walls On occasion, spawn special enemies in front of the player, but at invisible points. Never spawn enemies closer than X meters from the player Never spawn more than X enemies at the same time At one point, we had about a hundred missions ready, but after a while, we needed even more of them. The other designers and I didn’t want to spend a lot of time and effort creating another hundred missions, so we started searching for a quick and cheap method for mission generation. Mission Generation Mission decomposition All generators operate according to some set of rules, and our manually-created missions were also done according to certain recommendations. So, we came up with a hypothesis about the patterns within the missions, and those patterns would act as rules for the generator. ✍🏻 Some terms that you’ll find in the text: Clustering is the task of dividing a given collection into non-overlapping subsets (clusters), so that similar objects belong to the same cluster, and objects from different clusters are significantly different. Categorical features are data that take a value from a finite set and don’t have a numerical representation. For example, the spawn wall tag: North, South, etc. Coding of categorical features is a procedure for converting categorical features into a numerical representation according to some previously specified rules. For example, North → 0, South → 1, etc. Normalization is a method of preprocessing numerical characteristics in order to bring them to some common scale without losing information about the difference in ranges. They can be used, for example, to calculate the similarity of objects. As mentioned earlier, object similarity plays a key role in clustering problems. Clustering is the task of dividing a given collection into non-overlapping subsets (clusters), so that similar objects belong to the same cluster, and objects from different clusters are significantly different. Clustering is the task of dividing a given collection into non-overlapping subsets (clusters), so that similar objects belong to the same cluster, and objects from different clusters are significantly different. Clustering Categorical features are data that take a value from a finite set and don’t have a numerical representation. For example, the spawn wall tag: North, South, etc. Categorical features are data that take a value from a finite set and don’t have a numerical representation. For example, the spawn wall tag: North, South, etc. Categorical features Coding of categorical features is a procedure for converting categorical features into a numerical representation according to some previously specified rules. For example, North → 0, South → 1, etc. Coding of categorical features is a procedure for converting categorical features into a numerical representation according to some previously specified rules. For example, North → 0, South → 1, etc. Coding of categorical features Normalization is a method of preprocessing numerical characteristics in order to bring them to some common scale without losing information about the difference in ranges. They can be used, for example, to calculate the similarity of objects. As mentioned earlier, object similarity plays a key role in clustering problems. Normalization is a method of preprocessing numerical characteristics in order to bring them to some common scale without losing information about the difference in ranges. They can be used, for example, to calculate the similarity of objects. As mentioned earlier, object similarity plays a key role in clustering problems. Normalization Searching for all of these patterns manually would be extremely time-consuming, so we decided to use clustering. This is where machine learning comes in handy, as it handles this task well. Clustering works in some N-dimensional space, and ML works specifically with numbers. Therefore all spawns would become vectors: Categorical variables were coded All data was normalized Categorical variables were coded All data was normalized So, for example, the spawn that was described as “spawn 10 zombie shooters at the northern wall in an area with an indentation of 2 meters, a width of 10, and a length of 5” became the vector [0.5, 0.25, 0.2, 0.8, …, 0.5] (←these numbers are abstract). Additionally, the power of the set of enemies was reduced by mapping specific enemies to abstract types. For starters, this kind of mapping made it easy to assign a new enemy to a certain cluster. This also made it possible to reduce the optimal number of patterns and, as a result, increase generation accuracy – but more on that later. The clustering algorithm There are many clustering algorithms: K-Means, DBSCAN, spectral, hierarchical, and so on. They are all based on different ideas but have the same goal: to find clusters in the data. Below, you see different ways of finding clusters for the same data, depending on the chosen algorithm. The K-Means algorithm performed best in the case of spawns. Now, a small digression for those who know nothing about this algorithm (there will be no strict mathematical reasoning since this article is about game development and not about the basics of ML). K-Means iteratively divides the data into K clusters by minimizing the sum of squared distances from each feature to the mean value of its assigned cluster. The average is expressed by the intracluster sum of squared distances. It's important to understand the following about this method: It does not ensure the same size of clusters — for us, this was not a problem since the distribution of clusters within a mission can be uneven. It does not determine the number of clusters inside the data, but it does require a certain K number as an input, that is, the desired number of clusters. Sometimes, this number is determined in advance, and sometimes, it is not. Moreover, there is no generally accepted method for finding the “best” number of clusters. It does not ensure the same size of clusters — for us, this was not a problem since the distribution of clusters within a mission can be uneven. It does not determine the number of clusters inside the data, but it does require a certain K number as an input, that is, the desired number of clusters. Sometimes, this number is determined in advance, and sometimes, it is not. Moreover, there is no generally accepted method for finding the “best” number of clusters. Let's look at that second point in a little more detail. The number of clusters The elbow method is often used to select the optimal number of clusters. The idea is very simple: we run the algorithm and try all K from 1 to N, where N is some reasonable number. In our case, it was 10 – it was impossible to find more clusters. Now, let's find the sum of the squared distances within each cluster (a score known as WSS or SS). We’ll display all of this on a graph and select a point after which the value on the y-axis stops significantly changing. To illustrate, we’ll use a well-known dataset, the Iris flower data set . Let's run the algorithm with K from 1 to 10 and see how the above estimate changes depending on K. At approximately K=3, the estimate stops changing much — and that’s exactly how many classes there were in the original dataset. Iris flower data set Iris flower data set If you can’t see the elbow, then you can use the Silhouette method, but it is beyond the scope of the article. All of the calculations above and below were done in Python using standard libraries for ML and data analysis: pandas, numpy, seaborn, and sklearn. I’m not sharing the code since the main purpose of the article is to illustrate capabilities rather than going into the technical details. Analyzing each cluster After obtaining the optimal number of clusters, each of them should be studied in detail. We need to see what spawns are included in it and the values they take. Let's create our own settings for each cluster for further generation use. The parameters include: Enemy weights to calculate probability. For example, a normal zombie = 5, and a zombie with a helmet = 1. Therefore, the probability of a normal one is 5/6, and a zombie with a helmet is 1/6. Weights are more convenient to operate. Value limits, for example, the minimum and maximum angle of rotation of the zone or its width. Each parameter is described by its own segment, any value of which is equally probable. Categorical values, for example, a wall tag or point visibility, are described as enemy settings, and this is via weights. Enemy weights to calculate probability. For example, a normal zombie = 5, and a zombie with a helmet = 1. Therefore, the probability of a normal one is 5/6, and a zombie with a helmet is 1/6. Weights are more convenient to operate. Value limits, for example, the minimum and maximum angle of rotation of the zone or its width. Each parameter is described by its own segment, any value of which is equally probable. Categorical values, for example, a wall tag or point visibility, are described as enemy settings, and this is via weights. Let's consider the cluster settings, which can be verbally described as “the spawning of simple enemies somewhere near the player at a short distance and, most likely, in visible points.” Cluster 1 table Enemies Type r R-delta rotation width visibility zombie_common_3_5=4, zombie_heavy=1 Player 10-12 1-2 0-30 30-45 Visible=9, Invisible=1 Enemies Type r R-delta rotation width visibility zombie_common_3_5=4, zombie_heavy=1 Player 10-12 1-2 0-30 30-45 Visible=9, Invisible=1 Enemies Type r R-delta rotation width visibility Enemies Enemies Type Type r r R-delta R-delta rotation rotation width width visibility visibility zombie_common_3_5=4, zombie_heavy=1 Player 10-12 1-2 0-30 30-45 Visible=9, Invisible=1 zombie_common_3_5=4, zombie_heavy=1 zombie_common_3_5=4, zombie_heavy=1 Player Player 10-12 10-12 1-2 1-2 0-30 0-30 30-45 30-45 Visible=9, Invisible=1 Visible=9, Invisible=1 Here are two useful tricks: It is not a fixed number of the enemy that is specified, but a segment from which its number will be selected. This helps to operate with the same enemy in different clusters but in different quantities. It is not the outer radius (R) that is specified, but the delta (R-delta) relative to the inner radius (r), so that the rule R > r is respected. Thus, R-delta is added to random r, r+R-delta > r for any R-delta > 0, which means everything is good. It is not a fixed number of the enemy that is specified, but a segment from which its number will be selected. This helps to operate with the same enemy in different clusters but in different quantities. It is not the outer radius (R) that is specified, but the delta (R-delta) relative to the inner radius (r), so that the rule R > r is respected. Thus, R-delta is added to random r, r+R-delta > r for any R-delta > 0, which means everything is good. This was done with each cluster, and there were less than 10 of them, so it didn't take long. Some interesting things about clustering We’ve only touched upon this topic a little, but there is still a lot of interesting stuff to study. Here are some articles for reference; they provide a good description of the processes of working with data, clustering, and analyzing results. Pokmean — KMean Clusting in Pokedex Clustering League of Legends Games FIFA20 Field Players Clustering Pokmean — KMean Clusting in Pokedex Pokmean — KMean Clusting in Pokedex Pokmean — KMean Clusting in Pokedex Clustering League of Legends Games Clustering League of Legends Games Clustering League of Legends Games FIFA20 Field Players Clustering FIFA20 Field Players Clustering FIFA20 Field Players Clustering Time for a mission In addition to spawn patterns, we decided to study the dependence of the total health of enemies within a mission on the expected time of its completion in order to use this parameter during generation. In the process of creating manual missions, the task was to build a coordinated pace for the chapter — a sequence of missions: short, long, short, short again, and so on. How can you get the total health of enemies within a mission if you know the player’s expected DPS and its time? 💡 Linear regression is a method of reconstructing the dependence of one variable on another or several other variables with a linear dependence function. The examples below will consider exclusively linear regression from one variable: f(x) = wx + b. Let’s introduce the following terms: HP is the total health of enemies in the mission DPS is the expected player damage per second Action time is the number of seconds the player spends destroying enemies in the mission Free time is the additional time within which the player can, for example, change the target Expected mission time is the sum of action and free time HP is the total health of enemies in the mission HP DPS is the expected player damage per second DPS Action time is the number of seconds the player spends destroying enemies in the mission Action time Free time is the additional time within which the player can, for example, change the target Free time Expected mission time is the sum of action and free time Expected mission time So, HP = DPS * action time + free time. When creating a manual chapter, we recorded the expected time of each mission; now, we need to find action time. action time. If you know the expected mission time , you can calculate action time and subtract it from expected time to get free time : free time = mission time - action time = mission time - HP * DPS. This number can then be divided by the average number of enemies in the mission, and you get free time per enemy. Therefore, all that remains is to simply build a linear regression from the expected mission time to free time per enemy. expected mission time action time expected time free time Additionally, we will construct a regression of the share of action time from mission time. Let's look at an example of calculations and see why these regressions are used: Enter two numbers: mission time and DPS as 30 and 70 See the regression of the share of action time from mission time and get the answer, 0.8 Calculate the action time as 30*0.8=6 seconds Calculate HP as 6*70=420 See the regression of free time per enemy from mission time and get the answer, which is 0.25 seconds. Enter two numbers: mission time and DPS as 30 and 70 See the regression of the share of action time from mission time and get the answer, 0.8 Calculate the action time as 30*0.8=6 seconds Calculate HP as 6*70=420 See the regression of free time per enemy from mission time and get the answer, which is 0.25 seconds. Here’s a question: why do we need to know free time for the enemy? As mentioned earlier, spawns are arranged by time. Therefore, the time of the i-th spawn can be calculated as the sum of the action time of the (i-1)th spawn and free time within it. And here comes another question: why isn’t the share of action time and free time constant? In our game, the difficulty of a mission is related to its duration. That is, short missions are easier, and long ones are more difficult. One of the difficulty parameters is free time per enemy. There are several straight lines in the graph above and they have the same slope coefficient (w), but a different offset (b). Thus, to change difficulty, it’s enough to change the offset: increasing b makes the game easier, decreasing makes it more difficult, and negative numbers are allowed. These options help you change the difficulty from chapter to chapter. I believe all designers should delve into the problem of regression, as it often helps in deconstructing other projects: Linear Regression Tutorial Machine Learning Project Basic - Linear Regression Beginner Scikit-learn Linear Regression Linear Regression Tutorial Linear Regression Tutorial Linear Regression Tutorial Machine Learning Project Basic - Linear Regression Machine Learning Project Basic - Linear Regression Machine Learning Project Basic - Linear Regression Beginner Scikit-learn Linear Regression Beginner Scikit-learn Linear Regression Beginner Scikit-learn Linear Regression Generating new missions So, we managed to find the rules for the generator, and now we can move on to the generation process. If you think abstractly, then any mission can be represented as a sequence of numbers, where each number reflects a specific spawn cluster. For example, mission: 1, 2, 1, 1, 2, 3, 3, 2, 1, 3. This means that the task of generating new missions comes down to generating new numerical sequences. After generation, you simply need to “expand” each number individually in accordance with the cluster settings. Basic approach If we consider a trivial method of generating a sequence, we can calculate the statistical probability of a particular spawn following any other spawn. For example, we get the following diagram: The top of the diagram is a cluster it leads to, a vertex, and the edge weight is the cluster probability of being next. Walking through such a graph, we could generate a sequence. However, this approach has a number of disadvantages. These include, for example, lack of memory (it only knows the current state) and the chance of “getting stuck” in one state if it has a high statistical probability of turning into itself. ✍🏻 If we consider this graph as a process, we get a simple Markov chain. Recurrent neural networks Let's turn to neural networks, namely recurrent ones since they don’t have the disadvantages of the basic approach. These networks are good at modeling sequences like characters or words in natural language processing tasks. To put it very simply, the network is trained to predict the next element of the sequence based on the previous ones. A description of how these networks work is beyond the scope of this article, as this is a huge topic. Instead, let's look at what is needed for training: A set of N sequences of L length The answer to each of N sequences is a one-hot vector, that is, a vector of C length consisting of C-1 zeros and one 1, indicating the answer. C is the power of the set of answers. A set of N sequences of L length The answer to each of N sequences is a one-hot vector, that is, a vector of C length consisting of C-1 zeros and one 1, indicating the answer. one-hot one-hot C is the power of the set of answers. A simple example with N=2, L=3, C=5. Let’s take the sequence 1, 2, 3, 4, 1 and look for subsequences of L+1 length inside it: [1, 2, 3, 4], [2, 3, 4, 1]. Let’s divide the sequence into an input of L characters and an answer (target) - the (L+1)th character*.* For example, [1, 2, 3, 4] → [1, 2, 3] and [4]. We encode the answers into one-hot vectors, [4] → [0, 0, 0, 0, 1]. Next, you can sketch out a simple neural network in Python using tensorflow or pytorch. You can see how this is done using the links below. All that remains is to start the training process on the data described above, wait, and... then you can go into production! Machine learning models have certain metrics, such as accuracy. Accuracy shows the proportion of correctly given answers. However, it must be viewed with caution as there may be class imbalances in the data. If there are none (or almost none), then we can say that the model works well if it predicts answers better than at random, that is, accuracy > 1/C; if close to 1, it works great. In our case, the model showed good accuracy. One of the reasons for these results is the small number of clusters that were achieved thanks to mapping enemies to their types and their balance. Here are more materials on RNN for those interested: Beginners Guide to Text Generation using LSTMs Tackling Toxic Using Keras Exploring Gameboy Advanced Games Beginners Guide to Text Generation using LSTMs Beginners Guide to Text Generation using LSTMs Beginners Guide to Text Generation using LSTMs Tackling Toxic Using Keras Tackling Toxic Using Keras Tackling Toxic Using Keras Exploring Gameboy Advanced Games Exploring Gameboy Advanced Games Exploring Gameboy Advanced Games Generation Process Generator setup The trained model is easily serialized , so you can use it as an asset in the engine, in our case, Unity. Accordingly, the generator accesses the model via an API and iteratively creates a sequence. The result is expanded and saved into a separate CSV file. serialized serialized To interact with the model, a custom window is created in Unity where the game designers can set all the necessary mission parameters: Name Duration Available enemies, as enemies appear gradually Number of waves in the mission and the distribution of health across them Enemy-specific weight modifiers, which help to select certain enemies more often, for example, new ones And so on Name Duration Available enemies, as enemies appear gradually Number of waves in the mission and the distribution of health across them Enemy-specific weight modifiers, which help to select certain enemies more often, for example, new ones And so on After entering the settings, all that’s left is to press a button and get a file that can be edited if necessary. Yes, I wanted to generate missions in advance, and not during the game, so that they could be tweaked. The stages of generation Let’s look into the generation process: The model receives a sequence as input and produces an answer — a vector of probabilities that the i-th cluster will be next. The algorithm rolls the dice, if the number is greater than the error chance, then we take the most probable one, otherwise random. This trick adds a little creativity and variety. The process continues until a given number of iterations. It’s greater than the number of spawns in any of the manually created missions. The sequence goes on; that is, each number accesses the saved data of the cluster and receives random values from them. The health inside the data is summed up, and everything that is greater than the expected health is thrown out of the sequence (its calculation was discussed above) Spawns are divided into waves depending on the specified health distribution and then divided into groups (so that several enemies appear at once), and their appearance time is given as the sum of action and free time of the previous group of spawns. The mission is ready! The model receives a sequence as input and produces an answer — a vector of probabilities that the i-th cluster will be next. The algorithm rolls the dice, if the number is greater than the error chance , then we take the most probable one, otherwise random. This trick adds a little creativity and variety. error chance The process continues until a given number of iterations. It’s greater than the number of spawns in any of the manually created missions. The sequence goes on; that is, each number accesses the saved data of the cluster and receives random values from them. The health inside the data is summed up, and everything that is greater than the expected health is thrown out of the sequence (its calculation was discussed above) Spawns are divided into waves depending on the specified health distribution and then divided into groups (so that several enemies appear at once), and their appearance time is given as the sum of action and free time of the previous group of spawns. The mission is ready! Conclusions So, this is a good tool that helped us speed up the creation of missions by several times. Additionally, it helped some designers to overcome the fear of ”writer’s block,” so to speak, since now you can get a ready-made solution in a few seconds. In the article, using the example of mission generation, I tried to demonstrate how classical machine learning methods and neural networks can help in game development. There is a huge trend towards generative AI these days –but don't forget about other branches of machine learning, as they are also capable of a lot. Thanks for taking the time to read this article! I hope you get the idea of both the approach to missions in generated locations and the generation of missions. Don't be afraid of learning new things, develop yourself, and make good games! Illustrations by shabbyrtist Illustrations by shabbyrtist