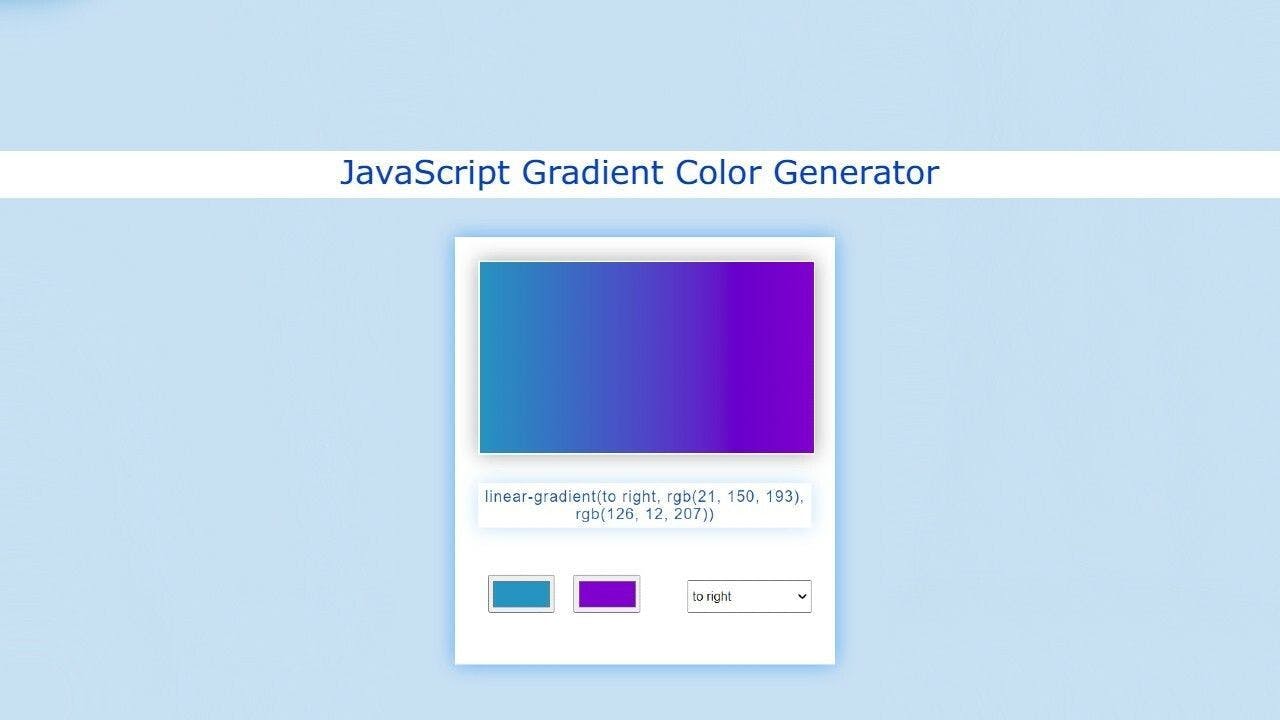
In this article, I have shown you how to make Gradient Color Generator using JavaScript. Earlier I shared with you how to make many more types of random color generators. However, in this project, you can manually create the color of your choice.
Watch its live demo to learn how it works. Here's how to choose a color using HTML's color input.
This allows you to choose the color of your choice and combine it with different angles to create a Gradient Color.
You can do the work of creating Gradient Color manually. But this project will help you to create the perfect color. You need to have an idea about basic HTML CSS and JavaScript to build it. Here I have given a complete step-by-step tutorial and necessary source code.
First, I made a box, and there is a small display in that box. The colors can be seen in the display. Then, there is a box in which the color code can be found. I created two color input boxes with the help of HTML. A select box has been created to select the angle.
The following code is the HTML code required to create this Gradient Color Generator. Below I have shown all the codes broken down. But if you want all the code at once, you can take the help of this link to download the source code.
Basic Structure
The following HTML code helped to create the basic structure.
<div class="random-color">
</div>
Color Display
Created a display using the code below.The Gradient Color can be seen in this display.
<!-- color Display -->
<div class="display" id="gradient"></div>
Color Code Box
Now I have created a box in which the color codes can be seen.
<!-- color code box -->
<div class="codess"></div>
Color Input
Now I have created the color input box. In HTML, we get many types of input. In which 'color' is a kind of input.
<!-- color input -->
<input type="color" class="color1" name="color1" value="#FFAAAA">
<input type="color" class="color2" name="color2" value="#734C8F">
HTML Select Box
Now I have created a select box with different angles. As a result, you can select the angle of your choice and add two colors.
<!-- select box -->
<select name="toDirection">
<option value="to right">to right</option>
<option value="to left bottom">to left bottom</option>
<option value="to left top">to left top</option>
<option value="to bottom">to bottom</option>
<option value="to top">to top</option>
<option value="to right bottom">to right bottom</option>
<option value="to right top">to right top</option>
<option value="to left">to left</option>
</select>
We have used the HTML code above, but now is the time to design HTML with CSS code.
I designed the web page using the following CSS code.
html {
height: 100%;
-webkit-background-size: cover;
-moz-background-size: cover;
-o-background-size: cover;
background-size: cover;
background-repeat:no-repeat;
}
body {
color: #035aab;
text-align: center;
}
I have designed the box using the following CSS. Box width: 350px and height: 400px are used here. I didn't use any background color here, so I added box-shadow.
.random-color{
width: 350px;
box-shadow: 0 0 20px rgba(0,139,253,0.25);
margin: 50px auto;
padding: 20px;
height: 400px;
}
Now I have designed the display. Display width: 350px
and height: 200px
. Here a background Gradient color is used, which can be seen in normal condition. This color will change when you change the value of the input function.
.display{
width: 350px;
height: 200px;
border: 2px solid white;
box-shadow: 0 0 20px rgba(1,1,1,0.35);
background: linear-gradient(to right, #FFAAAA, #734C8F)
}
Now the box is designed to see the color code. It will determine its own size based on the amount of content.
.codess{
padding: 5px;
margin-top: 30px;
margin-bottom: 30px;
font-family: sans-serif;
letter-spacing: 1px;
box-shadow: 0 0 20px rgba(0,139,253,0.25);
}
Now the space for color input has been designed. The width of those two input boxes: 70px, height: 40px and float: left
have been used to keep it along the left side.
.color1,.color2{
width: 70px;
height: 40px;
float: left;
margin: 10px;
margin-top: 20px;
}
Now I have done some basic design of the select box. Box width: 130px
and height: 35px
.
select{
float: right;
margin-top: 25px;
width: 130px;
height: 35px;
}
Above, we have completed the basic design of the Gradient Color Generator. But now, it is time to implement this color generator with the help of JavaScript.
First, a global constant of some IDs and class functions is determined.
//Some classes and html functions need to determine a constant
var css = document.querySelector(".codess") // color code
var color1 = document.querySelector(".color1") // 1st color
var color2 = document.querySelector(".color2") // 2nd color
var bodys = document.getElementById("gradient") // color display
var linearDirection = document.getElementsByName("toDirection")[0] //Select box
Now, I have arranged for the color codes to be shown on the display. I have indicated here that the color that can be seen in the display can be seen in the form of CSS code in the code box.
GetPropertyValue
helped make this work. getPropertyValue () method interface returns a DOMString containing the value of a specified CSS property.
Then I took the help of textContent
to show all the information in the box.
function currentSettings() {
var CSSprop = window.getComputedStyle(bodys,null).getPropertyValue("background-image")
// console.log(CSSprop)
css.textContent = CSSprop
}
currentSettings()
I have given instructions here in which format the color codes can be seen in this code box. The color codes can be seen in the box according to this format.
With this, I have arranged to see the color in the display. In "bodys.style.background"
I have added all formats. Its color can be found on the display. That means it will do two things at once.
In this format, the values of each of these elements are added. As a result, when you change the value of the input, the information in the code box will continue to change.
function returnColor(){
bodys.style.background =
"linear-gradient("
+ linearDirection.value
+ ", "
+ color1.value
+ ","
+ color2.value
+ ")";
currentSettings()
}
Now I have connected all the input functions with the calculations above. "ReturnColor"
helped. As a result, when you make any changes to the input box, all of the above systems will change.
document.querySelector('select[name="toDirection"]').onchange=returnColor;
color1.addEventListener("input", returnColor)
color2.addEventListener("input", returnColor)
Complete JavaScript
Below, I have put together the complete JavaScript, which will help you to understand these codes better.
//Some classes and html functions need to determine a constant
var css = document.querySelector(".codess") // color code
var color1 = document.querySelector(".color1") // 1st color
var color2 = document.querySelector(".color2") // 2nd color
var bodys = document.getElementById("gradient") // color display
var linearDirection = document.getElementsByName("toDirection")[0] //Select box
function currentSettings() {
var CSSprop = window.getComputedStyle(bodys,null).getPropertyValue("background-image")
// console.log(CSSprop)
css.textContent = CSSprop
}
currentSettings()
function returnColor(){
bodys.style.background =
"linear-gradient("
+ linearDirection.value
+ ", "
+ color1.value
+ ","
+ color2.value
+ ")";
currentSettings()
}
document.querySelector('select[name="toDirection"]').onchange=returnColor;
color1.addEventListener("input", returnColor)
color2.addEventListener("input", returnColor)
I hope you understand JavaScript above. If there is any problem, then you can take the help of the video tutorial.
If you like this tutorial, then you must like the article
. Please comment on how you like it. You can download the complete source code if you want.