Lately on this blog we've been spending a lot of time focusing on features that help us build user generated content (UGC) platforms with Amazon Interactive Video Service (Amazon IVS). Features like chat moderation (both automated and manual), and giving creators a way to notify channel subscribers when their live stream is online.
These types of features go a long way in differentiating between a simple streaming site and an engaging platform that promotes and encourages interaction between creators and viewers. But there's another feature that we can add to our UGC application to keep viewers entertained and engaged, and that's giving them the ability to replay past live streams.
In this post, we'll look at how to auto-record live streams to an Amazon Simple Storage Service (Amazon S3) bucket and play them back at a later time.
Recording Configurations
The Amazon IVS docs provide a full overview on auto-record to Amazon S3. In this post, we'll focus on creating a recording configuration, associating it with an Amazon IVS channel, and using the Amazon CloudWatch SDK to retrieve recording events in order to obtain the master playlist for playback. To get started, we'll need to create a recording configuration.
Using the Amazon IVS Console To Create a Recording Configuration
To get started, select Recording configuration from the left sidebar in the Amazon IVS Console.
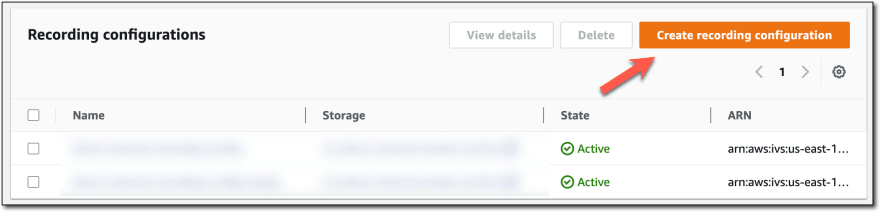
On the Recording configuration list page, select Create recording configuration.
Enter a Recording configuration name, and choose whether or not you'd like thumbnails generated from your recording. If you would like thumbnails generated (which is a very useful feature to provide viewers a glimpse of the recorded content), enter the thumbnail generation frequency.
If you'd like to merge interrupted streams (IE: continue recordings when a broadcaster goes offline for a short period of time due to network or other glitches), enable Reconnect window and specify the maximum gap between streams to consider them a single recording.
Next, enter a name for the S3 bucket in which the recording data will be stored (or choose an existing bucket) and then click Create recording configuration.
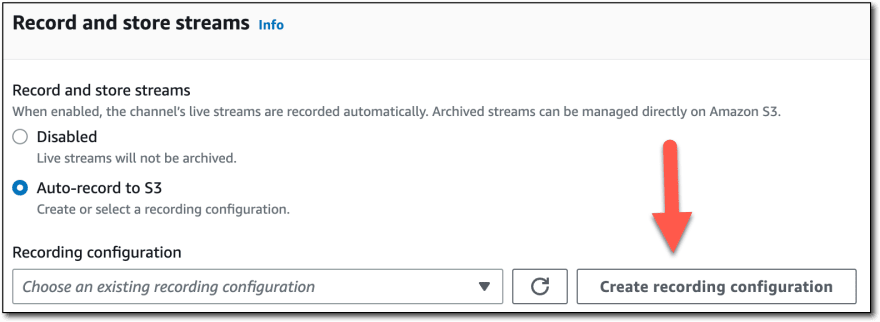
You can also create a new recording configuration directly from the Edit channel page, or when creating a brand new channel by clicking Create recording configuration.
Using the AWS SDK To Create a Recording Configuration
As always, the AWS SDK (Node.js docs) can be used to create a recording configuration. Since the SDK is likely the preferred way to create such resources in production applications, let's take a quick look at how that is done.
import { IvsClient, CreateRecordingConfigurationCommand, RecordingMode } from "@aws-sdk/client-ivs";

const ivsClient = new IvsClient();
const createRecordingConfigInput = {
  name: 'ivs-demo-recording-config-sdk',
  thumbnailConfiguration: {
    recordingMode: RecordingMode.Interval,
    targetIntervalSeconds: 60,
  },
  recordingReconnectWindowSeconds: 30,
  destinationConfiguration: {
    s3: {
      bucketName: 'ivs-demo-channel-stream-archive'
    }
  }
};
const createRecordingConfigRequest = new CreateRecordingConfigurationCommand(createRecordingConfigInput);
const createRecordingConfigResponse = await ivsClient.send(createRecordingConfigRequest);
console.log(createRecordingConfigResponse);
The SDK code above will produce a result similar to the following.
{
  "$metadata": {
    "httpStatusCode": 200,
    "requestId": "[redacted]",
    "cfId": "[redacted]",
    "attempts": 1,
    "totalRetryDelay": 0
  },
  "recordingConfiguration": {
    "arn": "arn:aws:ivs:us-east-1:[redacted]:recording-configuration/[redacted]",
    "destinationConfiguration": {
      "s3": {
          bucketName: 'ivs-demo-channel-stream-archive'
      }
    },
    "name": "ivs-demo-recording-config-sdk",
    "recordingReconnectWindowSeconds": 30,
    "state": "CREATING",
    "tags": {},
    "thumbnailConfiguration": {
      "recordingMode": "INTERVAL",
      "targetIntervalSeconds": 60
    }
  }
}
Note: The Amazon S3 bucket used in the SDK example above must already exist before the recording configuration is created. If necessary, use the AWS SDK for Amazon S3 to create the bucket first. Also note - Amazon S3 buckets can be associated with multiple recording configurations, and one configuration might be sufficient to associate with every channel that you create. There is no need to have a unique recording configuration for every single Amazon IVS channel!
Associating a Recording Configuration With an Existing Amazon IVS Channel
Now that we have created the recording configuration, we'll have to associate it with a channel.
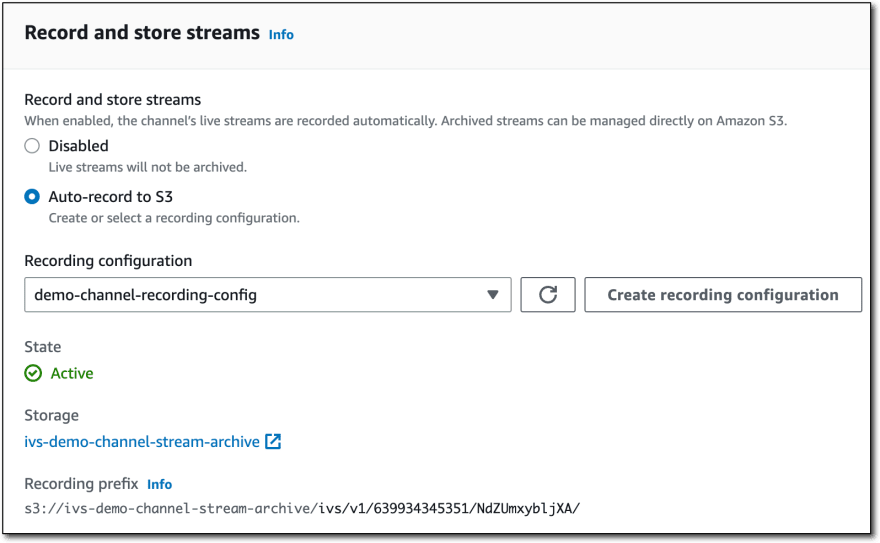
Select a channel from the Amazon IVS channel list page, click Edit, enable Auto-record to S3, and select the applicable recording configuration.
To associate the recording configuration with an existing channel via the AWS SDK for JavaScript, use the UpdateChannelCommand (docs) and pass the channel's arn along with the newly created recordingConfigurationArn.
import { IvsClient, UpdateChannelCommand } from "@aws-sdk/client-ivs";

const ivsClient = new IvsClient();
const updateChannelInput = {
  arn: 'arn:aws:ivs:us-east-1:[redacted]:channel/[redacted]',
  recordingConfigurationArn: 'arn:aws:ivs:us-east-1:[redacted]:recording-configuration/[redacted]',
};
const updateChannelRequest = new UpdateChannelCommand(updateChannelInput);
const updateChannelResponse = await ivsClient.send(updateChannelRequest);
console.log(updateChannelResponse);
Once your recording configuration is associated with a channel, all new streams on that channel will be recorded to S3 at a path that follows this format:
/ivs/v1/<aws_account_id>/<channel_id>/<year>/<month>/<day>/<hours>/<minutes>/<recording_id>
When a recording starts, video segments and metadata files are written to the Amazon S3 bucket that is configured for the channel. Within the unique path for each recording, there will be an /events folder which contains the metadata files corresponding to the recording event. JSON metadata files are generated when recording starts, ends successfully, or ends with failures:
- events/recording-started.json
- events/recording-ended.json
- events/recording-failed.json
There will also be a /media folder that contains all of the relevant media contents within two subfolders. The /hls folder contains all media and manifest files generated during the live session and is playable with the Amazon IVS player.
The /thumbnails folder will contain any thumbnail images generated during the live session.
Accessing Recorded Streams for Playback
For security purposes, all auto-recorded live streams are stored in a private bucket. Because of this, these objects can not be played back using a direct S3 URL. To expose these objects for playback, we'll need to create an Amazon CloudFront distribution.
Head over the the Amazon CloudFront console, and click Create distribution.
In the Origin domain, select the S3 bucket associated with the recording configuration. Leave the Origin path blank, and accept the default Name. Choose Origin access control settings (recommended).
Click Create control setting, enter a Name and Description, then click Create.
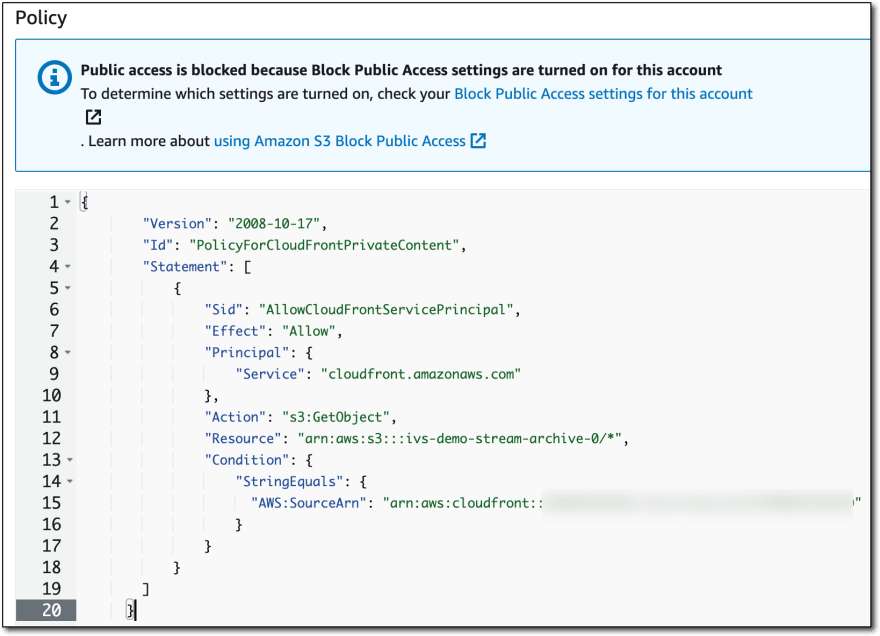
Per the warning message, we'll need to modify the bucket policy after the distribution is created.
Modify any additional settings for your distribution as necessary.
Once the distribution is created, copy the policy by clicking Copy policy.
Click Go to S3 bucket permissions to update policy and paste the new policy.
At this point, all of the objects stored in the S3 bucket will be available via the CloudFront distribution. To access them, we'll just use the base URL from our distribution in place of the standard S3 base URL.
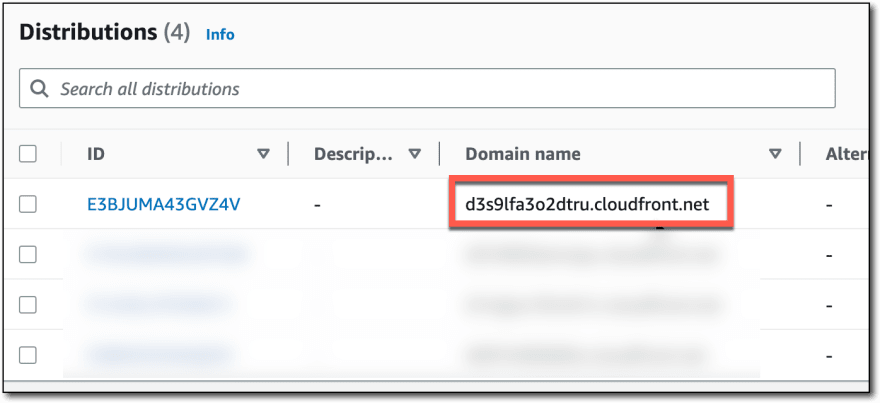
Listening for Recording Events
We've previously looked at using EventBridge rules to notify users when an Amazon IVS stream goes live. We can also create rules to listen for Recording Start/Stop events. Let's create a rule to listen for recording end, and log those events to CloudWatch so that we can easily retrieve this information later on when we want to playback a stream.
Select AWS Events or EventBridge partner events.
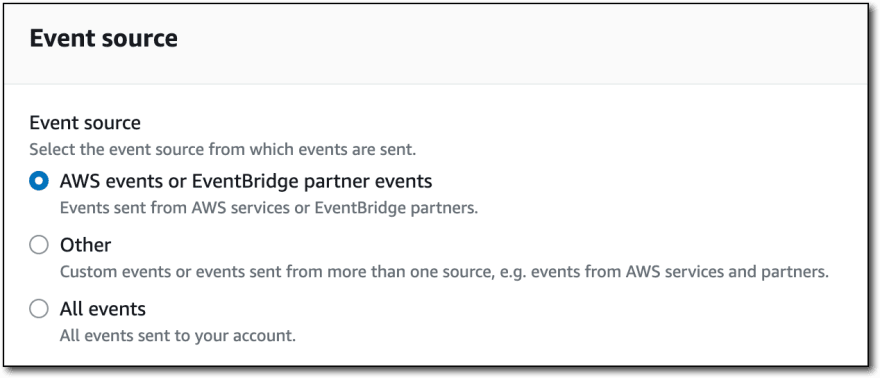
Under Creation method, select Custom pattern (JSON editor) and paste the following pattern. Note that you'll have to substitute YOUR_CHANNEL_NAME with your existing channel name. If you don't have an existing Amazon IVS channel created, refer to this blog post to get started.
{
  "source": ["aws.ivs"],
  "detail-type": ["IVS Recording State Change"],
  "detail": {
    "channel_name": ["YOUR_CHANNEL_NAME"],
    "recording_status": ["Recording End"]
  }
}
Note: Your event bridge rule can listen for events for all channels, or utilize the channel’s ARN instead of the channel name. Refer to the docs for more information on creating your EventBridge rules.
Which should look like this:
On the Target page, select a Target type of AWS service, select CloudWatch log group, and enter a name for the log group.
Enter desired tags, confirm selections, and create the rule.
Viewing CloudWatch Events
Once you have applied the configuration and configured the event bridge rule, all events will be logged to CloudWatch. After you have completed a broadcast, head over to CloudWatch and look for the log group that was created above. Your channel’s recording events will be visible once a live stream is completed, but keep in mind that there may be a slight delay between the end of a broadcast and the publishing of the recording events.
{
  "version": "0",
  "id": "3c86196e-624f-9ccd-b89b-434414bd93b5",
  "detail-type": "IVS Recording State Change",
  "source": "aws.ivs",
  "account": "[redacted]",
  "time": "2022-12-12T20:07:16Z",
  "region": "us-east-1",
  "resources": [
      "arn:aws:ivs:us-east-1:[redacted]:channel/[redacted]"
  ],
  "detail": {
    "recording_status": "Recording End",
    "recording_status_reason": "",
    "recording_s3_bucket_name": "ivs-demo-channel-stream-archive",
    "recording_s3_key_prefix": "ivs/v1/[redacted]/x4aGUUxIp5Vw/2022/12/12/19/59/[redacted]",
    "recording_duration_ms": 87000,
    "channel_name": "demo-channel",
    "stream_id": "st-[redacted]",
    "recording_session_id": "[redacted]",
    "recording_session_stream_ids": [
        "st-[redacted]"
    ]
  }
}
Retrieving CloudWatch Logged Events
We can use the AWS SDK for JavaScript v3 to retrieve these events based on a given start/end time.
import { CloudWatchLogsClient, FilterLogEventsCommand } from "@aws-sdk/client-cloudwatch-logs";
import util from 'node:util';

const cloudwatchClient = new CloudWatchLogsClient();

const filterLogEventsInput = {
  logGroupName: '/aws/events/ivs-stream-recording-end-log-group',
  startTime: 1670875080000,
  endTime: 1670875200000,
};
const filterLogEventsRequest = new FilterLogEventsCommand(filterLogEventsInput);
const filterLogEventsResponse = await cloudwatchClient.send(filterLogEventsRequest);
const events = filterLogEventsResponse.events.map(e => JSON.parse(e.message));
Which gives an array of events matching the criteria:
[
  {
    "version": "0",
    "id": "8d2da908-bf44-f491-8b6e-784bdba37a1d",
    "detail-type": "IVS Recording State Change",
    "source": "aws.ivs",
    "account": "[redacted]",
    "time": "2022-12-12T19:58:27Z",
    "region": "us-east-1",
    "resources": [
      "arn:aws:ivs:us-east-1:[redacted]:channel/[redacted]"
    ],
    "detail": {
      "recording_status": "Recording End",
      "recording_status_reason": "",
      "recording_s3_bucket_name": "ivs-demo-channel-stream-archive",
      "recording_s3_key_prefix": "ivs/v1/[redacted]/[redacted]/2022/12/12/19/52/[redacted]",
      "recording_duration_ms": 0,
      "channel_name": "demo-channel",
      "stream_id": "st-[redacted]",
      "recording_session_id": "[redacted]",
      "recording_session_stream_ids": [
        "st-[redacted]"
      ]
    }
  },
  {
    "version": "0",
    "id": "281586b5-f680-2ca6-f60a-cf5b327b15d3",
    "detail-type": "IVS Recording State Change",
    "source": "aws.ivs",
    "account": "[redacted]",
    "time": "2022-12-12T19:58:43Z",
    "region": "us-east-1",
    "resources": [
      "arn:aws:ivs:us-east-1:[redacted]:channel/[redacted]"
    ],
    "detail": {
      "recording_status": "Recording End",
      "recording_status_reason": "",
      "recording_s3_bucket_name": "ivs-demo-channel-stream-archive",
      "recording_s3_key_prefix": "ivs/v1/[redacted]/[redacted]/2022/12/12/19/52/[redacted]",
      "recording_duration_ms": 10000,
      "channel_name": "demo-channel",
      "stream_id": "st-[redacted]",
      "recording_session_id": "[redacted]",
      "recording_session_stream_ids": [
        "st-[redacted]"
      ]
    }
  }
]
We can loop over the parsed events and retrieve the master playlist for each recording, using our CloudWatch base URL:
events.forEach(async event => {
  const playlistUrl = `https://[redacted].cloudfront.net/${event.detail.recording_s3_key_prefix}/media/hls/master.m3u8`;
  console.log(playlistUrl);
});
At this point, we can plug the URL into the IVS player to playback the stream!
Summary
In this post, we learned how to create a recording configuration to auto-record Amazon IVS live streams to Amazon S3. We also learned how to expose the Amazon S3 bucket via a CloudFront distribution, and construct a URL for on-demand playback of the recorded streams. In our next post, we're going to learn about chat logging, which is a new feature that allows you to log all chat messages from an Amazon IVS chat room. In a future post, we'll combine auto-recorded streams with chat logs to complete the full on-demand playback experience.