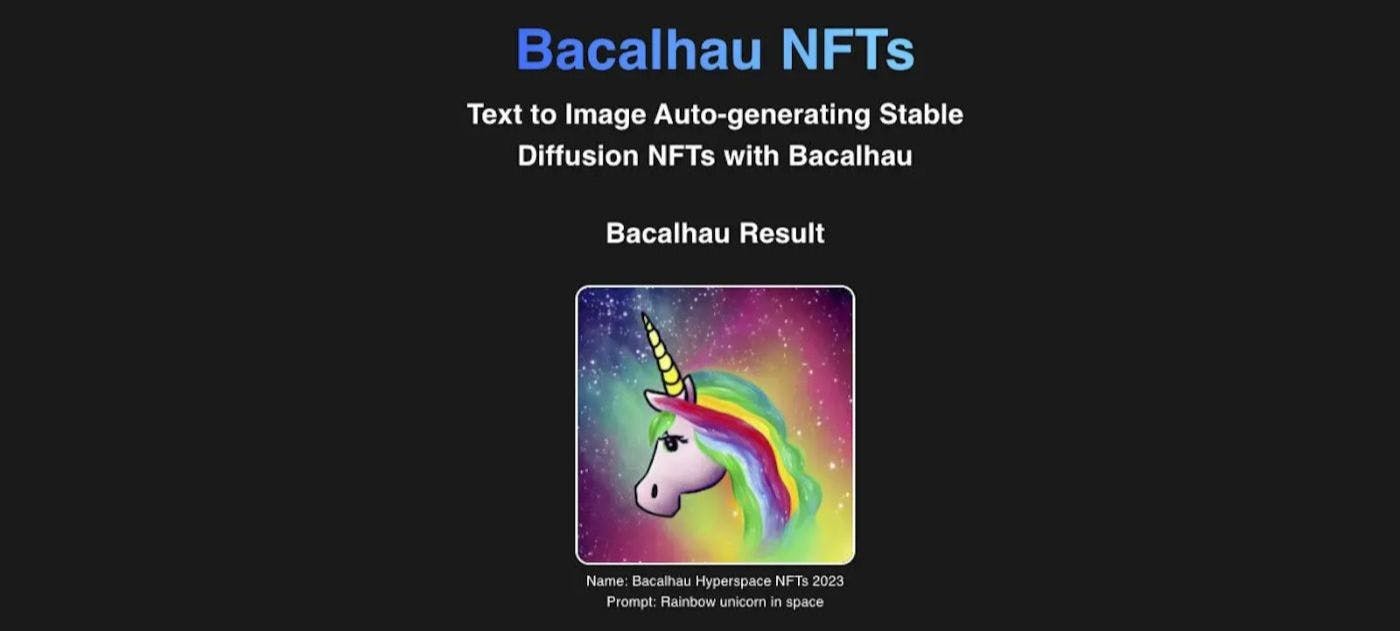
使用您自己的文本到图像脚本构建、运行和部署 DApp 的完整指南,以在 FVM 超空间测试网上铸造 AI 生成的艺术 NFT! 目录 👩💻 我们会做什么... 🏛 架构图(有点) 🥞 DApp 技术栈 🏗️ 构建 Python 文本到图像脚本 ⚒️ 构建和部署 Solidity NFT 脚本 🎬 构建前端交互 完整流程 Bacalhau 互动 NFT.存储 合约交互 🌟 最后的想法:人工智能和区块链的可能性 🐠 Bacalhau 路线图 ✍️保持联系! 🦄 快速链接: 视频版 GitHub代码 Bacalhau 文档 幻灯片共享 👩💻 我们会做什么... 这篇博客将带您了解如何 基于 Tensorflow 构建一个基于 Python 的开源文本到图像脚本(如果您对此不感兴趣,也可以只使用 Bacalhau HTTP 端点) 在 Bacalhau(一个开放的 p2p 链下计算平台)上运行这个脚本 在 Solidity 中创建 NFT 合约(基于 Open Zeppelin ERC721 合约) 使用 Hardhat 将 NFT 合约部署到 Filecoin 虚拟机 (FVM) Hyperspace Testnet 前端交互——如何在 React 中与 Bacalhau 文本到图像脚本和你的 NFT 合约进行交互 如何将你的 NFT 元数据保存到 NFT.Storage 如何将前端 DApp 部署到 Fleek 我特意选择尽可能多地使用此堆栈中可用的开源和去中心化技术。 这个博客会很长(嘿 - 我想提供所有信息并确保我们对初学者友好和包容!) - 所以请随意跳到表中对你有用的部分内容 <3 🏛 架构图(有点) 🥞 DApp 技术栈 (明白了 - 这是煎饼堆#sorrynotsorry) 从头开始重视开源和 Web3 :) [Solidity, Open Zeppelin] 智能合约 是一种面向以太坊 (EVM) 兼容区块链的 OO 智能合约编程语言 Solidity 提供了一个经过安全审核的通用智能合约组件和合约的实施库 Open Zeppelin [Hardhat] 智能合约 IDE 是一个用于编辑、编译、调试和部署以太坊软件的开发环境 Hardhat 区块链测试网 [ 虚拟机超空间] Filecoin 是建立在 Filecoin 区块链上的 EVM 兼容测试网 FVM Hyperspace 【NFT.Storage】 NFT元数据存储 是一种建立在 IPFS 和 Filecoin 之上的公共产品,用于不可变且持久地存储 NFT 元数据,并为 NFT 和 javascript sdk 提供免费的去中心化存储。 NFT.Storage [NextJS / React + NPM] 前端 我们可能都知道这些……对吧? :P 来自客户端的 [Metamask、Ethers、Chainstack RPC 节点] 智能合约交互 使用 ——我可以获得与我的区块链合约的只读交互。 公共 RPC 节点 使用 提供程序(或将 指定 浏览器的类似钱包),我们启用对区块链合约的写入调用。 Metamask EIP-1193 的以太坊 API 注入 js 是一个用于与 EVM 兼容的智能合约进行交互的库 Ethers AI [Python, Tensorflow] 文本转图像稳定扩散脚本 是一个开源机器学习平台和库,提供预训练模型和其他数据和 ML 工具。 TensorFlow 用于 AI 文本到图像生成的去中心 [Bacalhau] 化链下计算 是一个点对点的开放式计算网络,它为公共、透明和可选的可验证计算过程提供了一个平台。它是一个去中心化的链下数据计算层。 Bacalhau 去中心化 [Fleek] DApp 部署 提供在 IPFS 和 Filecoin 上部署网站。它是 Vercel 或 Netlify 的 web3 版本——不能说我们真的有一个去中心化的应用程序然后将它部署到 web2! :D Fleek 🏗️ 构建 Python 文本到图像脚本 💡 💡 TLDR 提示 该脚本已经可以通过 CLI 和 HTTP 端点通过 Bacalhau 使用,因此请随意跳过这部分。 稳定扩散的快速介绍 Stable Diffusion 是目前领先的用于文本到图像处理的机器学习模型(与 Dall-E 使用的模型相同)。它是一种深度学习——机器学习的一个子集,它自学执行特定任务——在这种情况下将文本输入转换为图像输出。 在此示例中,我们使用扩散概率模型,该模型使用转换器从文本生成图像。 不过别担心——我们不需要为此训练机器学习模型(不过嘿——如果那是你的事——你完全可以!) 相反,我们将在我们的 python 脚本中使用来自 Google 的 TensorFlow 开源机器学习库的预训练模型,因为 ML 权重已经为我们预先计算好了。 更准确地说,我们正在使用原始 ML 模型的优化 。 Keras/TensorFlow 实现分支 Python 脚本 🦄 您可以在 和 中找到有关如何构建和 Dockerise 这个文本到图像脚本并在 Bacalhau 上运行它的 演练。🦄 您也可以在此 中运行它 Bacalhau 文档 @BacalhauProject YouTube 视频 完整 Google Collabs Notebook 这是完整的 python 脚本! import argparse from stable_diffusion_tf.stable_diffusion import Text2Image from PIL import Image import os parser = argparse.ArgumentParser(description="Stable Diffusion") parser.add_argument("--h",dest="height", type=int,help="height of the image",default=512) parser.add_argument("--w",dest="width", type=int,help="width of the image",default=512) parser.add_argument("--p",dest="prompt", type=str,help="Description of the image you want to generate",default="cat") parser.add_argument("--n",dest="numSteps", type=int,help="Number of Steps",default=50) parser.add_argument("--u",dest="unconditionalGuidanceScale", type=float,help="Number of Steps",default=7.5) parser.add_argument("--t",dest="temperature", type=int,help="Number of Steps",default=1) parser.add_argument("--b",dest="batchSize", type=int,help="Number of Images",default=1) parser.add_argument("--o",dest="output", type=str,help="Output Folder where to store the Image",default="./") args=parser.parse_args() height=args.height width=args.width prompt=args.prompt numSteps=args.numSteps unconditionalGuidanceScale=args.unconditionalGuidanceScale temperature=args.temperature batchSize=args.batchSize output=args.output generator = Text2Image( img_height=height, img_width=width, jit_compile=False, # You can try True as well (different performance profile) ) img = generator.generate( prompt, num_steps=numSteps, unconditional_guidance_scale=unconditionalGuidanceScale, temperature=temperature, batch_size=batchSize, ) for i in range(0,batchSize): pil_img = Image.fromarray(img[i]) image = pil_img.save(f"{output}/image{i}.png") 上面的脚本只是接受一个文本提示输入参数和一些其他可选参数,然后调用分叉的 TensorFlow 库来生成图像并将它们保存到输出文件中。 此处完成的所有繁重工作都在下面的部分中进行 - 这是机器学习模型发挥其魔力的地方。 🪄 generator = Text2Image( img_height=height, img_width=width, jit_compile=False, ) img = generator.generate( prompt, num_steps=numSteps, unconditional_guidance_scale=unconditionalGuidanceScale, temperature=temperature, batch_size=batchSize, ) 太好了,我们可以从文本提示生成图像,但是嗯……在哪里运行这个 GPU 所需的脚本……🤔🤔 如果说区块链技术在本质上没有做好一件事,那就是大数据处理。这是由于在分布式系统上进行计算以提供其他强大属性(例如去信任和审查抵抗)的成本。 使用您的本地机器作为小示例是可能的 - 事实上我确实设法让这个特定示例在我的(对此非常不满意)Mac M1 上运行,但是,结果等待时间很长(有人打乒乓球吗?)所以,一旦你开始处理更大的数据,你将需要更多的 gas(双关语),如果你家里没有专用服务器,那么你将需要在一个虚拟机上使用虚拟机。云计算平台。 这不仅是中心化的,而且效率低下——由于数据与计算机的距离未知,而且它可能会很快变得昂贵。我没有找到任何为此提供 GPU 处理的免费层级云计算服务(有人说加密采矿禁令......?)并且计划每月 (不,谢谢)。 超过 400 美元 Bacalhau! 幸运的是,这些问题是 Bacalhau 试图解决的一些问题。在 Bacalhau 中,使数据处理和计算对每个人开放和可用并加快处理时间是可能的,首先 - 通过跨多个节点使用批处理,其次将处理节点放在数据所在的地方! Bacalhau 的目标是通过在不放弃更广泛的 IPFS、Filecoin 和 Web3 固有的去中心化价值的情况下,通过对数据进行链下计算来帮助实现数据处理的未来民主化。 是一个点对点的开放式计算网络,它为公共、透明和可选的可验证计算过程提供了一个平台,用户可以在其中运行 Docker 容器或 Web Assembly 图像作为针对 数据的任务,包括存储在 IPFS(以及即将推出的 Filecoin)中的数据。它甚至支持 GPU 作业,而且价格不超过 400 美元! Bacalhau 任何 在 Bacalhau 上运行脚本 要运行此脚本,我们可以将其 Docker 化以在 Bacalhau 上使用。如果你想学习如何做,你可以按照 。然后我们可以用一行代码用 Bacalhau CLI 运行它(在用另一个单行 之后): 这里的教程 安装 Bacalhau bacalhau docker run --gpu 1 ghcr.io/bacalhau-project/examples/stable-diffusion-gpu:0.0.1 -- python main.py --o ./outputs --p "Rainbow Unicorn" 不过在这个例子中,我将使用一个 HTTP 端点将我连接到这个 dockerised 稳定的扩散脚本,我将在集成部分向您展示! 不过,我会在这里指出,这是一种运行数据计算过程的强大而灵活的方式,它也是 web3 友好的——我们不仅限于这个小模型。 不过,让我们继续讨论 NFT 脚本! :) ⚒️ 构建和部署 Solidity NFT 脚本 智能合约 NFT 智能合约基于 ,但使用 ERC721URIStorage 版本,其中包括元数据标准扩展(因此我们可以将我们的 IPFS 寻址元数据——我们将保存在 NFT.Storage 上的元数据传递给合约) . Open Zeppelin 的 ERC721 实现 该基础合约还为我们提供了 NFT 合约的一般功能,其中包括 mint() 和 transfer() 等已经为我们实现的功能。 您会注意到我还添加了几个 getter 函数来为我的前端获取数据,以及每次铸造新 NFT 时都会在链上发出的事件。这提供了从 DApp 监听链上事件的能力。 💡 💡 通过单击此链接在 remix 上试用并查看所有可用功能! BacalhauFRC721.sol // SPDX-License-Identifier: MIT pragma solidity ^0.8.4; import "@openzeppelin/contracts/token/ERC721/extensions/ERC721URIStorage.sol"; import "@openzeppelin/contracts/utils/Counters.sol"; import "@hardhat/console.sol"; contract BacalhauFRC721 is ERC721URIStorage { /** @notice Counter keeps track of the token ID number for each unique NFT minted in the NFT collection */ using Counters for Counters.Counter; Counters.Counter private _tokenIds; /** @notice This struct stores information about each NFT minted */ struct bacalhauFRC721NFT { address owner; string tokenURI; uint256 tokenId; } /** @notice Keeping an array for each of the NFT's minted on this contract allows me to get information on them all with a read-only front end call */ bacalhauFRC721NFT[] public nftCollection; /** @notice The mapping allows me to find NFT's owned by a particular wallet address. I'm only handling the case where an NFT is minted to an owner in this contract - but you'd need to handle others in a mainnet contract like sending to other wallets */ mapping(address => bacalhauFRC721NFT[]) public nftCollectionByOwner; /** @notice This event will be triggered (emitted) each time a new NFT is minted - which I will watch for on my front end in order to load new information that comes in about the collection as it happens */ event NewBacalhauFRC721NFTMinted( address indexed sender, uint256 indexed tokenId, string tokenURI ); /** @notice Creates the NFT Collection Contract with a Name and Symbol */ constructor() ERC721("Bacalhau NFTs", "BAC") { console.log("Hello Fil-ders! Now creating Bacalhau FRC721 NFT contract!"); } /** @notice The main function which will mint each NFT. The ipfsURI is a link to the ipfs content identifier hash of the NFT metadata stored on NFT.Storage. This data minimally includes name, description and the image in a JSON. */ function mintBacalhauNFT(address owner, string memory ipfsURI) public returns (uint256) { // get the tokenID for this new NFT uint256 newItemId = _tokenIds.current(); // Format info for saving to our array bacalhauFRC721NFT memory newNFT = bacalhauFRC721NFT({ owner: msg.sender, tokenURI: ipfsURI, tokenId: newItemId }); //mint the NFT to the chain _mint(owner, newItemId); //Set the NFT Metadata for this NFT _setTokenURI(newItemId, ipfsURI); _tokenIds.increment(); //Add it to our collection array & owner mapping nftCollection.push(newNFT); nftCollectionByOwner[owner].push(newNFT); // Emit an event on-chain to say we've minted an NFT emit NewBacalhauFRC721NFTMinted( msg.sender, newItemId, ipfsURI ); return newItemId; } /** * @notice helper function to display NFTs for frontends */ function getNFTCollection() public view returns (bacalhauFRC721NFT[] memory) { return nftCollection; } /** * @notice helper function to fetch NFT's by owner */ function getNFTCollectionByOwner(address owner) public view returns (bacalhauFRC721NFT[] memory){ return nftCollectionByOwner[owner]; } 要求 我会将此合约部署到 ,但您可以将此合约部署到任何 EVM 兼容链,包括 Polygon、BSC、Optimism、Arbitrum、Avalanche 等。你甚至可以调整你的前端来制作多链 NFT(提示: )! Filecoin 虚拟机超空间测试网 这个 repo 要部署到超空间测试网,我们需要 Metamask 钱包并将其连接到 Hyperspace 测试网 设置 从水龙头( 或 )获取一些测试 tFIL 资金 Yoga Zondax 使用 Hardhat 部署智能合约 我正在使用 hardhat 将此合约部署到 Hyperspace 测试网。 🛸 超空间 RPC 和 BlockExplorer 选项: 公共 RPC 端点 区块浏览器的 https://filecoin-hyperspace.chainstacklabs.com/rpc/v0 https://beryx.zondax.ch/ https://hyperspace.filfox.info/rpc/v0 https://fvm.starboard.ventures/contracts/ https://rpc.ankr.com/filecoin_testnet https://explorer.glif.io/?network=hyperspacenet : 开放API beryx.zondax.ch https://hyperspace.filfox.info/en 对于配置设置,我们可以从任何可用的公共 RPC 端点中进行选择。 hardhat.config.ts import '@nomicfoundation/hardhat-toolbox'; import { config as dotenvConfig } from 'dotenv'; import { HardhatUserConfig } from 'hardhat/config'; import { resolve } from 'path'; //Import our customised tasks // import './pages/api/hardhat/tasks'; const dotenvConfigPath: string = process.env.DOTENV_CONFIG_PATH || './.env'; dotenvConfig({ path: resolve(__dirname, dotenvConfigPath) }); // Ensure that we have all the environment variables we need. const walletPrivateKey: string | undefined = process.env.WALLET_PRIVATE_KEY; if (!walletPrivateKey) { throw new Error('Please set your Wallet private key in a .env file'); } const config: HardhatUserConfig = { solidity: '0.8.17', defaultNetwork: 'filecoinHyperspace', networks: { hardhat: {}, filecoinHyperspace: { url: 'https://api.hyperspace.node.glif.io/rpc/v1', chainId: 3141, accounts: [process.env.WALLET_PRIVATE_KEY ?? 'undefined'], }, // bleeding edge often-reset FVM testnet filecoinWallaby: { url: 'https://wallaby.node.glif.io/rpc/v0', chainId: 31415, accounts: [process.env.WALLET_PRIVATE_KEY ?? 'undefined'], //explorer: https://wallaby.filscan.io/ and starboard }, }, // I am using the path mapping so I can keep my hardhat deployment within the /pages folder of my DApp and therefore access the contract ABI for use on my frontend paths: { root: './pages/api/hardhat', tests: './pages/api/hardhat/tests', //who names a directory in the singular?!!! Grammarly would not be happy cache: './pages/api/hardhat/cache', }, }; export default config; 为了部署智能合约,我们创建了一个部署脚本——请注意,我在这里专门将钱包地址设置为签名者(所有者)——在撰写本文时,FEVM 中仍然存在一些映射错误,这可能会导致一些奇怪的行为。 deploy/deployBacalhauFRC721.ts import hre from 'hardhat'; import type { BacalhauFRC721 } from '../typechain-types/contracts/BacalhauFRC721'; import type { BacalhauFRC721__factory } from '../typechain-types/factories/contracts/BacalhauFRC721__factory'; async function main() { console.log('Bacalhau721 deploying....'); // !!!needed as hardhat's default does not map correctly to the FEVM const owner = new hre.ethers.Wallet( process.env.WALLET_PRIVATE_KEY || 'undefined', hre.ethers.provider ); const bacalhauFRC721Factory: BacalhauFRC721__factory = < BacalhauFRC721__factory > await hre.ethers.getContractFactory('BacalhauFRC721', owner); const bacalhauFRC721: BacalhauFRC721 = <BacalhauFRC721>( await bacalhauFRC721Factory.deploy() ); await bacalhauFRC721.deployed(); console.log('bacalhauFRC721 deployed to ', bacalhauFRC721.address); // optionally log to a file here } main().catch((error) => { console.error(error); process.exitCode = 1; }); 要部署,请使用以下代码在终端中运行上述脚本(注意:由于我们在配置中将默认网络设置为 filecoinHyperspace,因此无需为网络传递标志,尽管如下所示) > cd ./pages/hardhat/deploy/ npx hardhat run ./deployBacalhauFRC721.ts --network filecoinHyperspace 庆祝!我们刚刚将 NFT 合约部署到 Filecoin 超空间测试网! 🎬 构建前端交互 哇哇哇哇哇哇哇哇哇哇哇哇哇哇哇哇哇哇哇哇哇哇哇哇哇哇哇哇哇哇哇哇哇哇哇哇哇哇哇哇哇哇哇哇哇哇哇哇哇哇哇哇哇哇 为了构建前端,我使用了 NextJS 和 Typescript。不过,老实说——我没有利用 NextJS 的任何 SSR(服务器端渲染)功能,我什至没有使用他们的页面路由(因为它是一个单页 Dapp),所以你真的可以去使用 vanilla React 设置(或者当然是您选择的任何框架!)。 至于打字稿......好吧,我构建它有点匆忙并且不得不承认这不是打字稿的一个很好的例子 - 虽然变量看起来很高兴......;) Anyhoo - 本节的重点不是向您展示如何编写前端代码,而是向您展示如何与智能合约、Bacalhau(使用我们稳定的扩散 ML 模型)以及当然还有 NFT.Storage 进行交互 - # NotOnIPFSNotYourNFT。 完整流程 [todo:构建流程图] 用户在输入字段中输入文本提示 -> 单击生成图像按钮 -> 调用 Bacalhau Job 生成图像 Bacalhau Job 完成 -> 格式返回 NFT 元数据 JSON 对象 用户单击 Mint NFT 按钮 -> NFT.Storage 被调用以保存 NFT 元数据并返回文件夹的 IPFS CID -> 使用此 IPFS_URI 调用智能合约的 mint NFT 函数以使用此元数据铸造 NFT -> !! [FEVM 陷阱] -> 在这里我们通常会等待此结果的 TX(交易哈希)返回,但它目前无法正常工作,因此我们使用合约事件侦听器来确定何时完成。 完毕! -> 现在可以重新获取任何显示数据,并在铸币时给用户状态成功反馈。 很好 - 让我们看看我们如何在代码中实现它! Bacalhau 互动 工程师 在 中记录了为 Bacalhau 创建前端 API 端点。 Luke Marsden 此项目报告 该 API 目前 直接命中此博客中记录的稳定扩散脚本,但是,该团队正在将其扩展为更通用的 API,以便您可以调用任何示例以及您自己从 HTTP 部署的脚本休息API。请在 或 仅 此处 FilecoinProject slack 的#bacalhau 频道中关注这一点。 >run/test in terminal curl -XPOST -d '{"prompt": "rainbow unicorn"}' 'http://dashboard.bacalhau.org:1000/api/v1/stablediffusion'; >react / typescript code import { CID } from 'multiformats/cid'; export const callBacalhauJob = async (promptInput: string) => { //Bacalahau HTTP Stable Diffusion Endpoint const url = 'http://dashboard.bacalhau.org:1000/api/v1/stablediffusion'; const headers = { 'Content-Type': 'application/x-www-form-urlencoded', }; const data = { prompt: promptInput, //The user text prompt! }; /* FETCH FROM BACALHAU ENDPOINT */ const cid = await fetch(url, { method: 'POST', body: JSON.stringify(data), headers: headers, }) .then(async (res) => { let body = await res.json(); if (body.cid) { /* Bacalhau returns a V0 CID which we want to convert to a V1 CID for easier usage with http gateways (ie. displaying the image on web), so I'm using the IPFS multiformats package to convert it here */ return CID.parse(body.cid).toV1().toString(); } }) .catch((err) => { console.log('error in bac job', err); }); return cid; }; 此函数将返回一个 IPFS CID(内容标识符),其文件夹结构如下所示。然后可以在 下找到图像。 /outputs/image0.png 💡 💡 ! 点击此处亲自查看 啊彩虹独角兽......有什么不喜欢的! NFT.存储 NFT.Storage 是一种公共产品(又名免费),可以轻松地使用 javascript 或 HTTP SDK 将 NFT 元数据永久存储在 IPFS 和 Filecoin 上。 NFT 元数据是一个 JSON 文档,看起来像下面的示例——直接取自 Open Zeppelin 文档: 在创建 NFT 时,请务必注意,除非您将元数据存储在链上(这对于大文件来说可能变得非常昂贵),否则为了符合令牌的“不可替代性”,您需要存储是持久,可靠和 不变。 如果你的 NFT 有一个像上面例子那样的基于位置的地址,那么这个位置路径在销售后被切换是相当简单的,这意味着你认为你购买的 NFT 变成了完全不同的东西 - 或者在这种情况下是一个字面意义上的地毯拉在 NFT 创作者将艺术图像换成地毯图片的下方。 甚至 Open Zeppelin 也会发出警告! 使用 NFT.Storage 意味着我们为我们的元数据获得一个不可变的 IPFS 文件 CID( - 而不是位置 - entifier),它不仅固定到 IPFS,而且还存储到 Filecoin 以实现持久性。你只需要注册NFT.Storage 并为此获得一个 (保存在您的 .env 文件中)。 内容 id API 密钥 .env example NEXT_PUBLIC_NFT_STORAGE_API_KEY=xxx 我们还需要确保我们已经创建了一个格式正确的元数据 JSON——因为虽然 FVM(还没有!)有 NFT 市场……我们确实想确保当它被采用时我们的 NFT 仍然希望符合标准. import { NFTStorage } from 'nft.storage'; //connect to NFT.Storage Client const NFTStorageClient = new NFTStorage({ token: process.env.NEXT_PUBLIC_NFT_STORAGE_API_KEY, }); const createNFTMetadata = async ( promptInput: string, imageIPFSOrigin: string, //the ipfs path eg. ipfs://[CID] imageHTTPURL: string //an ipfs address fetchable through http for the front end to use (ie. including an ipfs http gateway on it like https://[CID].ipfs.nftstorage.link) ) => { console.log('Creating NFT Metadata...'); let nftJSON; // let's get the image data Blob from the IPFS CID that was returned from Bacalhau earlier... await getImageBlob(status, setStatus, imageHTTPURL).then( async (imageData) => { // Now let's create a unique CID for that image data - since we don't really want the rest of the data returned from the Bacalhau job.. await NFTStorageClient.storeBlob(imageData) .then((imageIPFS) => { console.log(imageIPFS); //Here's the JSON construction - only name, description and image are required fields- but I also want to save some other properties like the ipfs link and perhaps you have other properties that give your NFT's rarity to add as well nftJSON = { name: 'Bacalhau Hyperspace NFTs 2023', description: promptInput, image: imageIPFSOrigin, properties: { prompt: promptInput, type: 'stable-diffusion-image', origins: { ipfs: `ipfs://${imageIPFS}`, bacalhauipfs: imageIPFSOrigin, }, innovation: 100, content: { 'text/markdown': promptInput, }, }, }; }) .catch((err) => console.log('error creating blob cid', err)); } ); return nftJSON; }; 现在让我们将此元数据存储到 NFT.Storage 中! await NFTStorageClient.store(nftJson) .then((metadata) => { // DONE! - do something with this returned metadata! console.log('NFT Data pinned to IPFS & stored on Filecoin!'); console.log('Metadata URI: ', metadata.url); // once saved we can use it to mint the NFT // mintNFT(metadata); }) .catch((err) => { console.log('error uploading to nft.storage'); }); Woot - 我们拥有来自 Bacalhau 的图像,我们已经使用 NFT.Strorage 不变且持久地保存了我们的元数据,现在让我们铸造我们的 NFT! 💡 💡NFT.Storage 还提供了一系列其他 ,如 storeCar 和 storeDirectory 以及 - 它返回 CID 的 IPFS 固定和 Filecoin 存储交易 -> 这可能是一个非常酷的补充用于检查 NFT 状态的 FEVM DApp(或在 FEVM 发布主网后在 FEVM 上实施 NFT)。 快速提示 API 调用 status() 函数 合约互动 这里有 3 种类型的交互(还有一些 FEVM 陷阱 - 测试版技术总是会有一些古怪的错误功能!) 只读调用以从链中检索数据而不改变它 编写需要钱包签名和支付汽油的电话,即。改变链状态的函数,比如铸造 NFT! 事件侦听器——侦听从合约发出的事件 对于所有这些功能,我们将使用 ——以太坊 API 的轻量级包装器,连接到我们的合约并执行对它的调用。 ethers.js 库 使用公共 RPC 以 模式连接到合约: 读取 //The compiled contract found in pages/api/hardhat/artifacts/contracts import BacalhauCompiledContract from '@Contracts/BacalhauFRC721.sol/BacalhauFRC721.json'; //On-chain address of the contract const contractAddressHyperspace = '0x773d8856dd7F78857490e5Eea65111D8d466A646'; //A public RPC Endpoint (see table from contract section) const rpc = 'https://api.hyperspace.node.glif.io/rpc/v1'; const provider = new ethers.providers.JsonRpcProvider(rpc); const connectedReadBacalhauContract = new ethers.Contract( contractAddressHyperspace, BacalhauCompiledContract.abi, provider ); 监听合约上的事件。由于这是一个只读(获取)事件,我们可以使用公共 RPC 来监听链上的事件发射。 //use the read-only connected Bacalhau Contract connectedReadBacalhauContract.on( // Listen for the specific event we made in our contract 'NewBacalhauFRC721NFTMinted', (sender: string, tokenId: number, tokenURI: string) => { //DO STUFF WHEN AN EVENT COMES IN // eg. re-fetch NFT's, store in state and change page status } ); 以 模式连接到合约 - 这需要以太坊对象通过钱包注入网络浏览器,以便用户可以签署交易并支付 gas - 这就是我们检查 window.ethereum 的原因目的。 写入 //Typescript needs to know window is an object with potentially and ethereum value. There might be a better way to do this? Open to tips! declare let window: any; //The compiled contract found in pages/api/hardhat/artifacts/contracts import BacalhauCompiledContract from '@Contracts/BacalhauFRC721.sol/BacalhauFRC721.json'; //On-chain address of the contract const contractAddressHyperspace = '0x773d8856dd7F78857490e5Eea65111D8d466A646'; //check for the ethereum object if (!window.ethereum) { //ask user to install a wallet or connect //abort this } // else there's a wallet provider else { // same function - different provider - this one has a signer - the user's connected wallet address const provider = new ethers.providers.Web3Provider(window.ethereum); const contract = new ethers.Contract( contractAddressHyperspace, BacalhauCompiledContract.abi, provider ); const signer = provider.getSigner(); const connectedWriteBacalhauContract = contract.connect(signer); } 使用写入连接的合约调用 mint 函数。 首先,确保我们有一个来自用户的钱包地址,并且我们在 FVM Hyperspace 链上。这里有一些您可能需要的有用的钱包功能,包括如何检查 chainId,以及如何以编程方式将 Hyperspace 网络添加到 Metamask / 钱包。您可以直接使用以太坊对象或使用 ethers.js 与钱包交互。 declare let window: any; const fetchWalletAccounts = async () => { console.log('Fetching wallet accounts...'); await window.ethereum //use ethers? .request({ method: 'eth_requestAccounts' }) .then((accounts: string[]) => { return accounts; }) .catch((error: any) => { if (error.code === 4001) { // EIP-1193 userRejectedRequest error console.log('Please connect to MetaMask.'); } else { console.error(error); } }); }; const fetchChainId = async () => { console.log('Fetching chainId...'); await window.ethereum .request({ method: 'eth_chainId' }) .then((chainId: string[]) => { return chainId; }) .catch((error: any) => { if (error.code === 4001) { // EIP-1193 userRejectedRequest error console.log('Please connect to MetaMask.'); } else { console.error(error); } }); }; //!! This function checks for a wallet connection WITHOUT being intrusive to to the user or opening their wallet export const checkForWalletConnection = async () => { if (window.ethereum) { console.log('Checking for Wallet Connection...'); await window.ethereum .request({ method: 'eth_accounts' }) .then(async (accounts: String[]) => { console.log('Connected to wallet...'); // Found a user wallet return true; }) .catch((err: Error) => { console.log('Error fetching wallet', err); return false; }); } else { //Handle no wallet connection return false; } }; //Subscribe to changes on a user's wallet export const setWalletListeners = () => { console.log('Setting up wallet event listeners...'); if (window.ethereum) { // subscribe to provider events compatible with EIP-1193 standard. window.ethereum.on('accountsChanged', (accounts: any) => { //logic to check if disconnected accounts[] is empty if (accounts.length < 1) { //handle the locked wallet case } if (userWallet.accounts[0] !== accounts[0]) { //user has changed address } }); // Subscribe to chainId change window.ethereum.on('chainChanged', () => { // handle changed chain case }); } else { //handle the no wallet case } }; export const changeWalletChain = async (newChainId: string) => { console.log('Changing wallet chain...'); const provider = window.ethereum; try { await provider.request({ method: 'wallet_switchEthereumChain', params: [{ chainId: newChainId }], //newChainId }); } catch (error: any) { alert(error.message); } }; //AddHyperspaceChain export const addHyperspaceNetwork = async () => { console.log('Adding the Hyperspace Network to Wallet...'); if (window.ethereum) { window.ethereum .request({ method: 'wallet_addEthereumChain', params: [ { chainId: '0xc45', rpcUrls: [ 'https://hyperspace.filfox.info/rpc/v0', 'https://filecoin-hyperspace.chainstacklabs.com/rpc/v0', ], chainName: 'Filecoin Hyperspace', nativeCurrency: { name: 'tFIL', symbol: 'tFIL', decimals: 18, }, blockExplorerUrls: [ 'https://fvm.starboard.ventures/contracts/', 'https://hyperspace.filscan.io/', 'https://beryx.zondax.chfor', ], }, ], }) .then((res: XMLHttpRequestResponseType) => { console.log('added hyperspace successfully', res); }) .catch((err: ErrorEvent) => { console.log('Error adding hyperspace network', err); }); } }; 在写入模式下调用合约 mint 函数.... // Pass in the metadata return from saving to NFT.Storage const mintNFT = async (metadata: any) => { await connectedWriteBacalhauContract // The name of our function in our smart contract .mintBacalhauNFT( userWallet.accounts[0], //users account to use metadata.url //test ipfs address ) .then(async (data: any) => { console.log('CALLED CONTRACT MINT FUNCTION', data); await data .wait() .then(async (tx: any) => { console.log('tx', tx); //CURRENTLY NOT RETURNING TX - (I use event triggering to know when this function is complete) let tokenId = tx.events[1].args.tokenId.toString(); console.log('tokenId args', tokenId); setStatus({ ...INITIAL_TRANSACTION_STATE, success: successMintingNFTmsg(data), }); }) .catch((err: any) => { console.log('ERROR', err); setStatus({ ...status, loading: '', error: errorMsg(err.message, 'Error minting NFT'), }); }); }) .catch((err: any) => { console.log('ERROR1', err); setStatus({ ...status, loading: '', error: errorMsg( err && err.message ? err.message : null, 'Error minting NFT' ), }); }); } Woooo - NFT 铸造!!独角兽舞蹈模式时间! 🌟 最后的想法:人工智能和区块链的可能性 Bacalhau 非常适合对数据执行重复的、确定性的处理作业。 ETL 过程 机器学习与人工智能 物联网数据整合 批处理包括 财务和市场数据 视频和图像处理 - 非常适合创意 中也有多个示例说明如何实现上述某些功能。 Bacalhau 文档 虽然 Bacalhau 正忙于构建一个集成以直接从 FEVM 智能合约调用 Bacalhau,但这里有一些关于 Bacalhau x FVM 合作的想法: 帮助未来 Filecoin 数据的 Onboarding 和 Offboarding 通过处理在链上检索到的有关交易和存储提供商的数据,帮助 Filecoin 建立声誉和服务质量层。 Bacalhau 可以为市场和支付数据提供计算 Bacalhau 可以帮助处理来自 DAO 和 DataDAO 的数据 Bacalhau 可以帮助实现视频和图像处理等创造性工作的更多自动化 Bacalhau 可以实现游戏和元数据处理,包括 VR 和 AR。 Bacalhau,物联网和模拟是可能的 人工智能和机器学习应用 🐠 Bacalhau 路线图 我们目前正在构建一种方法,让您可以直接从您的智能合约运行 Bacalhau!!!!这个项目被称为 Project Frog / Project Lilypad - 并将成为一个集成层,可以从 FEVM 智能合约调用 Bacalhau 作业。 通过注册我们的时事通讯或加入以下社交活动,关注这方面的进展。 ✍️保持联系! 恭喜你看完了!!! 如果这对您有用,我将不胜感激,评论,关注或分享! <3 与Bacalhau保持联系! 推特 @BacalhauProject YouTube @BacalhauProject Filecoin Project Slack #bacalhau @filecoinproject Github@bacalhau.org 论坛 github.com/filecoin-project/bacalhau/discussions 与 ♥️ DeveloperAlly 你觉得这篇文章有价值吗? 成为赞助商来支持 。任何金额表示赞赏! Alison Haire 了解有关 Hashnode 赞助商的更多信息 也发布 。 在这里