paint-brush
How To Use The Requests Python Library To Make An API Call And Save It As A Pandas Dataframeby@nathanrosidi
336 reads
336 reads

How To Use The Requests Python Library To Make An API Call And Save It As A Pandas Dataframe

by Nathan at StrataScratchApril 25th, 2021
Read on Terminal Reader
Read this story w/o Javascript
tldt arrow

Too Long; Didn't Read

In this article, we will work with YouTube Python API to collect video statistics from our channel using the requests python library to make an API call and save it as a Pandas DataFrame. This article isn’t about how to work with the Youtube API but it’s about working with APIs in general, so we’ll make sure to use libraries that can be used for any API service. We’re going to use Google Colabs which is basically Jupyter notebooks. We're going to grab all the videos that we have in our channel and then we will grab the metrics.

Companies Mentioned

Mention Thumbnail
Mention Thumbnail
featured image - How To Use The Requests Python Library To Make An API Call And Save It As A Pandas Dataframe
Nathan at StrataScratch HackerNoon profile picture

In this article, we will work with YouTube Python API to collect video statistics from our channel using the requests python library to make an API call and save it as a Pandas DataFrame.

Working with APIs for data science is a necessary skill set for all data scientists and should be incorporated into your data science projects. In our previous blog - data analytics project ideas, we outlined the only data science project you’ll ever need and talked about how important it is to work with APIs to collect your data for your data science project. So in this article, we want to show you how to pull data from an API specifically using python to pull data from the YouTube API and the request library that's found in python.

So let's understand how to work with an API for data science. We'll pull the data and look through the JSON response that we get and then we'll save all of this data into a Pandas DataFrame.

We'll do this all programmatically with good software engineering skills so your code looks clean and concise, and not like some 10 years old wrote it. This article isn’t about how to work with the Youtube API but it’s about how to work with APIs in general, so we’ll make sure to use libraries and techniques that can be used for any API service.

Why collect data from an API?

You might be thinking that why we don't just use a CSV or pull data from a database? There are two reasons why you should learn APIs:

1. An API is a very common industry, professional way of collecting data and so if you ever work as a data scientist, you’ll be required to learn how to do this.

2. It’s the more complicated and advanced way to collect data compared to pulling data from a database. So, just another reason to learn APIs and to impress your colleagues and hiring manager.


Tools and Platforms

Platform

We’re going to use Google Colabs which is basically Jupyter notebooks. You can use Jupyter notebooks if you want but we will use Colabs because it’s easy to spin up and get saved our work in Google drive.

Imports

Now the first thing is to import and the libraries.

#import libraries

import requests
import pandas as pd
import time

The request library is a library that is going to allow us to make API calls. You can use this library to make a request to any API so depending on what API you want to grab data from, the techniques covered here will be the same. If you want to learn more about the requests library, here’s a link - https://realpython.com/python-requests/. Then we have the Pandas library because we're going to save our data into a Pandas DataFrame and then there's a time library.


API Key

The next step is to get an API key. We’re going to grab data from the Youtube API, specifically, going to grab data from our channel here. In order to access our channel information via API, we need to apply for an API key. You can do so by going to this link - https://www.slickremix.com/docs/get-api-key-for-youtube/. We don’t want to make this article specifically about how to work with the Youtube API so we’ll leave you to getting the API key yourself. But in general, whenever you’re working with an API, you’ll always need a key. And the way to get a key is different for each API service. So let’s say you went through the process and got your API key.

Now we will grab all the videos that we have in our channel and then we will grab the metrics from each video:

List of Videos from Channel

  • Video ID
  • Video Title
  • Publish Date

Video Metrics

  • View Count
  • Link Count
  • Dislike Count
  • Comment Count

Now what we need is our channel ID. So these two parameters will be used to make our API call.

#keys

API_KEY = "AIXXXXXXXX"
CHANNEL_ID = "UCW8Ews7tdKKkBT6GdtQaXvQ"


Testing With The requests Library

Let’s quickly test out an API call. Using the request library, you can make a call just by putting the URL of the API in the get() method.

#make API call

response = requests.get('https://api.github.com').json()

To grab some data, we are using the get() method. The data is located at api.github.com. We're passing the URL to the get() method and add the json() method which will return a JSON object in the response.

What's a JSON file?

It's a popular data file sent over as a JS object and contains your data usually as attribute-value pairs or in an array. And save the data in a variable called response.

Now let’s view the data:

response

As you can see in the output, the entire result is encapsulated in curly braces and each line has an attribute or key and each key has a value. This is a list of URLs that you can access for specific information from Github.

For example, if you want to find user emails, you’d use the email_url in your get() method.

emails_url': 'https://api.github.com/user/emails'

We were just testing out the request library and quickly testing out its functionality. Let’s now make a call to the Youtube API and grab some data.


Working With The YouTube API

So the hardest part of making an API call is figuring out how to structure the URL, mainly what parameters to add into the URL. We currently have a root URL

url = "https://www.googleapis.com/youtube/v3/

This is the location of our data. We just need to define what type of data we want to collect. In order to do that we now need to add parameters to the URL to get specific video information from our specific channel.

The hardest part is figuring out which parameters and properties to add to the URL? How do you figure that out? The best way is to read the official documentation. https://developers.google.com/youtube/v3/docs/search

We’re going to make a “search” and include several parameters like “part”, “channelID” and my API key. And within the “parts” parameter, we’ll add the id and snippet properties to grab ID data which includes videoID and information about the video itself as you see here in the list.

Now we’re going to write the entire URL with the parameters which will give us all the data we want to collect. Again, this article isn’t about YouTube specifically so we won’t go into how we figured out which parameters to use and all that. Lots of it was trial and error. But let us guide you on how we're structuring this URL.

url = "https://www.googleapis.com/youtube/v3/search?key="+API_KEY+"&
channelId="+CHANNEL_ID+"&part=snippet,id&order=date&maxResults=10000"
+pageToken

We’re performing a “search” through the YouTube API. Everything to the right of the '?' is parameters we add to request specific information.

  • First, we add our API key that’s stored in the API_KEY variable in this key parameter.
  • We specify the channel ID we want to collect information from.
  • Next is the part parameter where we’re specifying that we want snippet and ID data. From the documentation, it tells us what data we can expect to get when we ask for snippet and ID data.
  • Order the data by date and then we want the maxResults of 10000 videos in our API call.
  • Lastly, the pageToken is a token, which is a code, that is needed to get to the next page of the search results. We’ll deal with this later when we try to extract all the data.

Building this can be hard and it’s a lot of trial and error. But once you play around with it and get the data you want, you won't have to worry about it again. So this entire URL is saved in our URL variable.


Response From Making API Call

We make the API call in the exact same way we did for the Github example.

pageToken = ""
response = requests.get(url).json()

And here’s the output of the API call.

As you can see we have the same JSON object saved in the response variable. You’ll see all the properties for id and snippet.


Parsing Through The Data

How do you make heads or tails out of this data? First, let’s identify what we’re interested in? We see the etag key at the top and then the items key as the 2nd key in the response. The items key starts with a square brace and then basically is listing all the videos in our channel. If we go to the end of the response, we finally see the last video in our channel and the closing square bracket for the items key. Then we see the other keys kind, nextPageToken, and so forth.

You can also see that we have 95 results but only retrieved 50. The nextPageToken key will help us with getting the videos on the next page of the search. But we’ll cover that later.

So our API call gave us a search result of all of our videos and some information about the video. All this information is stored in the items key. So let’s just grab that data and filter out the rest.

You can do that easily by specifying just the items key.

response['items']

You see that the output starts with the square brackets and it lists all the videos we have on our channel. In order to isolate one video, we can specify the position.

response['items'][0]

So, this is our latest video.


Parsing through the output and saving it to variables

It’s obvious that what we need to do is loop through all the videos in the items key and save specific pieces of information. Let’s save the information into variables first and build the loop last.

Let’s save the video ID. In order to do that, we need to call the response variable, item key, and 1st position. Then once we have that, we are selecting the id key and then the videoID key. We can save that value in the video_id variable. That’s basically how you will navigate through the array and save the data you want.

video_id = response['items'][0]['id']['videoId']

Let’s do the same with the video title. Here we're also replacing any & (ampersand) symbols with a blank)

video_title = response['items'][0]['snippet']['title']
video_title = str(video_title).replace("&","")

Then let’s grab the upload date

upload_date = response['items'][0]['snippet']['publishedAt']

We want to grab just the date and leave out the timestamp.

To do that we can split on the T and grab the left side of the output.

upload_date = str(upload_date).split("T")[0]

So that’s how you save all the information.


Creating the Loop

Let’s create a Loop to go through all the videos collected in the API call and save the information.

We’ll be going through the response[‘items’] array so our 'for Loop' starts with

for video in response['items']:

Next, we have to add some logic that ensures we’re only going to collect video information. So in order to ensure this logic, we need to make sure that we’re looking only at videos. If you check the response, you’ll see

'kind': 'youtube#video',

So we’ll add an if statement just to ensure we’re saving video information. As you can also see instead of response['items'] we’re using the video variable because we’re in the 'for loop'.

if video['id']['kind'] == "youtube#video":

And lastly, all the variables that we built out to collect the information from the response, we’ll use those again but we’ll just need to change the variable name to video. Your end result will look like this.

for video in response['items']:
   if video['id']['kind'] == "youtube#video":
       video_id = video['id']['videoId']
       video_title = video['snippet']['title']
       video_title = str(video_title).replace("&","")
       upload_date = video['snippet']['publishedAt']
       upload_date = str(upload_date).split("T")[0]


Making A Second API Call

Collecting this information is great but it’s not interesting. We also want to collect the view count, likes and dislikes for each of our videos. That’s not in the first API call. What we need to do is now make a second API call to collect this information because we need to use the video_id that we collected from the first API call to then make a second API call to grab the view, like, dislike, and comment counts.

As we've shown you exactly how to make an API call, we suggest figuring out a way to make this second API call yourself. And if you're successful in making the second API call, it should look something like this:

url_video_stats = "https://www.googleapis.com/youtube/v3/videos?id="
                  +video_id+"&part=statistics&key="+API_KEY
response_video_stats = requests.get(url_video_stats).json()
 
view_count = response_video_stats['items'][0]['statistics']['viewCount']
like_count = response_video_stats['items'][0]['statistics']['likeCount']
dislike_count = response_video_stats['items'][0]['statistics']
                ['dislikeCount']
comment_count = response_video_stats['items'][0]['statistics']
                ['commentCount']

Now, we have to add it to the 'for loop'. And we'll get something like this:

for video in response['items']:
   if video['id']['kind'] == "youtube#video":
       video_id = video['id']['videoId']
       video_title = video['snippet']['title']
       video_title = str(video_title).replace("&","")
       upload_date = video['snippet']['publishedAt']
       upload_date = str(upload_date).split("T")[0]
 
       #colleccting view, like, dislike, comment counts
       url_video_stats = "https://www.googleapis.com/youtube/v3/videos?id="
                          +video_id+"&part=statistics&key="+API_KEY
       response_video_stats = requests.get(url_video_stats).json()
 
       view_count = response_video_stats['items'][0]['statistics']
                    ['viewCount']
       like_count = response_video_stats['items'][0]['statistics']
                    ['likeCount']
       dislike_count = response_video_stats['items'][0]['statistics']
                    ['dislikeCount']
       comment_count = response_video_stats['items'][0]['statistics']
                    ['commentCount']


Saving To A Pandas DataFrame

Now let’s build out a Pandas DataFrame so that we can save all of this information. Since we already know all the information we want to save, we’ll create a blank Pandas DataFrame with the column headers above the 'for loop'.

df = pd.DataFrame(columns=["video_id","video_title","upload_date",
"view_count","like_count","dislike_count","comment_count"])

Next, we will append the data we’ve saved in the variables in the 'for loop' to that Pandas DataFrame. Let's use the append() method to do this inside the 'for loop'.

df = df.append({'video_id':video_id,'video_title':video_title,
                'upload_date':upload_date,'view_count':view_count,
                'like_count':like_count,'dislike_count':dislike_count,
                'comment_count':comment_count},ignore_index=True)

The entire 'for loop' will look like this:

for video in response['items']:
   if video['id']['kind'] == "youtube#video":
       video_id = video['id']['videoId']
       video_title = video['snippet']['title']
       video_title = str(video_title).replace("&","")
       upload_date = video['snippet']['publishedAt']
       upload_date = str(upload_date).split("T")[0]
 
       #collecting view, like, dislike, comment counts
       url_video_stats = "https://www.googleapis.com/youtube/v3/videos?id="
                          +video_id+"&part=statistics&key="+API_KEY
       response_video_stats = requests.get(url_video_stats).json()
 
       view_count = response_video_stats['items'][0]['statistics']
                    ['viewCount']
       like_count = response_video_stats['items'][0]['statistics']
                    ['likeCount']
       dislike_count = response_video_stats['items'][0]['statistics']
                    ['dislikeCount']
       comment_count = response_video_stats['items'][0]['statistics']
                    ['commentCount']
    
       df = df.append({'video_id':video_id,'video_title':video_title,
                        'upload_date':upload_date,'view_count':view_count,
'like_count':like_count,'dislike_count':dislike_count,
                         'comment_count':comment_count},ignore_index=True)

Now we have all of our data in this Pandas DataFrame and the output should be a Pandas DataFrame with all the video statistics.


Creating the Functions

The code we’ve written so far works perfectly but there are some things that can be improved. The main part to improve is to separate the API call that grabs video information from the main part because the logic for the 2nd API call doesn’t need to be mixed into the logic of saving the data.

So we can separate the 2nd API call into its own function and just pass the video_id we collected from the 1st API call.

def get_video_details(video_id):
   url = "https://www.googleapis.com/youtube/v3/videos?id="+video_id+"&
          part=statistics&key="+API_KEY
   response = requests.get(url).json()
 
   return response['items'][0]['statistics']['viewCount'],\
          response['items'][0]['statistics']['likeCount'],\
          response['items'][0]['statistics']['dislikeCount'],\
          response['items'][0]['statistics']['commentCount']

We can then wrap the main work into its function.

def get_videos(df):
   pageToken = ""
   while 1:
       url = "https://www.googleapis.com/youtube/v3/search?key="+API_KEY+"
&channelId="+CHANNEL_ID+"&part=snippet,id&order=date&maxResults=10000&"
+pageToken
 
       response = requests.get(url).json()
       time.sleep(1) #give it a second before starting the for loop
       for video in response['items']:
           if video['id']['kind'] == "youtube#video":
               video_id = video['id']['videoId']
               video_title = video['snippet']['title']
               video_title = str(video_title).replace("&","")
               upload_date = video['snippet']['publishedAt']
               upload_date = str(upload_date).split("T")[0]
               print(upload_date)
               view_count, like_count, dislike_count, comment_count = get_
               video_details(video_id)
 
               df = df.append({'Video_id':video_id,'Video_title':
                    video_title,
                               "Upload_date":upload_date,"View_count":
                                view_count,
                               "Like_count":like_count,"Dislike_count":
                                dislike_count,
                               "Comment_count":comment_count},ignore_index=
                                True)
       try:
           if response['nextPageToken'] != None: #if none, it means it 
           reached the last page and break out of it
               pageToken = "pageToken=" + response['nextPageToken']
 
       except:
           break

Lastly, we can call the functions in this way.

df = pd.DataFrame(columns=["Video_id","Video_title","Upload_date",
"View_count","Like_count","Dislike_count","Comment_count"]) #build our 
dataframe
 
df = get_videos(df)
 
print(df)

Let's see our final output, where we get a Pandas DataFrame, video_id, video_title, upload_date, view_count, like_count, dislike_count, and comment_count.


Conclusion

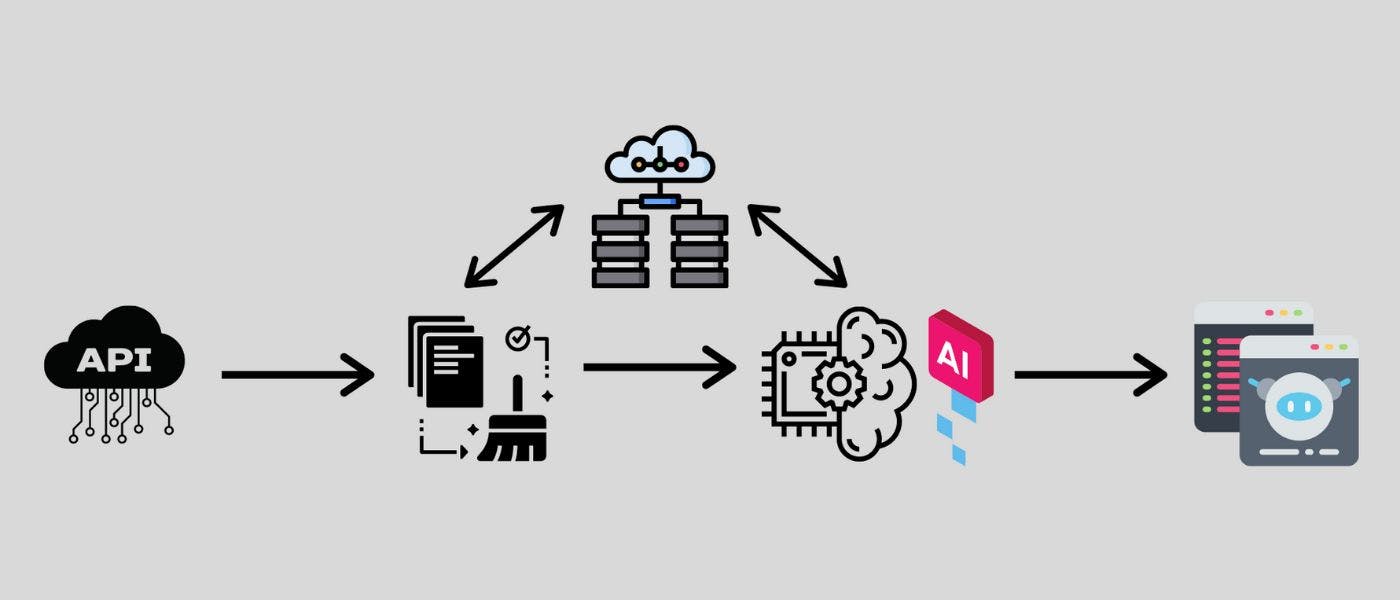
This is how you can work with Python API for your data science project and grab data from an API and save it to a Pandas DataFrame. As a data scientist, you’ll be expected to know how to grab data from APIs. Let's break down the steps we performed:

  • Learned the request library to make an API call
  • Made API call to YouTube API: We passed a URL to the API that specified what data we want. We had to read the documentation carefully to build the URL.
  • Collected data as JSON: We collected the data as a JSON object and parsed through the data saving it as variables first.
  • Saved the data as a Pandas DataFrame
  • Lastly, we just added some error handling logic and cleaned up the code