paint-brush
How To Add Authentication To Your Apps and dAppsby@polluterofminds
627 reads
627 reads

How To Add Authentication To Your Apps and dApps

by Justin HunterAugust 24th, 2019
Read on Terminal Reader
Read this story w/o Javascript
tldt arrow

Too Long; Didn't Read

SimpleID is an identity as a service provider. It grew out of the need for decentralized applications to have a better authentication experience. We use SimpleID for our own internal app, so when you sign up, you're actually creating a decentralized identity with cryptographic keypairs. For this tutorial, we are going to use the Blockstack modules from SimpleID to add authentication and storage to our app. The project itself starts as a bare-bones todo app with basic state management. There's no authentication and no data persistence, so we're going to fix that in literally just a few minutes.

Company Mentioned

Mention Thumbnail
featured image - How To Add Authentication To Your Apps and dApps
Justin Hunter HackerNoon profile picture

I co-founded a developer toolkit company with the explicit goal of making decentralized applications easier to use. However, the tools aren't just for decentralized applications. Traditional application developers can make use of SimpleID to add authentication and storage to their app quickly and with zero overhead. Let me show you how easy it is.

Let's start with a sample project since, in most cases, developers will be adding authentication to an existing project. For this, we can use a simple to-do application I had built to compare reactn to Redux.

Prerequisites:

- Some familiarity with React since the sample project is in React

- Node and NPM installed on your machine

- A text editor

Let's get started!

Step One: Clone the todo app repository:

git clone https://github.com/Graphite-Docs/reactn-todo-example.git

Step Two: Change into the newly cloned directory:

cd reactn-todo-example

Step Three: Install dependencies

npm install

Step Four: Install SimpleID

npm i simpleid-js-sdk

Ok now that we have everything installed and ready to go, let's talk about exactly what we're doing here. The project itself starts as a bare-bones todo app with basic state management. There's no styling in this thing, so please ask your eyes to forgive me in advance. It may be nice for you to see the app working first before we edit anything, so go ahead and fire it up by running

npm start
.

As you can see, there's no authentication and no data persistence. Refresh and your updates are lost. We're going to fix that in literally just a few minutes. I'll explain how:

SimpleID is an identity as a service provider. It grew out of the need for decentralized applications to have a better authentication experience. SimpleID is free to get started with and scales flexibly as you grow. Out of the box, you get access to the following decentralized protocols:

  • Ethereum
  • IPFS
  • Blockstack

But you may not care about that. Your might just care about adding authentication and storing data easily. For that, we are going to use the Blockstack modules from SimpleID. So, let's begin.

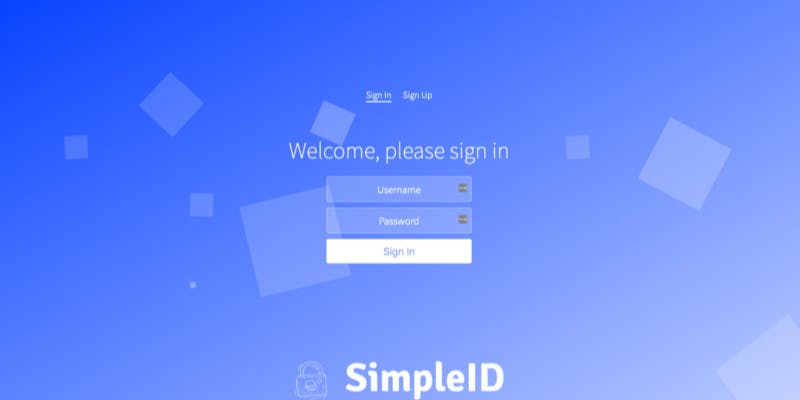
Go sign up for a free developer account at https://app.simpleid.xyz. A fun note here: we use SimpleID for our own internal app, so when you sign up, you're actually creating a decentralized identity with cryptographic keypairs.

When you've signed up, you should see a verification screen. Go check your email and look for a developer verification email from SimpleID. This email is just making sure you are who you say you are. Once you click the link, your account should get verified and you'll be in. You'll see a screen like this:

There are couple of things you'll need to do to get started. First, click on the Edit Module button. This will take you to the screen where you can choose what protocols you'd like to use in your application.

As I mentioned, we'll be using Blockstack for this tutorial. On the Authentication Modules screen, select Blockstack. Then switch to the Storage Modules and select Blockstack there. Hit the Save button in the bottom-right, and you'll be all set for module selection.

Now, return to the Account page by hitting the menu icon in the top-left and choosing Account. Here, you'll just need to create a project. Give your project a name and a URL (this should be the base URL where your users will ultimately access the app from).

Once you've done that, click Create Project and your Account page should look similar to this:

One final thing we need to do is grab the

devID
and the
apiKey
for the project. To do that, click View Project and you'll have access to those two things. Record them somewhere because you'll use them in the Todo app.

Now, let's start coding. You'll want to consult the SimpleID documentation as you work with SimpleID. You can find that here. Open up your todo app in your favorite text editor. The project structure looks like this:

We're going to keep things really simple by adding just one new component for Authentication. So, let's create a new component called

Auth.js
and nest it under the
components
folder. In your Auth.js file, you are welcome to create a class component or a function component. For simplicity (and quick state changes without involving React Hooks), I'm going to make a class component. But what do we want this component to do? Well, we want it to handle sign up and login requests, right?

This means our component needs to be able to conditionally render a sign up page or a login in page depending on what the user wants to do. Let's build that.


There's not a lot happening yet, but we've now built out the framework. So are we looking at exactly? Well, first, notice we are importing React from "reactn". This is the global state management framework used in this todo app, so to make use of global state (which we will in just a moment), we need to import React from that module.

Next, we've created local state in the constructor within the class component. This is because we need the authSelection state to tell the app whether to display the sign up page or the login page. You can see how this logic is put in place between the opening and closing divs in the return statement.

Now, we need to do two things:

1. Allow users the ability to switch between sign up and login.

2. Give inputs fields for the user to fill out.

Let's do that now:

We didn't do anything too fancy here. We added two buttons above the conditional render statement, one for sign up and one for login. On those buttons, there is a click handler that will update the local state to show the appropriate screen. If the user click the Sign Up button, the sign up form is shown. If the user clicks the Login button, the login form is shown.

We also added two forms in their respective locations under the conditional statement. One form for sign up, which requires username, password, and email. And another form for login, which requires just username and password.

Now, we need a form submit handler for each of these forms, and this is where can drop in SimpleID! We're going to be working right off the documentation for this, so let's begin.

What did we do here? Well, we imported

createUserAccount
and
login
from the
simpleid-js-sdk
that we previously installed into this todo app. We added a config object to house our project information (including
apiKey
and
devId
which you would want to protect in a production project). We built a form submission handler within the
handleSubmit
function. We used both the
createUserAccount
and login functions from
simpleid-js-sdk
within the
handleSubmit
function. And finally, we wired up the forms to call the
handleSubmit
function on form submission.

Assuming all went well, you could actually try this out now and watch the console output. Or can you?

We still need to add out

Auth.js
component to the
App.js
main file. Let's do that now, but let's conditionally render it only if the user is not logged in. So, first find the
index.js
file under the
src
folder. You'll see a
setGlobal
function with a nested object. Update that object so it looks like this:

The

isLoggedIn
state is what we're going to be using in the
 App.js
file. Let's go to that file and refactor it to a class component to handle our conditional logic. What you will end up with is this:

We refactored this to a class component to make sure that on global state changes, the conditional logic is enforced. Again, we could have used Hooks for this, but we're trying to focus less on React functionality and more on the authentication solution.

The other things we did is we added the global state variable,

isLoggedIn
, and check for whether or not it was true. If true, show the app. If not, show the authentication page.

Now, you can try your sign up functionality. The username will need to be all lowercase with no spaces, but go ahead and give it a shot, and be sure to watch the console. You should see something like this:

The one thing you probably won't see is the 409 error message. The user names your users create are actually added to a batch of other names that get broadcast to the bitcoin blockchain and are registered there. This gives your users true control over their identity. However, I've maxed out the number of users I can register for now because of ip address limits on the registrar I use for development.

But I digress. The important this here is that final message in the console. It's an object with a message that says "user session created".

Now, what you do with that user session is entirely up to you, but the data returned is what you can use to make sure the user is actually logged in. So a quick simple way of checking is to do something like this:

First, add setGlobal to your import statement for React at the top of the file:

import React, { setGlobal } from 'reactn';

This allows you to set global state from anywhere in the app. Then, in the handleSubmit function, in the sign up logic, you can do something like this:

Of course, you'll want to do something with the user session data that's returned in account.body, but you can handle that in a number of ways and I'll leave that up to you.

The last thing we want to check is that login works. So, assuming you remember the credentials you entered, you can use those. If you don't, sign up again and remember them ;)

Refresh your page and let's log in (remember, you'll want to persist the user session data you get back so refreshing doesn't wipe out a user's session, but this is just a simple tutorial). Open up console, so you can see what's happening. You should see this:

Now, you can add a check to your login functionality to update the global state properly just like with did with sign up. It can look something like this:

Again, you'll want to persist the user session so that your user is not logged out if the page refreshes, but that's outside the scope of this tutorial.

You have now added authentication to you app without any database configuration or management. You've made it easy for your users to sign up and sign in. You've given them a decentralized identity (which if you explore the returned user session object, you can provide your users a lot of useful information). You've done a lot with very little code.

SimpleID's whole goal is to make authentication easy. Decentralized apps, traditional apps, IoT projects, server-side projects, etc. We want to make it easy for any developer in any language anywhere.

If you're interested in learning more, check out SimpleID today.