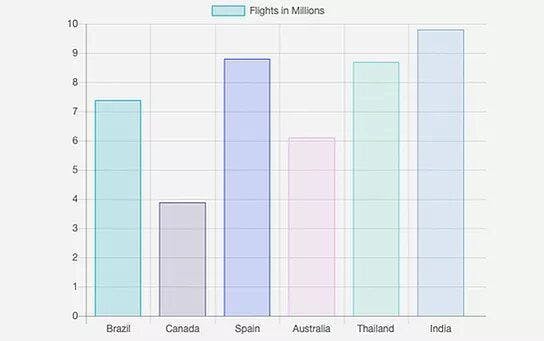
This example demonstrates how to use the HTML component to embed a chart on a page. This is just one of the many things you can embed in your site using the HTML component.
Home
let year = 2017;
let flights = {
2014: [6.3, 2.4, 7.6, 5.4, 9.9, 7.8],
2015: [6.7, 2.2, 11.2, 5.5, 10.1, 7.9],
2016: [7.2, 3.1, 8.2, 5.6, 9.2, 10.2],
2017: [7.4, 3.9, 8.8, 6.1, 8.7, 9.8]
};
$w.onReady(() =>{
$w("#html1").postMessage(flights[year]);
$w("#html1").onMessage((event)=>{
if(event.data.type === 'ready'){
$w("#html1").postMessage(flights[year]);
}
if(event.data.type === 'click'){
$w("#clickedMessage").text = `The number of flights to ${event.data.label} in ${year} is ${event.data.value} million.`;
$w("#clickedMessage").show();
}
});
});
export function year_onChange(event) {
year = $w('#year').value;
$w("#html1").postMessage(flights[year]);
}
Site Code
$w.onReady(function () {
//TODO: write your page related code here...
});
Here we embed a Chart.js chart. The HTML code for the chart is entered into the HTML Component using its Edit Code button. The page and the HTML component communicate with each other using the postMessage and onMessage functions.
When the page loads and each time a year is selected using the dropdown
element, the page sends a message to the HTML component using the
postMessage function. The message contains the values to display in the
chart. The HTML component receives the message using its onMessage
function and updates the chart accordingly.
When a user clicks a bar on the chart, the HTML component sends a message to the page using its postMessage function. The message contains data about the item that was clicked. The page receives the message using the onMessage function and displays its contents to users using the text element below the chart.
The chart is based on chartjs.org. You can find their repository and license on GitHub.
Next Steps
Previously published at https://www.wix.com/velo/example/create-a-custom-chart