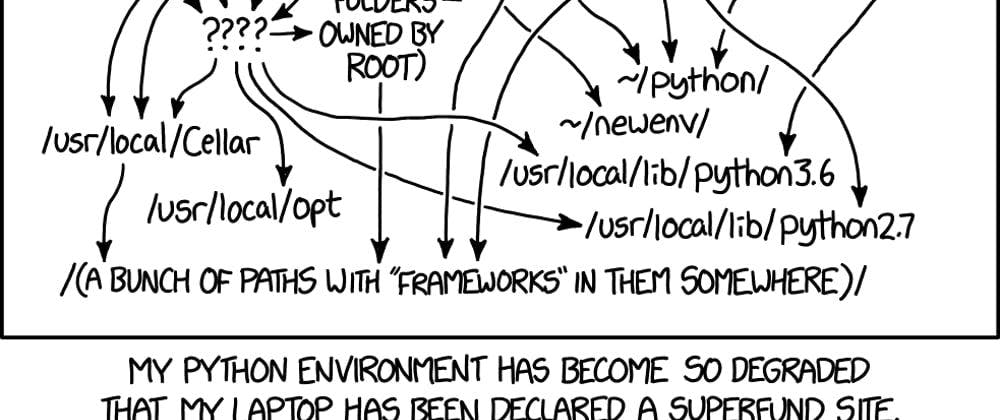
paint-brush
Setting Up a Python Dev Environment in 2024by@drehh
265 reads

Setting Up a Python Dev Environment in 2024

by Andreas WinschuMay 1st, 2024
Read on Terminal Reader
Read this story w/o Javascript
tldt arrow

Too Long; Didn't Read

How to and why: - Find a way to install multiple pythons - Make your python code a python package - Put all your config into a pyproject.toml - Use a virtual environment Use a deterministic locking solution
featured image - Setting Up a Python Dev Environment in 2024
Andreas Winschu HackerNoon profile picture

The following two xkcd issues pretty much sum up the experience of coming new to Python.


You start flying on day 1:

XKCD 1987: Python Environment


Image description


Later, by the time it comes to shipping your code to production, you experience the inevitable crash due to getting entangled in all the different Python environment symlinks:

XKCD 353: Python


Image description

Occasionally, I see posts on social media of people stumbling into this and asking for some single source, which sums up how to have a proper Python development environment:

Image description

An iconic reaction of a user on Twitter after getting a bunch of suggestions:

Image description

Recently on my team we went through standardizing bunch of Python data processing projects, so i decided to write this one post, pythonists were asking about.

TL)DR

There is, unfortunately, still no single out-of-the-box solution.

  • Find a way to install multiple pythons
  • Make your Python code a Python package
  • Put all your config into a pyproject.toml
  • Use a virtual environment
  • Use a deterministic locking solution

Installing Pythons

Your package manager of choice has a way of installing multiple Python versions. But only one of them will be the default python3 command. For example, a new Python 3.12 might have already been released, but your distro package manager will still point python3 to Python 3.11.

No matter what the default Python is, all Python installs will put a versioned pythonX.YY command on your path. Let's say you now need Python 3.12 for some project. On MacOS homebrew, you can run.


brew install [email protected] 
python3.12 -V
# -> Python 3.12.2

# check installed pythons
brew list | grep python@
-> 
#  [email protected]


On other distros, this will look similar. This will allow you to work on different projects that require different Python versions. However, as you might have noticed, we only get one single patch version for each minor version of Python.


In the example above for [email protected] , we got Python 3.12.2. At some point, there will be bugfixes for Python 3.12, and after a package upgrade, the [email protected] package will be replaced with a newer 3.12 patch , e.g Python 3.12.3.


People on your team might not be as quick to upgrade, and so probably also your production environment. This is when your local env starts to defer slightly. A lot of the time, this will go unnoticed: new patches do not break backward compatibility, and you simply might not be running into the fixed bug. Hence, you might decide not to bother at all. I must admit to being guilty of this most of the time.


However, not bothering is not an ideal solution, as this is exactly what is called a nondeterministic build. You end up with a slightly different version, as everyone else does, and now there is a classic "Works on my machine" scenario.


One way to solve this is version switcher tools. A popular version switcher for Python is pyenv. It will allow you to install the exact Python version and switch the default python command to the exact version of your choice.


brew install pyenv
pyenv install -l | grep " 3.12" # list all 3.12 versions
pyenv install 3.12.2
mkdir -p ~/src/my-python-project && cd ~/src/my-python-project
pyenv local python 3.12.2
which python 
# => ~/.pyenv/shims/python
python -V # => Python 3.12.2  


The above will create a .python-version file in your project directory. Every time you switch to this directory, the exact Python version will be selected.

Installing Pythons like this also has a downside: Every Python version will be compiled from src on your machine. Compiling takes more time than just pulling a binary. Pyenv rarely fails on this, in my experience. While still compiling, sometimes you will run into edge cases because you have some wrong version of a system lib or a linking path that is misconfigured.


Therefore, not bothering with exact versions of Python, as I mentioned above, is also an option. You might at some point do both. And this is how you end up with Randal's XKCD Python environment diagram. That is also why some people have a hard habit to never run the default python or pip command.


Instead, they run them like this:

python3.12 my-python-script.py
python3.12 -m pip show pandas


Also, remember those friends:

which python3
# => /opt/homebrew/bin/python3

echo $PATH
# => /opt/homebrew/bin:/opt/homebrew/sbin:/usr/local/bin ...
# the python3 command in the most left dir wins


At this point, I think I have a nervous habit to run which python or python -V before typing any Python command.

Virtual Environments

Once you have multiple Pythons, you want to make sure that any different project on your machine is using the respective Python with a specific set of Python packages.


Python, by now, probably has over ten solutions on how to isolate a project-specific environment, while more are being created at the time of writing. (See [1], [2]). This is because the default package manager pip has two major limitations:


  1. Pip can only install a single version of a package at a time. A package update replaces this version. That means, for example, you can't have pandas 2.x in one project and pandas 1.x for another in the same Python installation.

  2. Pip has no lockfile support, or at least no obvious one. Lockfiles are created from requirements policies. It means that if a package you need for your software depends on another package, there is no good build-in way to lock an exact installed configuration that meets this dependency. Multiple versions may meet the dependency, but you want to reproduce the exact single-resolution variant on another machine - e.g., production or your teammates ’s computer. (we are at deterministic builds here again)


The importance of deterministic locking is explained in detail in upcoming section.


Not long ago, pip even had no real good support to tell you that your mix of installed packages is incompatible with each other. I was pretty surprised reading it on Pip's mailing list announcement that they now support proper dependency resolution in the year after npm vs. yarn, which has already happened, and Python has been there for way longer. It means that for a long time if any two packages needed different versions of a 3rd one, where those different versions have an incompatible API breaking change, pip would not warn you. You would end up with whatever latest version came by the most recent pip install, even if that recent install is technically breaking another package requirement. In the end, only one of the two packages worked with the installed dependency, and the other was silently broken.


This all leads to a really fragmented ecosystem of Python environment and package managers, which solved different aspects of the above shortcomings in different ways - virtualenv, venv, conda, mamba, pdm, Poetry, Pipenv, rey, uv - to name a few. Some of them rely on pip, others ditch it completely and use the pypi.org package repository api directly with their own dependency resolution algorithm.


Writing a reliable and fast dependency resolution algorithm is hard, though - in fact, it is NP-hard. See this excellent explanation on a modern resolver - PubGrub. Hence, whatever comes as default tooling from a language will be regarded as more stable, and you need good arguments to convince people to switch to something else. Convincing people is sometimes even harder than NP-hard, so it makes also sense to learn whatever is default.


A tool shipped with Python for isolating different project environments is venv. Venv is short for virtualenv. Prior to venv a tool actually named virtualenv was implemented and then venv was shipped as the default tool with every Python install. Some projects still use virtualenv. The tools also slightly defer in how they symlink or copy the Python version.


As Python cannot install multiple versions of packages, venv helps you create a separate directory of packages for each project - the virtual environment. The virtual environment also fixates the Python version, it was created with. Then for development on a particular project, you activate the respective environment. This activation just fiddles with your shell path and default python and pip commands and makes the activated default commands point to the symlinks under ~/venv/my-python-project/bin folder.


cd ~/src/my-python-project
which python3.12 
# => ~/.pyenv/shims/python3.12

# creates the virtual env
python3.12 -m ~/venv/my-python-project 

source ~/venv/my-python-project/bin/activate
which python
# => ~/venv/my-python-project/bin/python
which pip
# => ~/venv/my-python-project/bin/pip

pip install pandas==2.2.1
pip show pandas
# => 
# Name: pandas
# Version: 2.2.1
# ...
# Location: ~/venv/my-python-project/lib/python3.12/site-packages


If Python is your first language, then probably all the above sounds like a straightforward solution. However, we have over a decade of systems in place that solve this problem more elegantly. Languages like ruby, rust, or go-lang allow multiple packages to be installed at the same time. Then, you specify a lockfile - which versions to pick before running or compiling your code. People coming from those languages rather expect to find such a solution. In my experience, this was a big cause of frustration for a lot of people when trying to establish a good DevOps workflow.

Why is there also pipx?

Python is also a common choice for other people's software, not only for your project. Hence, you will be tempted to install other Python cmd tooling at some point, e.g., cookiecutter, httpie, copyright. Installing a bunch of those via pip might clash with each other due to incompatible requirements, and as we saw earlier, there can only be one version of each package. Also, you will want those tools to be accessible on the PATH regardless of the currently activated virtual environment.


Pipx does the same as described in the Virtual Environments chapter but for every single package.


brew install pipx
pipx ensurepath
pipx install cookiecutter


The above will install cookiecutter cmd tools into a separate virtual env in ~/.local/pipx/venvs/cookiecutter and add its command to ~/.local/bin/cookiecutter which is now on the PATH.

Deterministic builds and dependency locking

The most known way of somehow reproducing the same set of required packages on another machine in Python is a requirements.txt file. You list all your packages in a file together with some version policy. Then you run pip install -r requirments.txt


pandas >=1.5.2, <2.0.0
pyarrow >=12.0.0, <13.0.0
flask >=2.3.3, <3.0.0


However, this is not a complete definition of your environment. For example, pandas and pyarrow need numpy to work. numpy can be in whatever version, as long as its API is compatible with the requirements of both pandas as pyarrow. Also the above requirements.txt file allows for installing any range of package versions as long as they are not higher than certain major versions.


Installing those requirements will lead to different sets of packages, depending on the point in time you run it. At some point, there is only most recent pandas==1.5.3 and numpy==1.25.1, which satisfy the requirements. At another point, there will be pandas==1.9 and numpy==1.7.


So you must be asking yourself then, why would I write such a requirements policy file at all? I will just write down all the exact versions of packages I need and the packages those packages need and the packages those packages need and so on - their so-called transitive dependencies. Then I use those exact full recursive dependency tree to reproduce the install on deployment.

You probably already see that this is a tedious task that has to be automated. Also, you have to think about the maintenance required in upgrading all those packages later. You care only about upgrading packages your software needs. All others should just work with your software and be upgraded to a state where they have no reported security holes (CVEs), bugs or performance regressions.

This is where semver comes into play. I have already used semver terminology across the blogpost. Check out the link above for a full reference. Here is a little recap:


You can see above that pandas==1.5.3 versioning scheme is a 3-dotted number. Those dots are like special code for all developers and users of the package. The code is deciphered like this: pandas==<MAJOR>.<MINOR>.<PATCH>. All users of the code agree that as long as the MAJOR number stays the same, the package will still work without adapting your usage code. Once a package maintainer breaks this backwards compatibility, he bumps up the MAJOR version. MINOR is changed when new features are added. And PATCH is changed when bugs are fixed.


While we can agree on some convention code, it is not guaranteed that we all will flawlessly follow it. Some package maintainers don't care about the code. Some will publish early packages with 0.0.x number and just bump the last number until they believe the package API has reached some stability to become 1.0.0. And some will accidentally introduce a breaking change without bumping up MAJOR versions.


It makes the following goals valid at same time:

  1. I want to have a semver policy definition of my development environment. Because I mostly trust the developers of packages to adhere to semver. This allows us to see if updates to any required package are supposed to be backward compatible.

  2. I still want to have my environment locked with exact versions to be able to reproduce it as closely as possible on another machine or a fresh install


The above goals allow an optimistic upgrade strategy, where I can just do pip install -U requirements.txt . Everything will be upgraded up until the current major version. Now I run my test suite and just ship the change without some sort of manual QA. With a good unit and integration test suite, this strategy allowed teams I was on, to literally press a single button on package upgrades and be done with it.


As sometimes things behave differently across different minor/patch versions when you ship a change, you want to be sure it is shipped with the exact same packages with which the feature was tested. Also, when bugs happen and cause a failing CI or, worse, broken production, you want to be able to install the exact same set of packages on the local machine to debug the issue. Also, you want to simply have a good way to track which exact packages were shipped. As mentioned earlier pip has no good built-in way to create an exact lockfile from a semver requirements.txt policy. There are some methods involving a pip freeze command. But they will freeze whatever is currently installed. And sometimes you might install packages for development, which you don't want to ship - e.g. jupyter notebook and jupyter lab. The extra list of requirements for only those two will be huge.


A commonly adopted tool for dependency locking is pip-tools. pip-tools is also a pip package and can be installed via pip. pip-tools works with the default pip resolver for transitive dependencies.


Instead of having a single requirements.txt file, you change it to a requirements.in file


# requirements.in
pandas >=1.5.2, <2.0.0
pyarrow >=12.0.0, <13.0.0
fllask >=2.3.3, <3.0.0


Now at the same directory of the requirements.in run pip-compile and it will produce a complete requirements.txt with a full list of transitive dependencies and their exact versions.


pip install pip-tools
pip-compile


Extract of the resulting requirements.txt


#
# This file is autogenerated by pip-compile with Python 3.11
# by the following command:
#
#    pip-compile
#
blinker==1.7.0
    # via flask
click==8.1.7
    # via flask
flask==2.3.3
#...
numpy==1.25.1
    # via
    #   pandas
    #   pyarrow
pandas==1.5.2
    # via requirements.in
pyarrow==12.0.0
    # via requirements.in
# ...


There are also nice interpretability comments, allowing us to trace why certain packages were installed or, to be precise, which other packages required them. Another benefit of such a full lockfile workflow is interoperability with automation bots for dependency updates and vulnerability scans -e.g dependabot or renovate. Those tools can only scan packages for CVEs, which are somehow listed in a text file. In other words, if your ternary dependencies are not listed here, they are also not scanned.


Now, you probably think of various other solutions to make reproducible environments - e.g., docker or conda. I will discuss them at the end of the post.

Python project definition

Python code does not have to belong to a project or package definition. Python gives you the flexibility to just do python3 script.py and it will run it, allowing to import whatever packages are currently known to pip and pip's current path to site-packages folder (PYTHONPATH). Also other Python code can be imported relative to the directory where you run the script from. (Python puts the current dir on the PYTHONPATH).


In a larger project script.py will need other modules to work. And you will want to split those module definition into other files structured by some namespaces. Because Python is designed to have the flexibility to just run things with a couple of quick imports, there is also no single set-in-stone convention for a Python project. However it is a common source of misunderstanding and frustration, so its’s important to understand the import system.


The easiest way you can split code in modules is just to throw in import statements to other "files".


# ./script.py

from my-service import MyService

if __name__ == "__main__":
    MyService().compute()

# ./my-service.py
class MyService:     
    def compute():
        # ...


Technically, this practice is not just "importing files," though. Python has an import convention, which defines modules within its interpreter based on their definition in text files. Upon calling the import <module> or from <module> import statement, Python will lookup either a corresponding file with <module>.py name or a directory with name <module>/ and an empty __init__.py file in it. The corresponding *.py files will be parsed, and all entities in them will be made available under the module - functions, classes, constants, etc.


In the example above. A statement import my-service or from my-service loads the corresponding my-service.py file. This automatically defines the respective module named my-service by convention. All function and class definitions like MyService inside my-service.py are now part of my-service module.


By adding a folder with an empty __init__.py, you can introduce a module hierarchie - modules containing other modules.


~/my-python-project
├── products
|    ├──  __init__.py
|    └── product_service.py
└── script.py


# ./script.py
from products.product_service import ProductService
# ..

# ./products/product_service.py
class ProductService:
# ..


Now ProductService class is part of a product_service module, which itself is part of products module.


product_service module could itself be defined as directory of files with __init__.py marker containing a sub hierarchy of more product services. Introducing this nesting is sometimes just done for the sake of adding an extra namespace. There can be multiple product services depending on different context.


Somebody on the internet could also have defined a nice package called products After installing that package, if you call from products, Python has no way to know which products to use - the one from your project or the one you installed from the internet. In this case another level of nesting is often introduced just for the sake of an extra namespace, often by using the organisation name - e.g. google/cloud.


While, for example, in Java, it is very common to use the organization name as a namespace, pythonists tend to be rather simplistic. Still, at least a single flat namespace is used, preferably. If you install pandas, you import all pandas code always from pandas, if you install numpy you import nunmpy code always from numpy etc. This has a bet that names like pandas or numpy are rather unique.

There might be also multiple namespaces to import from via a single package install.


For reference, Python also has other import and project layout mechanisms, as outlined above:

We chose to ignore all those options on a recent team and never looked back. Wasn't Python's credo after all: "There should be one obvious way to do it"?

When trying to find some minimal project definition example, one often comes across articles named like "Python Package Layout". A common confusion in my experience often is: "I am not creating a pip installable python package. I just want to create an app". But the answer is actually that it is best to make your app exactly such an installable package, even if you are not planning to publish it to some package registry.


By making your project installable, it can be installed locally in a so-called editable mode, with pip install -e .This will make your project known to pip without the sources being copied to the site-packages folder. The pip package install will point to the project src folder instead. Hence the editable naming. The package live changes whenever you edit a project src file without any extra installation.

One benefit of editable installation is, that now import from my-python-project works no matter in which directory you run a Python script. This gives a consistent way of importing your code in tests. Also, you can put jupyter notebooks in some extra folders and don't have to fiddle with import paths to your project sources. For example, VSCode starts jupyter notebooks with an import path relative to the notebook parent directory but jupyter notebook command itself sets the import path to the directory the command was launch from. This will mess up imports relative to the current launch directory. Contrary, if your project was installed to pip, this does not matter because the project is already on the PYTHONPATH and code from it can be imported from anywhere.


Another benefit is that an editable install will undergo the same dependency resolution as other pip packages. The requirements policy mentioned in earlier chapter can be placed inside pyproject.toml configuration file instead of a requirements.in file according to relatively recent PEP 621 standard. Now pip install -e will check if other installed packages meet your project’s requirements. As you might have installed other packages manually for development - e.g jupyter, there might be some clash, which is good to resolve or its just a verification that your current project requirements are met by whatever is now locally installed in the virtual env.

Venv + PEP 621 + pip-tools

The rationale outlined in previous chapters is, to most degree, the default Python way to achieve isolated per-project environments with deterministic builds.


In such a workflow, a Python project can be defined like this:


~/src/my-python-project
├── my_python_project
│   ├── __init__.py
│   ├── products
│   │   ├── __init__.py
│   │   └── products_service.py
│   └── run_products_service.py
├── notebooks
│   └── Product.ipynb
├── pyproject.toml
├── requirements.txt
└── tests
    ├── __init__.py
    └── products
        ├── __init__.py
        └── test_products_service.py


At the root, there is a pyproject.toml, which makes the project installable with -e option. It also specifies a policy for project requirements. A full requirements.txt, which includes all transitive dependencies, was generated out of the PEP 621 spec in pyproject.toml. A top Python module with same (underscored) name is specified under root. All modules have an empty __init__.py marker, if they include other modules.


Below is the minimal pyproject.toml:


# ./pyproject.toml
[build-system]
requires = ["setuptools>=68.0.0", "setuptools-scm", "wheel"]
build-backend = "setuptools.build_meta"

[project]
name = "piptools_demo"
requires-python = ">=3.12, <3.13"
dynamic = ["version"]
dependencies = [
    "pandas >=1.5.2, <2.0.0",
    "pyarrow >=12.0.0, <13.0.0",
    "flask >=2.3.3, <3.0.0",
]

[tool.setuptools]
packages = ["my_python_project"]


Python, by now, has some democratic policy to build packages by multiple build backends. It makes things even more confusing for new pythonists, so let’s ignore it (as this post is already long). The config contains a minimal spec for using the classic setuptools for this and also for some automatic versioning every time a package is build: setuptools-scm and dynamic = ["version"].


The packages = ["my_python_project"] directive tells setuptools build backend to build code only from the my_python_project module (directory). If you want to import from other module names at the root, you can specify a list of top modules here. There can also be other folders under root that are not a Python package; hence, the configuration is needed. The packages configuration necessity can be omitted at the cost of adding an extra nesting under a folder named src at the top. See src layout vs flat layout.

Having the above project set up with minimal build definition, you can now create a virtual environment with a suitable Python version, lock and install all dependencies, and install the project in editable mode.


cd ~/src/my-python-project
python3.12 -m venv ~/venv/my-python-project
source ~/venv/my-python-project/bin/activate
pip install pip-tools
pip-compile
pip install -r requirements.txt
pip install -e .


There is also a pip-sync command from pip-tools, but it will wipe out everything not listed in requirements.txt (excluding pip-tools itself). Unfortunately, there is no built-in easy way to list and lock development dependencies like jupyter lab or black with Venv + PEP 621 + pip-tools workflow.


After having the project installed in editable mode (-e), all its code from any place can be imported consistently like this:


# ./run_products_service.py, ./notebooks/Product.ipynb or 
# ./tests/products/test_products_service.py
# ...
from my_python_project.proudcts.product_service import ProductService
# ...
ProductService().list_products()


When a full requirements.txt was generated and checked in under version control, anyone on the team or any CI workflow can install the exact same environment as this


cd ~/src
git clone [email protected]:my-org/my-python-project
cd ~/src/my-python-project
python3.12 -m venv ~/venv/my-python-project
pip install -r requirements.txt
pip install -e .


Note how, for installation, pip-tools are not required. It is only needed to lock dependencies as they change. Also, installing project requirements and the project itself, as an editable package, changes order. The requirements.txt already contains everything needed for the project, hence a subsequent editable project install must not pull any new packages.

This setup also allows for one command upgrade of all packages and transitive packages to their latest versions, which does not break your PEP 621 server policy.


pip-compile --upgrade


In other words, installed packages after this command should stay backward compatible if every package maintainer properly adheres to semver when bumping up versions.See updating-requirements.


To upgrade packages with breaking changes, you can manually bump up major versions in the policy and run pip-compile and pip install -r requirements.txt. Finally, the code will be adapted, and the tests will be green.

Conclusion

The venv+pep621+pip-tools workflow is mostly using basic Python tooling. To clone and reproduce the environment the extra pip-tools package is not even required. Believe it or not, this flow feels natural to a lot of Python developers. The consistent from my-python-project import scheme, together with an editable install, saves you from running into various import issues. (See [1] [2] [3].)

Drawbacks

One aspect of this setup that somehow annoyingly catches the eye of a lot of developers (myself included in the beginning) is the project name repetition at the root - the ~/src/my-python-project/my_python_project directory needed for the module naming inside Python interpreter with same name as the project. It turns out to be actually a common pattern across all languages. (See [1], [2], [3]). Probably, it jumps the eye because of the flat layout, thus being immediate repetition after the project name, or maybe it's because Python somehow does not have one obvious way to do it, so you start thinking about this naming scheme too much. On the JVM, for example, there is no other way - all code must belong to some other package. In Python, you have the choice of just running a script. But if you choose to standardize your project and create a top package - this is the way. (See [1],[2],[3])


There is actually one more important downside to the venv + PEP 621 + pip tools workflow. It does not allow cross-platform building. Python packages have the option to define different requirements depending on the system and CPU architecture on which the package will be installed. It results in a different lock file depending on the platform you run it. pip-tools also does not offer an option to create a lockfile for a different platform.


Python has a good way of shipping native binaries - wheels (accessible via native-binding) only for the platform you are currently on. Most packages rather choose to ship a different binary wheel under the same package version than add different transitive dependencies for different hardware architectures. Those different wheels for each system do not affect the pip-tools lockfile.(They do not appear in the lockfile at all).


However, sometimes, a different architecture requirements strategy is chosen. A popular package with such an issue is tensorflow. Tensorflow installs different packages on Apple Silicon, Apple Intel, Linux/arm64, and Linux/amd64. One practice that became popular recently is getting Apple Silicon machines for development. Those machines use arm64 architecture. Deployment or CI workers will, on the other hand, often use Linux/amd64 architecture. If you use tensorflow and you run pip-compile on Apple Silicon, a pip-tools lockfile turns out uninstallable on a linux/amd64 machine.


Further, as briefly mentioned above, there is no good way to specify extra development dependencies for all team members. Those are packages that are needed for development only - e.g., black or Jupyter notebook. This could probably be solved natively by an extra requirements file and other pip-compile commands the project has to document and require everyone to run. Having said that, installing dev tooling, where you care about the same versioning for everyone on the project, will likely be covered by another popular tool outside the Python ecosystem - pre-commit.


In general the venv+pep621+pip-tools workflow requires everyone on the team to know and run a mix of various tools and their commands - installing Pythons, creating virtual envs, activating them, locking versions etc. Also, it requires you to understand and know the implications of all that you read above in detail.


Our primary motivation is working on software; hence, it's natural to strive for a solution that just solves the Python packaging. I have some kind of single default workflow and mostly do not care about this. Imho, this is what you get from bundler or cargo. So lets’s look at other workflows.

Poetry

Poetry promises to solve almost all of the above issues. It does not take ownership of installing Pythons, but it covers everything else, at least on paper.


Poetry brings a single tool, which:

  • automates virtual envs and makes them an internal implementation detail.
  • requires a project definition with a spec for project requirements (though it is not using PEP 621 standard).
  • allows multiple groups of dependencies for different stages: dev, test etc.
  • creates lockfiles for all possible platforms and stages from a semver policy.
  • ships with tooling for upgrading dependencies w.r.t to current semver policy and previous lockfile
  • creates a full transitive dependency resolution lockfile for all possible platform specific variations


Poetry is best installed with pipx mentioned earlier.


pipx install poetry


A Poetry project setup looks almost same as the default Python project setup outlined above:


~/src/my-python-project
├── my_python_project
│   ├── __init__.py
│   ├── products
│   │   ├── __init__.py
│   │   └── products_service.py
│   └── run_products_service.py
├── notebooks
│   └── Product.ipynb
├── pyproject.toml
├── poetry.lock
└── tests
    ├── __init__.py
    └── products
        ├── __init__.py
        └── test_products_service.py


The only difference is the configuration within the pyproject.toml file:


name = "my-python-project"
version = "0.1.0"
description = ""
authors = ["Chuck Testa <[email protected]>"]
readme = "README.md"
packages = [{include = "poetry_demo"}]

[tool.poetry.dependencies]
python = ">=3.12,<3.13"
pandas = ">=1.5.2, <2.0.0"
pyarrow = ">=12.0.0, <13.0.0"
flask = ">=2.3.3, <3.0.0"

[tool.poetry.group.test.dependencies]
pytest = ">=8.1.1"

[build-system]
requires = ["poetry-core"]
build-backend = "poetry.core.masonry.api"


Now running poetry install will create a poetry.lock file, create a virtualenv under a directory managed by Poetry e.g ~/Library/Caches/pypoetry/virtualenvs/ and install all the locked dependcies into it. When a lockfile already exists, poetry install will adhere to it and install the packages at their exact versions listed in it.


...

[[package]]
name = "flask"
version = "2.3.3"
description = "A simple framework for building complex web applications."

[package.dependencies]
blinker = ">=1.6.2"
click = ">=8.1.3"
...

[[package]]
name = "blinker"
version = "1.7.0"
description = "Fast, simple object-to-object and broadcast signaling"

...

[[package]]
name = "click"
version = "8.1.7"
description = "Composable command line interface toolkit"

[package.dependencies]
colorama = {version = "*", markers = "platform_system == \"Windows\""}
...


Running poetry shell within the projects directory activates the corresponding virtual environment of the current project.

Drawbacks

While Poetry looks good on paper, some people report it to become either very slow or not working with certain packages.

One reason is that there is really no way in Python to tell, with 100% certainty, which other packages a particular package will require, without actually installing that package. PyPi allows the uploading of metadata about Python package dependencies, but their package server will not enforce the validity of that metadata. Unfortunately, some packages do not ensure to have consistent metadata file for all architectures with what their package setup.py script actually installs.


Some packages have no metadata uploaded at all. In this case, Poetry has to download the package. It will then try to find typical ways of requirements configuration within the package source code. While common patterns exist in Python, there is no 100% guarantee Poetry heuristics can properly scan every package setup. As mentioned earlier, Poetry also has a goal to detect requirements for every hardware architecture, which is even harder.


Finally the whole resolution slowness also boils down to the core problem of it being NP Hard. Hence adding all possible architectures, source downloads and source inspections makes the task even harder. Once Poetry has resolved the full spec to a lockfile things usually become way smoother.


Poetry resolution speed can often also be improved by constraining the range of possible packages which can be installed. For example, a constraint like: pyarrow = ">=12.0.0, <13.0.0" has way less combinations to check for than pyarrow = ">=5.0.0". With more packages, those combinations grow exponentially - hence the NP-hardness. A good practice is, therefore, bumping also the lowest acceptable version of your semver policy after upgrades.


And in case package maintainers did upload the wrong metadata, as in the case of TensorFlow, one can often add some manual workaround for poetry into project.toml.


Example:

[tool.poetry.dependencies]
python = ">=3.11,<3.12"
tensorflow-macos = { version = "^2.15.0", markers = "platform_system=='Darwin' and platform_machine=='arm64'" }
tensorflow = "^2.13.0"


Editor Integration

Now that you have as many Pythons as on the xkcd Diagram from the beginning of the post, it is important to configure the Editor to point to the exact symlink of the Python which was created via respective venv, Poetry or other Python project management tool. Only this particular Python symlink will have a proper PYTHONPATH configured to point to a site_packages directory with corresponding projects dependencies.


For venv and a virtual env created under ~/venv/my-python-project, the Python path will be ~/venv/my-python-project/bin/python.For Poetry, the virtual env path can be printed with poetry env info --path. It results in a path like ~/Library/Caches/pypoetry/virtualenvs/my-python-project-aMfufBzB-py3.11 . The respective Python path will be ~/Library/Caches/pypoetry/virtualenvs/my-python-project-aMfufBzB-py3.11/bin/python


VSCode, for example, is supposed to pick up the right interpreter by default. Open VSCode from a Python project root directory with the code . terminal command to make this happen. When using venv, the respective virtual environment must be activated before running the code . command. Poetry envs should be picked up automatically, if poetry command is on the PATH. If everything works correctly, a prompt like Python 3.11.9 ('python 3.11': venv) in the bottom right corner, will appear. One can also hover over this prompt and verify the full Python path.


In case the above does not work as expected, the interpreter settings can be adjusted manually per project. One can also quickly run:


cmd + opt + P -> Python: Select Interpreter


Entering an interpreter Path there changes the current VSCode interpreter temporarily.


A similar setting can be configured in Pycharm. A lot of plain text editors will ship a language server plugin allowing to add pyright integration. Pyright will use the dafault python command. If you start neovim, helix, or sublime from the terminal with activated virtual env, they should pick up the proper interpreter for the current project. Pyright also allows to change the default python path. If somehow the "launch editor from project directory" strategy does not work for you, you will have to figure out, how to do hardcode the Pyright Python path setting per project. (Example)

Automated dependcy updates

While semver policy plus lockfile and commands like pip list --outdated give some tooling for a package upgrade worfklow, it is still tedious to constantly run these things, bump versions, then run tests to check whether your code still works.


Therefore, dependency update automaton bots exist. One popular solution is dependabot, which is shipped by GitHub.

For GitHub to start creating automated dependency update pull requests, you just have to check in a .github/dependabot.yml configuraton under version control:


# ./.github/dependabot.yml
version: 2
updates:
  - package-ecosystem: "pip"
    directory: "/"
    schedule:
      interval: "daily"
    groups:
      patches:
        update-types:
        - "minor"
        - "patch"
    open-pull-requests-limit: 100


Dependabot works with both workflows covered in the post: pep 621 + pip-tools lockfile and Poetry. There is no need to configure which solution you use. Dependabot will recognize which python project management solution you use by either detecting a pip-tools or Poetry lockfile. (See dependabot package ecosystem)


Ideally you also have some CI workflow setup, which runs your tests (especially integration tests) on those package updates.

Normally dependabot creates a single pull request with a single dependency update. Dependabot bumps up both - the policy and the lockfile.


The policy in pyproject.toml is bumped up when a newer major version of a dependency listed in pyproject.toml is available.

Example:

--- a/pyproject.toml
+++ b/pyproject.toml
-    "pyarrow >=14.0.1,<15.0.0",
+    "pyarrow >=14.0.1,<16.0.0",


--- a/requirements.txt
+++ b/requirements.txt
-pyarrow==14.0.1
+pyarrow==15.0.1


Otherwise, when there were no new versions with breaking changes or no new versions for 1st party requirements in my project. tool, just the lock file is updated with minor/patch package upgrades.


The idea of automated package updates is also that you have mostly automated merge strategy. On each update PR you run an integration test suite with good coverage. And you are to a high degree confident to just press the merge button and ship a dependency update to production if those tests are green.


Whether you choose to follow this practice and merge dependabot PRs with a single click or rebase and test them on some branch is up to you. In the above .github/dependabot.yml there is also a grouping option. It will tell dependabot to create a combined PR for all non breaking (minor/patch) changes.

Other Tools

Conda

Conda will be mentioned briefly. Spoiler: It neither solves deterministic nor cross-platform builds.


I believe Conda solved a lot of pain at a time when Python dependencies often had to be compiled. Nowadays, I rarely run into a package that does not ship a binary wheel for its native code together with the package. However, if no wheel would be available, Python would fall back to compiling the dependency. For this, certain development system libraries must be available on your machine. It is not always straightforward where to get them for your package manager, and sometimes extra setting like LD_LIBRARY_PATH are required to specify a compatible system lib.


When conda came, it took care of providing system libraries and Python distributions itself. Hence, installing a package just worked, as opposed to pip, which required installing system libs on your own. As long as one is fine with only semver compatible environment definition (instead of deterministic), it is close to an out of the box solution.


One can also export the exact env clone with all the transitive dependencies. This is close to a lockfile workflow, but not quite. There is no good way of working hand in hand with a policy and a lockfile as outlined in the post. You either can have a semver policy env definition or the one with all the exact versions but not both, where update to the lockfile honor the policy.


Conda also defines its own packaging format with its own package repository. It has way fewer packages than are available for pip on PyPi. Therefore extra support for pip packages was added. However, for a long time, there was no resolution between the tree of conda packages and the tree of pip packages, and by adding a pip package, one accidentally could override a package that came from conda because the same ternary dependency might be shipped through different packages. This resolution was added as an optional flag, but even after 3 years passed since I saw that feature, it is still marked as experimental.


For DevOps engineers, using conda means some extra install scripting, larger build times, and still no straightforward deterministic build workflow that works for development and deployment. Also, using conda will actually require understanding conda and pip, as pip packages eventually will crumble into the environment. While data scientists like conda because it gives a somewhat seamless experience on a single machine, DevOps engineers do not, as it does not have a good solution for maintaining dependencies through the project lifetime and shipping deterministic builds.


For deterministic builds on the conda ecosystem - mamba exists. It claims to be cross-platform. I did not try to determine whether it actually allows building for another platform when you are developing on it.

Docker for development

Docker is used to deploy the exact same image in production. A common idea then: so why not also use it to specify the development environment? We can use mostly the same image for development as the one being deployed.


Recently, there has also been a popular devcontainers.json workflow. Even before that workflow, a wide adopted approach was to create a single docker-compose.yml for development, assembling all Dockerfiles from the project with bind mounting the project source files into this local Docker machine. This way, all sources live locally and in Docker, but the code runs only within a specified Docker environment.

I will try to cover such workflow in another post. There are certain caveats though, I want to share here already. Docker is known for its advertising to solve "Works on my machine!" issues. Therefore, there is a widespread wrong belief that it somehow happens automatically by just adding a Dockerfile and letting everyone build dev images from it.


Pushing/pulling same docker image is deterministic, building an image from a Dockerfile is not. Also, a named docker tag like - python:3 or my-project:latest on two different points in time can point towards two different base images. Building an image with exact same FROM <tag> statement at a different time therefore, also can lead to two completely different images.


In a typical Python project Dockerfile, you find some directives like this:


FROM python:3.12
COPY requirements.txt ./
RUN pip install -r requirements.txt


The COPY requirements.txt statement creates a cache based on the fingerprint of the content of the requirements.txt file. When you bump a version in that requirements.txt file, its fingerprint changes. Afterwards on running docker build, docker will repeat all instructions from that line. The cache for this line was invalidated due to a different fingerprint. Now, docker will run the RUN pip install line, and in case the contents of this requirements.txt do not lead to a deterministic build; the result is also not deterministic. You might have bumped up a single top package, but now Pip will pull the latest possible versions for each other transitive dependency as well.


For the risk of stating the obvious, The reproducibility in Docker workflows comes from building and uniquely tagging an image, then pushing this same image to a registry and using the exact same tag to pull and deploy that image from the registry. In other words, within the Docker workflow, the Docker image is the lock file. In a docker workflow, it is up to the DevOps engineers to establish a link between a source code commit revision and an accordingly tagged image. Docker images are not checked into the source code. By checking in a full requirements.txt with all transitive dependencies, this link is automatically made, at least for all Python libraries.


Another drawback for us, Apple Silicon victims - a docker image build for Linux/AMD64 will not run on Linux/arm64. The latter is what MacOS emulates Linux on to run docker. There is some virtualization to run docker on Mac in Linux/amd64 mode, but your image must be multiplatform, and running it in 64-bit CPU op mode is still unsupported at the time of writing. Running in 32 bit makes some Python packages with native extensions not even being able to launch.


Docker for Mac also comes with a performance penalty of approx 30%, but virtualization of Linux/amd64 comes even with some performance punishment.


Devcontainers still have their benefits, even if you just build dev images from scratch for the same CPU architecture without having a commit to docker tag relationship in development env. Even if such workflow does not create an exact reproducible environment, it creates a homogeneous and isolated environment. Also, they are a good way to automate installation. In the end, if we have already developed another architecture, the expectation is not to have an exact env copy of production locally. By locking the exact dependencies of our own 1st party software, we get at least a guarantee that the exact same versions will be used on another architecture. Those versions came from a single point-in-time multiplatform build.

Summary

Setting up a Python dev environment is still a common source of frustration in 2024. No out-of-the-box solution would match feature parity with tools from other languages like bundler, cargo, or Go Modules. Especially Apple Silicon trend of switching development to arm64 architecture, but deployment is still on amd64 made the situation worse.


Most of the time, one can set up a good workflow through pip+venv+piptools or 3rd Party tools like Poetry. This will:


  • Find a way to install multiple pythons

  • Make your Python code a Python package

  • Put all your config into a pyproject.toml

  • Use a virtual environment

  • Use a deterministic locking solution


Last but not least, because the situation is still far from perfect, there is, again, some movement in the world of Python package managers. The author, known by the pseudonym @mitsuhiko, is the creator of the popular Flask framework. He started the movement by questioning again whether another standard should exist. Despite there being so many packaging solutions already, the answer, among pythonists, was yes, and so rye was born.


Unfortunately, it is not cross-platform yet and is also not supported by Dependabot, so I have not tried it yet. But maybe it already will work for you. Also, it is written in Rust, which I suppose speaks for itself.